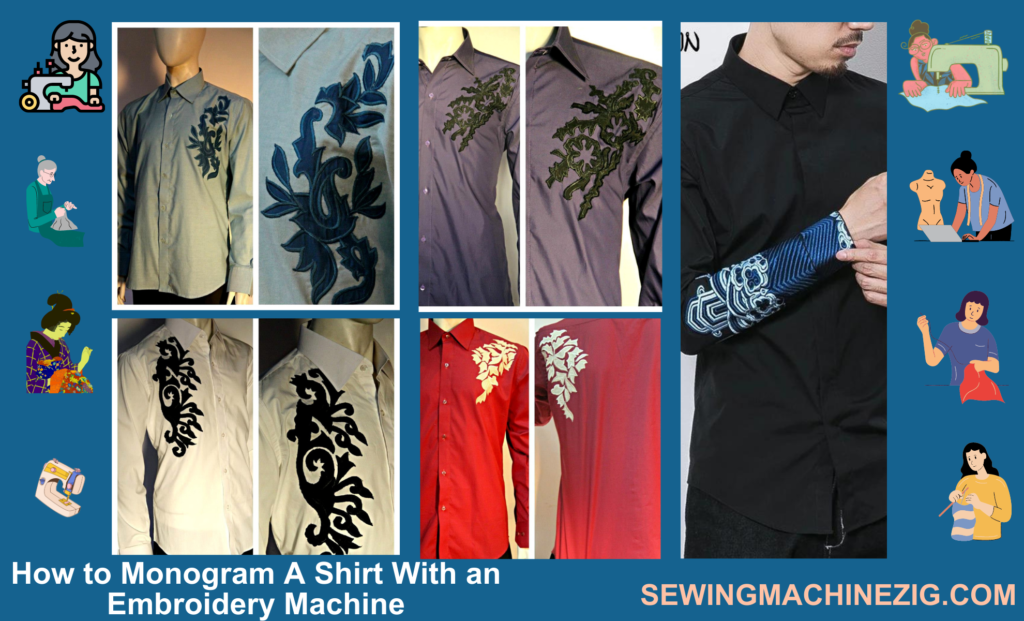
Embroidering a monogram onto a shirt is a classic way to personalize and add a touch of elegance to your clothing. While hand embroidery is a time-consuming and tedious process, using an embroidery machine can make the process much quicker and easier. An embroidery machine allows you to create intricate designs and monograms with precision and accuracy, resulting in a professional-looking finished product. In this article, we will discuss the best possible methods and related issues regarding how to monogram a shirt with an embroidery machine.
To monogram a shirt with an embroidery machine, you will need some basic embroidery skills, materials, and equipment. In this article, we will guide you through the steps required how to monogram a shirt with an embroidery machine. We will cover everything from choosing the right design, materials, and stabilizers to properly hooping your shirt and selecting the right thread colors. With these tips and techniques, you’ll be able to create beautiful and personalized monograms on your shirts in no time.
How To Monogram A Shirt Pocket
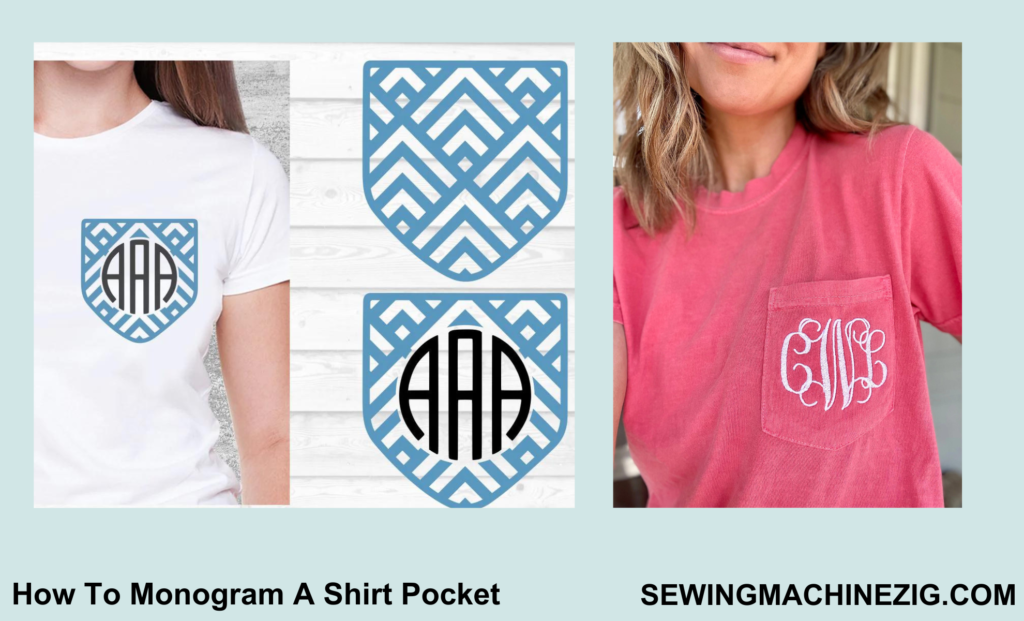
Monogramming a shirt pocket is a great way to add a personal touch to your clothing. It’s a classic and timeless way to customize your shirt and make it uniquely your own. Monogramming is the process of embroidering your initials or name onto the shirt pocket using thread or a heat transfer process.
It not only adds a touch of elegance to your wardrobe but also helps to identify your shirt if it gets lost or mixed up with someone else’s. Monogramming is a popular choice for formal occasions, such as weddings, corporate events, or other special events. In this article, we’ll discuss the steps on how to monogram a shirt with an embroidery machine or monogram a shirt pocket, and next, we will provide tips on how to make your monogram look its best.
Materials:
- Embroidery machine
- Embroidery thread in the desired color(s)
- Shirt or other garments to be monogrammed
- Embroidery hoop appropriate for the design size
- Stabilizer appropriate for the fabric and design
- Scissors
- Tape measure or ruler
Step-by-Step Guide:
Step 1: Choose Your Design
Choose a monogram design that fits your style and the garment you are monogramming. Many embroidery machines come with built-in monogram fonts, or you can download designs online or create your own using embroidery software.
Example: If you’re monogramming a button-down shirt, you might choose a classic three-letter monogram design with the initials arranged in a diamond shape. Leave 1-2 inches from the left side of the shirt for the monogram.
Step 2: Prepare The Fabric And Hoop
Cut a piece of stabilizer slightly larger than the embroidery hoop and attach it to the back of the shirt where the monogram will be stitched. Hoop the shirt and stabilizer together, making sure the fabric is taut and smooth.
Example: If you’re monogramming a lightweight cotton shirt, you might use a tear-away stabilizer and hoop both the front and back of the shirt to prevent puckering. Leave 1 inch from the top of the pocket for the monogram.
Step 3: Thread The Machine
Thread the embroidery machine with the desired color(s) of embroidery thread, following the machine’s instructions.
Example: If you’re using a light blue shirt, you might choose a navy blue or white thread for the monogram.
Step 4: Set Up The Machine
Adjust the machine’s settings as needed for the fabric and design, including tension, stitch length, and embroidery speed.
Example: If you’re monogramming a thick sweatshirt, you might need to adjust the tension and stitch length to prevent thread breakage and ensure even stitching. Leave 1-2 inches from the right side of the shirt for the monogram.
Step 5: Embroider The Design
Select the monogram design on the machine’s display screen and adjust the size and placement as desired. Start the machine and watch as it embroiders the design onto the fabric.
Example: If you’re monogramming a shirt pocket, you might choose a smaller design and position it in the center of the pocket. Leave 1 inch from the bottom of the pocket for the monogram.
Step 6: Monitor The Machine
Watch the machine as it embroiders the design, checking for any issues such as thread breaks or stitching errors. Pause the machine as needed to make adjustments.
Example: If the thread breaks, you might need to re-thread the machine or adjust the tension.
Step 7: Remove The Hoop And Stabilizer
Once the design is complete, remove the hoop from the machine and carefully cut away the excess stabilizer. Gently tug on the fabric to remove any remaining stabilizer fibers.
Example: If you’re monogramming a delicate blouse, you might need to use a small pair of scissors to carefully trim away the stabilizer. Leave 1-2 inches of space around the monogram for a clean finish.
Step 8: Finish And Enjoy
Trim any loose threads and give the shirt a final press if needed. Enjoy your new monogrammed garment!
Example: If you’re monogramming a polo shirt for a golf outing, you might choose a golf club or ball design to add a fun touch to the monogram. Leave 1-2 inches from the collar for the monogram. This process of monogramming a shirt pocket is also part of how to monogram a shirt with an embroidery machine.
How To Embroider A Monogram On Men’s Shirt Cuffs
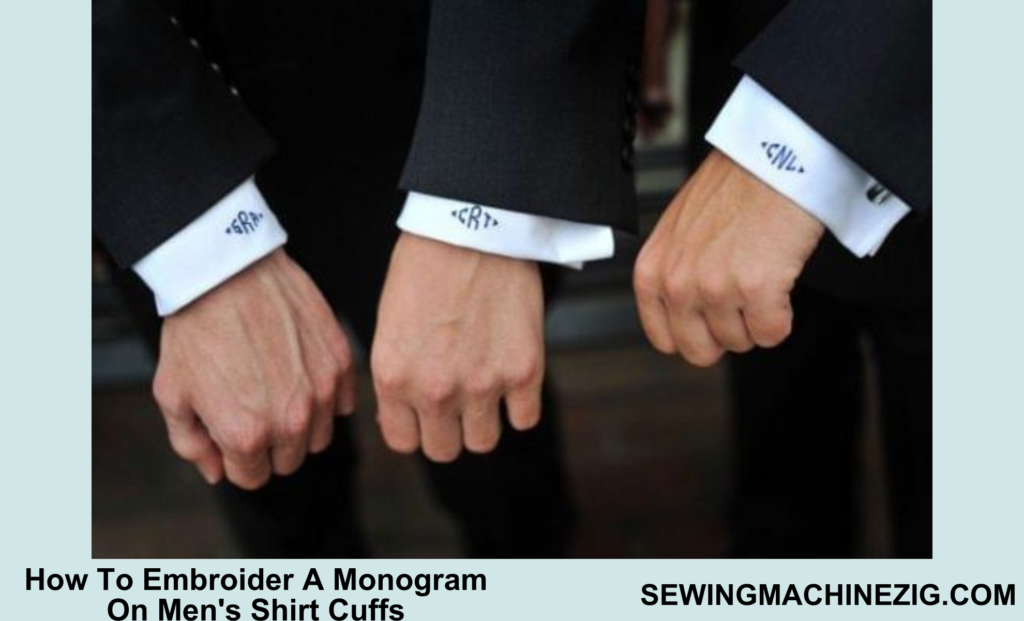
Embroidering a monogram onto the cuffs of a men’s shirt is a great way to add a personal touch to a classic wardrobe staple. Whether it’s a gift for a loved one or a DIY project for yourself, monogramming a shirt cuff can be a fun and rewarding process. With the right materials and a bit of patience, you can create a unique and stylish detail that will elevate any dress shirt. In this article, we will walk you through the steps for how to monogram a shirt with an embroidery machine and embroider a monogram onto men’s shirt cuffs, providing you with detailed instructions and tips along the way.
Materials:
- Embroidery machine
- Stabilizer
- Embroidery thread
- Shirt cuff
- Monogram design file
- Embroidery hoop
- Scissors
- Iron
Step 1: Choose Your Design
Choose the monogram design and transfer it to your embroidery machine.
Step 2: Use Of Stabilizer
Cut a piece of stabilizer slightly larger than your embroidery hoop and place it behind the shirt cuff, leaving approximately 1-2 inches of space between the edge of the stabilizer and the left and right sides of the cuff. Hoop the shirt cuff and stabilizer together, making sure the cuff is taut but not stretched.
Step 3: Thread The Machine
Thread the embroidery machine with your chosen thread color and align the hoop so the needle is directly over the center of the design, leaving approximately 1-2 inches of space between the left and right sides of the hoop and the left and right sides of the cuff.
Step 4: Start Designing
Begin the embroidery process, following the design file instructions for thread color changes and stitch types. Once the embroidery is complete, remove the hoop and stabilizer from the shirt cuff.
Step 5: Trim Any Excess Thread
Trim any excess thread from the embroidery and use a pair of scissors to carefully cut away the excess stabilizer, leaving approximately 1/4 inch of stabilizer around the embroidery design.
Step 6: Ironing The Shirt
Use a warm iron to press the shirt cuff, being careful not to directly touch the embroidery design.
In summary, when embroidering a monogram onto a men’s shirt cuff, it is important to leave approximately 1-2 inches of space between the edge of the stabilizer and the left and right sides of the cuff, as well as between the left and right sides of the embroidery hoop and the left and right sides of the cuff.
This will ensure that the embroidery design is properly centered and positioned on the cuff. After embroidery, it is important to carefully cut away excess stabilizer and press the shirt cuff with a warm iron. Now you are fully aware of how to monogram a shirt with an embroidery machine and embroider a monogram onto men’s shirt cuffs.
How To Embroider A Polo Shirt
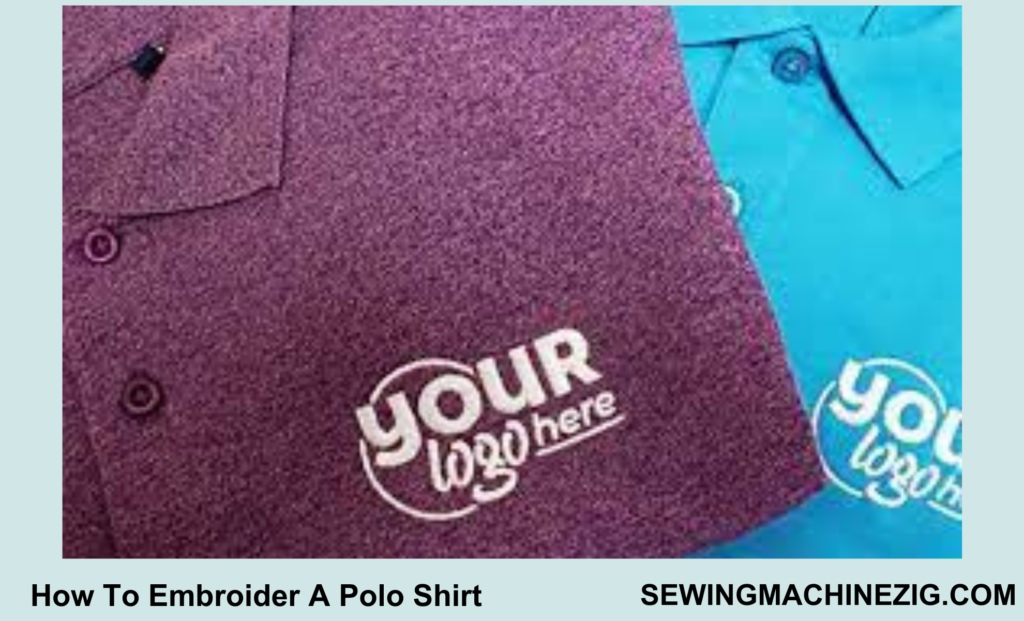
(how to monogram a shirt with an embroidery machine) also include Embroidering a polo shirt which is a great way to add a personal touch to your clothing. Whether you want to add your company logo, a monogram, or a custom design, embroidery can elevate the look of your polo shirt. However, embroidering a polo shirt can be more challenging than embroidering a flat piece of fabric.
The uneven texture and placket of the polo shirt require some special techniques to achieve a professional-looking result. In this guide, we will take you through the materials needed and the steps to how to monogram a shirt with an embroidery machine or embroider a polo shirt, so you can create a unique and stylish garment that you’ll be proud to wear.
Materials:
- Polo shirt
- Embroidery design file
- Embroidery machine
- Embroidery thread
- Bobbin thread
- Stabilizer
- Embroidery hoop
- Scissors
- USB or transfer cable to connect the embroidery machine to the computer
Step 1: Choose the embroidery design file that you want to stitch onto the polo shirt. For example, a company logo or a custom design.
Step 2: Load the design file onto your computer and use embroidery software to convert the file into a format that is compatible with your embroidery machine. Save the converted file onto a USB drive or transfer the file directly to your embroidery machine using a transfer cable.
Step 3: Choose the location on the polo shirt where you want to embroider the design. The left chest area is a common location for logos, while a custom design may be placed on the back or sleeve. Measure and mark the desired placement with a fabric pen or tailor’s chalk.
Step 4: Cut a piece of stabilizer slightly larger than your embroidery hoop and place it behind the area to be embroidered. Leave at least 1 inch of space between the stabilizer and the marked placement line to avoid accidentally stitching the stabilizer onto the shirt.
Step 5: Hoop the polo shirt and stabilizer together, making sure the fabric is taut but not stretched. Center the marked placement line within the embroidery hoop.
Step 6: Thread the embroidery machine with your chosen thread color and bobbin thread.
Step 7: Align the hoop so the needle is directly over the center of the design. Make sure the needle is not touching the stabilizer or the hoop.
Step 8: Begin the embroidery process, following the design file instructions for thread color changes and stitch types. Monitor the stitching process to make sure the design is stitching correctly and adjust the tension as needed. Leave at least 1 inch of space between the design and the edge of the polo shirt to avoid stitching over the edge of the shirt.
Once the embroidery is complete, carefully remove the hoop and cut away the excess stabilizer from the back of the shirt, leaving approximately 1/4 inch around the design. Use a warm iron to press the embroidery design to help the stitches settle and flatten any puckering that may have occurred during the stitching process. This is another part of how to monogram a shirt with an embroidery machine which includes how to embroider a polo shirt.
How To Monogram Initials On Fabric
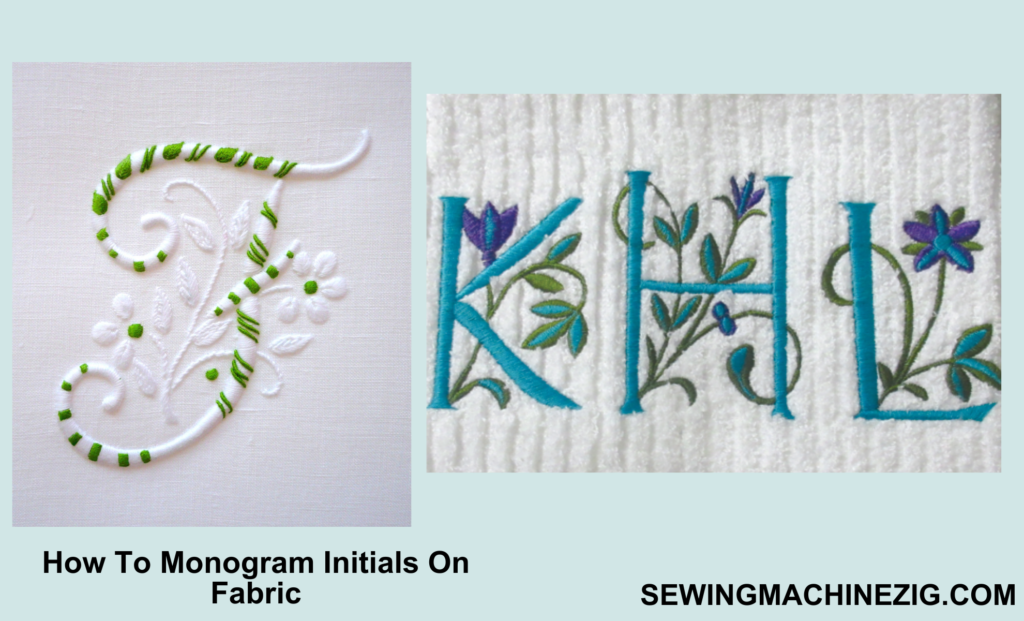
Monogramming is a popular way to personalize and add a decorative touch to fabric items such as clothing, towels, and bags. Monogramming involves stitching or printing initials onto the fabric to create a unique and customized design. There are several methods of how to monogram a shirt with an embroidery machine, including hand embroidery, machine embroidery, and heat transfer printing. Each method has its own benefits and challenges, and the choice depends on personal preference, skill level, and the intended use of the monogrammed item.
Hand embroidery is a traditional and timeless method that allows for more detailed and intricate designs, while machine embroidery is faster and more consistent. Heat transfer printing is a great option for bulk orders or when a high level of detail is required. But now you can tell “how to monogram a shirt with an embroidery machine“
Some Tips To Keep In Mind When Monogramming A Shirt With An Embroidery Machine:
1. Choose The Right Design And Font:
Select a design and font that complement the shirt and the recipient’s personal style. Consider the size of the shirt and the placement of the monogram when selecting the design.
2. Use Stabilizer:
To prevent the fabric from puckering or shifting during the embroidery process, use a stabilizer to hold the fabric in place. Choose a stabilizer that is appropriate for the weight and stretchiness of the fabric.
3. Test The Design:
Before stitching the design onto the shirt, test it on a scrap piece of fabric to ensure that the tension and thread color are correct.
4. Mark The Center:
Use a fabric marker or pins to mark the center of the shirt and the center of the monogram design to ensure that the design is centered and even.
5. Hoop The Shirt Carefully:
Use an appropriately sized embroidery hoop to hold the fabric in place. Be careful not to stretch the fabric too tightly or leave it too loose.
6. Use The Right Thread:
Choose a thread that is appropriate for the fabric and the design. A polyester thread is a common choice for embroidery because it is strong and colorfast.
7. Monitor The Stitching:
Keep an eye on the machine as it stitches to ensure that the design is coming out correctly and that there are no thread breaks or tension issues.
8. Finish The Back:
To prevent the back of the design from scratching or irritating the skin, cover it with a piece of soft, fusible interfacing or a second layer of fabric.
Now you have full knowledge about how to monogram a shirt with an embroidery machine and how to monogram initials on fabrics.
Conclusion:
Embroidering a monogram onto a shirt with an embroidery machine is a great way to personalize and add a special touch to any garment. With the right materials, tools, and techniques, it can be a fun and rewarding DIY project.
Remember to choose the right design and font, use a stabilizer, test the design, mark the center, hoop the shirt carefully, use the right thread, monitor the stitching, and finish back to ensure a high-quality result. With practice and patience, anyone can learn how to monogram a shirt with an embroidery machine and create a unique and personalized garment that they can cherish for years to come.
FAQs:
Q 1: Can I monogram any type of shirt fabric?
A: “how to monogram a shirt with an embroidery machine” While you can monogram most types of fabric, some fabrics are easier to embroider than others. Natural fibers like cotton, linen, and silk are generally easier to work with compared to synthetic materials like polyester or nylon.
Q 2: Can I use any font for monogramming?
A: You can use any font that is compatible with your embroidery machine software. However, it is recommended to use a font that is designed specifically for embroidery to ensure clean and precise stitching.
Q 3: Can I use regular sewing thread for embroidery?
A: No, regular sewing thread is not recommended for embroidery. Embroidery thread is specially designed for use with embroidery machines and comes in a variety of colors, weights, and finishes.
Q 4: How do I know where to place the monogram on the shirt?
A: It’s important to mark the center of the shirt and the placement of the monogram before starting to embroider. You can use a fabric pen or chalk to make a small mark on the shirt where you want the monogram to be centered.
Q 5: Can I embroider a monogram on a shirt without a stabilizer?
A: No, a stabilizer is necessary to prevent the fabric from shifting or puckering during embroidery. Always use a stabilizer that is suitable for your fabric type.
Q 6: How do I prevent thread breakage during embroidery?
A: Thread breakage can occur if the needle is not inserted properly or if the tension is too tight. Make sure to use the correct needle size for your fabric, and adjust the tension if necessary.
A: Yes, you can embroider a monogram on a shirt with buttons or pockets. However, you will need to carefully hoop the fabric to avoid stitching over the buttons or pockets. It may also be helpful to use a smaller hoop or to remove the buttons temporarily during embroidery.

