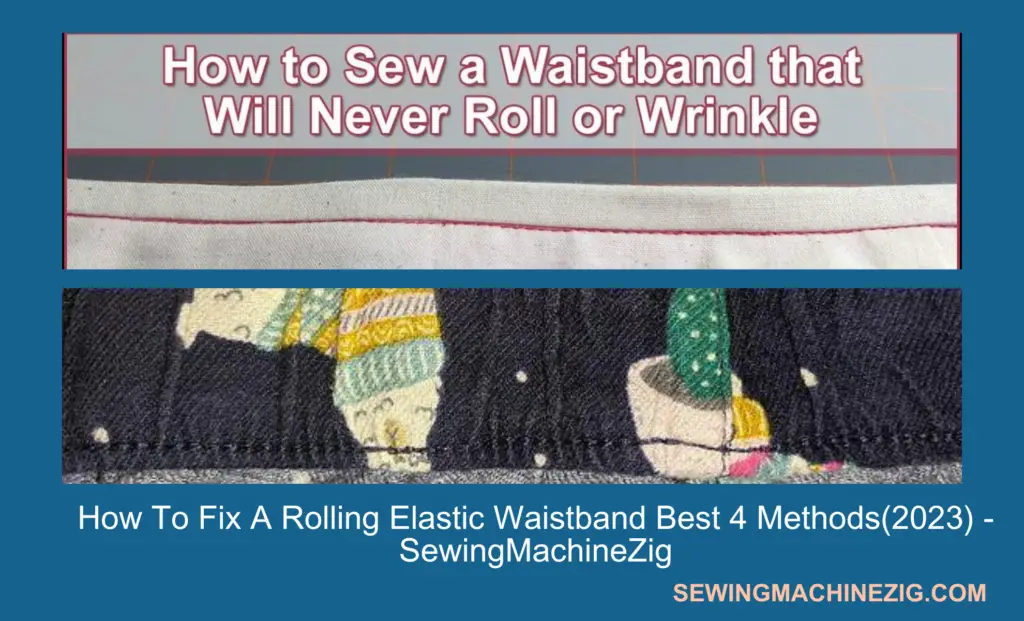
A rolling elastic waistband can be a frustrating and uncomfortable problem, causing your clothes to slip and slide around your body. It can also be unflattering to your silhouette and affect your confidence. Fortunately, there are several simple and effective solutions to fix a rolling elastic waistband. In this article, we will provide you with easy-to-follow steps to help you restore your waistband to its original shape and prevent it from rolling. In this article, we will cover all ways How To Fix A Rolling Elastic Waistband and its detailed solution which we have mentioned in four advanced methods.
There are several reasons why a waistband may roll, including being too loose, losing its shape, or the fabric being too slippery. However, the good news is that there are various methods to fix a rolling elastic waistband. These methods include tightening the elastic, applying heat, adding a non-slip material, or replacing the elastic altogether.
In this article, we will discuss each of these methods in detail and provide step-by-step instructions on How To Fix A Rolling Elastic Waistband. Whether you are dealing with a rolling elastic waistband on your favorite pair of pants, skirt, or dress, this guide has got you covered. With a few simple adjustments, you can enjoy a comfortable and secure fit without any more rolling or slipping. So, let’s dive into the methods to fix a rolling elastic waistband and get your clothes to fit properly again this article will fully help you understand.
This method will help you How To Fix A Rolling Elastic Waistband. and its complete solution with simple to advance level methods to make it easier to understand we prepare those methods in steps.
Here are four methods that can help you to fix a rolling elastic waistband:
- Waistband is rolling due to being too loose
- Apply heat to restore waistband rolling
- Using silicone tape to stop waistband rolling
- Replace the elastic to prevent the waistband from rolling
Waistband is rolling due to being too loose
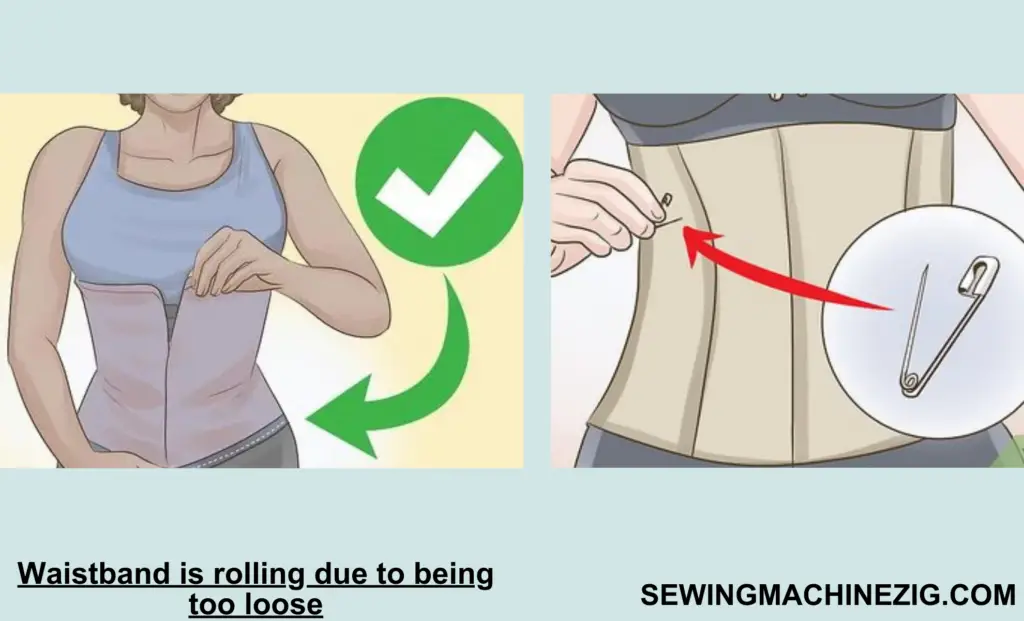
A loose waistband can be a frustrating and uncomfortable problem, causing your clothes to slip and slide around your body. One common issue with loose waistbands is rolling, where the elastic material that holds up the waistband begins to fold over itself. This can not only be annoying but also unflattering to your silhouette. However, there is a simple and effective solution to fix a rolling elastic waistband.
In the article, How To Fix A Rolling Elastic Waistband. we will focus on how to fix a rolling elastic waistband caused by being too loose, providing you with easy-to-follow steps to get your clothes to fit properly again. With a few simple adjustments, you can enjoy a comfortable and secure fit without any more rolling or slipping.
Materials:
- Seam ripper
- Measuring tape
- Needle and thread
- Sewing machine (optional)
How to fix a loose waistband
Step-by-Step Guide:
Step 1: Remove the waistband:
Using a seam ripper, carefully remove the waistband from the garment. Be sure not to cut any of the fabric or elastic while removing the stitches.
Step 2: Measure and adjust the elastic:
Measure the elastic by wrapping it around your waist and pulling it snugly. Add an extra half-inch to the measurement to provide room for the fabric. If the waistband is rolling due to being too loose, you may need to cut the elastic to make it shorter by an inch or two.
Step 3: Reattach the waistband:
Fold the waistband in half and mark the center point with a pin. Then, mark the center point of the elastic with another pin. Pin the elastic to the waistband at the center points and then pin it every couple of inches around the waistband.
Step 4: Stretch and stitch:
With the pins in place, begin stretching the elastic and sewing it to the waistband. Be sure to use a zigzag stitch to allow for stretching. If you cut the elastic, make sure to sew the ends together before sewing it onto the waistband. Sew all the way around the waistband, being careful not to twist the elastic as you go.
Step 5: Finish the waistband:
Trim any excess fabric and elastic from the waistband. Fold the waistband over, and sew it down by hand or with a sewing machine.
Step 6: Try on and adjust:
Try on the garment to ensure that the waistband fits snugly and doesn’t roll. If necessary, make additional adjustments to the elastic length and repeat the process.
It is important to note that when cutting the elastic to make it shorter, you should cut it in small increments (half an inch to one inch at a time) to avoid over-tightening the waistband. Similarly, when sewing the elastic back onto the waistband, make sure to stretch it slightly as you sew to avoid puckering or bunching of the fabric.
By following these steps and taking care of the cutting and sewing measurements, you can easily fix a rolling elastic waistband caused by being too loose. With just a few materials and some basic sewing skills, you can enjoy a comfortable and secure fit without any more rolling or slipping. This method will provide you with the best solution to the problem of How To Fix A Rolling Elastic Waistband.
Apply heat to restore waistband rolling
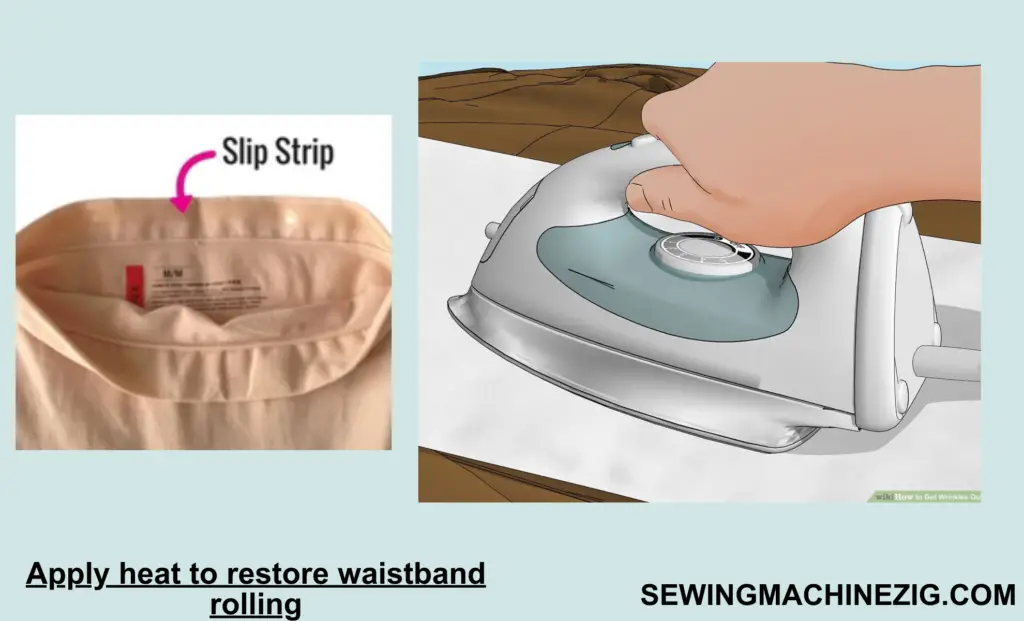
Waistband rolling is a common issue with many types of clothing, including pants, shorts, and skirts. It occurs when the waistband loses its elasticity or is stretched out over time, causing it to roll down and create an unflattering bulge. This can be especially frustrating for individuals who have invested in high-quality garments or are trying to maintain a professional appearance.
Elastic waistband repair hacks
Fortunately, there is a simple and effective solution to this problem: applying heat. By using heat, you can restore the elasticity of the waistband and prevent it from rolling down in the future. This technique can be used on a variety of fabrics, including cotton, denim, and spandex.
In the article, How To Fix A Rolling Elastic Waistband. we will explore the causes of waistband rolling, the benefits of using heat to restore it, and the steps involved in the process. We will also provide tips on how to prevent waistband rolling in the future, as well as additional resources for maintaining the quality and appearance of your clothing. Whether you’re dealing with a single pair of pants or a wardrobe full of garments, the information in this article will help you restore and maintain a smooth, comfortable, and flattering waistline.
Fixing waistband issues without buying new pants

Materials:
- Clothing item with a rolling waistband
- Heat source (hair dryer, iron, or clothes steamer)
- Clean, dry surface for ironing (if using an iron)
- Ironing board or towel (if using an iron)
- Fabric softener (optional)
- Spray bottle filled with water (optional)
Step-by-Step Guide:
Step 1: Identify the Problem Area The first step is to identify the problem area on your waistband. This will help you determine how much heat to apply and where to focus your efforts. Look for any areas where the waistband is rolling or folding, and take note of the size and location of these areas.
Step 2: Prepare the Clothing Item Before you begin applying heat, make sure the clothing item is clean and dry. Iron out any wrinkles and smooth out the fabric as much as possible. This will ensure that the heat is applied evenly and effectively.
Step 3: Choose a Heat Source There are several options for applying heat to your waistband, including a hair dryer, iron, or clothes steamer. Choose a heat source that you are comfortable using and that is appropriate for the fabric of your clothing item.
Step 4: Apply Heat to the Problem Area Hold the heat source about 1-2 inches away from the problem area and apply heat for 15-20 seconds. Be careful not to apply too much heat or hold the heat source too close to the fabric, as this can cause damage. If you’re using a hair dryer, use the highest heat setting and hold the dryer close to the waistband. If you’re using an iron, set it to the appropriate heat setting for the fabric and use a clean, dry surface for ironing. If you’re using a clothes steamer, hold the steamer close to the waistband and move it back and forth over the problem area.
Step 5: Stretch the Waistband While the fabric is still warm from the heat, gently stretch the waistband in the opposite direction of the roll. This will help restore the elasticity of the fabric and prevent it from rolling down in the future.
Step 6: Repeat, as Needed, Repeat steps 4 and 5 on any additional problem areas, focusing on one area at a time. You may need to apply heat and stretch the fabric multiple times to achieve the desired result.
Step 7: Optional: Use Fabric Softener or Spray Bottle To further enhance the elasticity of the fabric, you can use a fabric softener or a spray bottle filled with water. Simply add fabric softener to the wash cycle when washing the clothing item or spray the waistband with water before applying heat. This will help the fabric retain its new shape and prevent it from rolling down again.
Step 8: Allow the Fabric to Cool After applying heat and stretching the fabric, allow it to cool completely before wearing or washing the clothing item. This will help the fabric retain its new shape and prevent it from rolling down again.
By following these steps, you can effectively restore the elasticity of your waistband and prevent it from rolling down in the future. With a little bit of heat and stretching, you can maintain the quality and appearance of your clothing items for years to come. This method will help you How To Fix A Rolling Elastic Waistband.
Fixing a rolling waistband using silicone tape
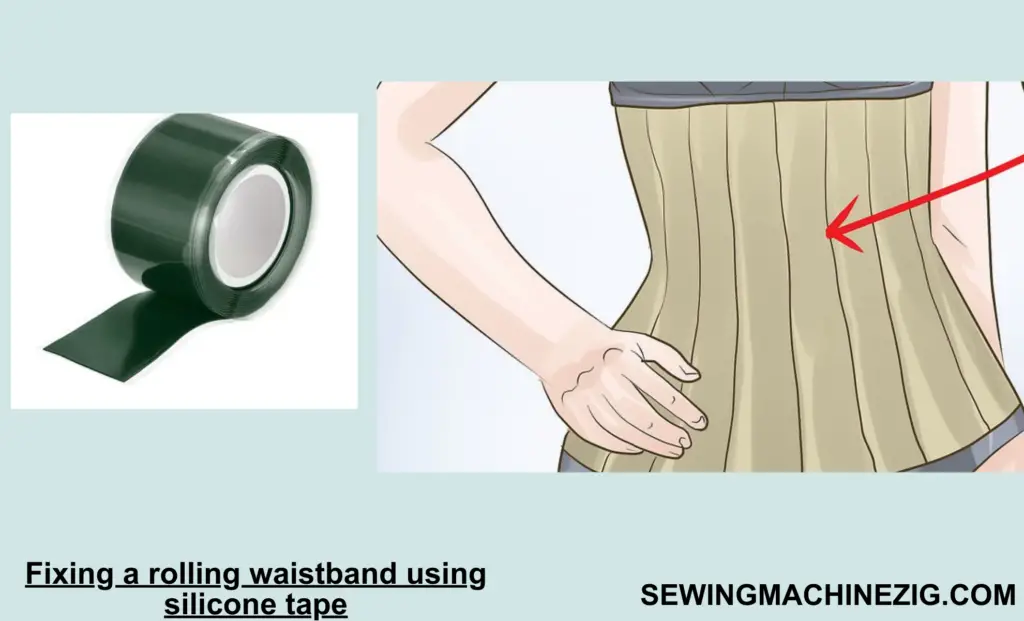
Are you frustrated with the rolling of the elastic waistband on your clothes? It can be a real nuisance to keep pulling up your pants or skirt throughout the day. Luckily, there’s a simple solution that can help fix a rolling elastic waistband: silicone tape. This tape can be applied to the inside of the waistband to help keep it in place and prevent it from rolling down.
Easy ways to fix waistband rolling
Silicone tape:
In this article, we’ll explore how to use silicone tape to fix a rolling elastic waistband and enjoy a comfortable and secure fit all day long. With just a few easy steps, you can say goodbye to the annoyance of constantly adjusting your clothes and hello to a hassle-free wardrobe.
Materials:
- Silicone tape
- Scissors
- The garment with rolling elastic waistband
Step-by-Step Guide:
Step 1: Measure and Cut the Silicone Tape Take the silicone tape and measure the length needed for the inside of the waistband. Cut the tape to the appropriate length.
Step 2: Prepare the Waistband Before applying the tape, make sure the inside of the waistband is clean and dry. Smooth out any wrinkles or folds.
Step 3: Apply the Tape Peel off the backing of the silicone tape and apply it to the inside of the waistband. Press down firmly to ensure it sticks well.
Step 4: Smooth Out the Tape Once the tape is applied, smooth it out with your fingers to remove any air bubbles or creases.
Step 5: Repeat the Process If necessary, repeat the process along the length of the waistband, ensuring that the tape is evenly spaced and applied.
Step 6: Try on the Garment Once the tape is applied, try on the garment to make sure the waistband stays in place and does not roll down. Adjust the tape as needed.
Step 7: Wash and Dry The silicone tape is durable and can withstand multiple washes. However, be sure to follow the garment’s care instructions and avoid using fabric softeners.
Step 8: Remove the Tape When it’s time to remove the tape, gently peel it off from the inside of the waistband. If any residue is left behind, it can be easily removed with a damp cloth.
Using silicone tape to fix a rolling elastic waistband is an easy and affordable solution that can save you from constantly adjusting your clothes throughout the day. With just a few simple steps, you can enjoy a comfortable and secure fit all day long. This method will help you How To Fix A Rolling Elastic Waistband.
Replace the elastic to prevent the waistband from rolling
Wearing clothes with a rolling waistband can be an irritating and uncomfortable experience. The elastic in the waistband can lose its stretch over time, causing the waistband to roll down and constantly requiring adjustment. This can be especially frustrating when you’re trying to look your best and be comfortable throughout the day. Fortunately, there’s a simple solution to this problem: replacing the elastic in your waistband. By doing so, you can restore the elasticity of your waistband and ensure that it stays in place all day long. In this article,
How To Fix A Rolling Elastic Waistband. I will guide you through the process of replacing the elastic in your waistband, step by step. Whether you’re a seasoned sewer or a complete beginner, this guide will provide you with all the information you need to get the job done right. By the end of this article, you’ll be able to say goodbye to the annoyance of constantly adjusting your clothes and hello to the comfort and convenience of a well-fitted waistband.
Materials:
- New elastic
- Seam ripper
- Scissors
- Safety pin
- Sewing machine or needle and thread
Step-by-Step Guide:
Step 1: Determine the width and length of the elastic needed for your waistband by measuring the waistband and subtracting 2-3 inches to account for stretch.
Step 2: Use a seam ripper to carefully remove the old elastic from the waistband, being sure to remove all of the old elastic to ensure a secure fit.
Step 3: Cut the new elastic to the appropriate length.
Step 4: Attach a safety pin to one end of the elastic and use it to guide the elastic through the waistband, being careful not to twist the elastic.
Step 5: Once the elastic is in place, overlap the ends of the elastic and sew them securely together, either by machine or by hand.
Step 6: Test the fit of the waistband before sewing it closed to ensure it is snug but not too tight.
Step 7: Sew the waistband closed using a sewing machine or needle and thread, being sure to backstitch at the beginning and end of the seam for added strength.
Step 8: Trim any excess thread or fabric and press the waistband to give it a professional finish.
Using these steps will help ensure that your waistband stays in place and doesn’t roll down. Remember to choose the right type and width of elastic for your waistband to ensure a comfortable and secure fit. I hope this method helps you in How To Fix A Rolling Elastic Waistband.
Waistband repair tips and tricks:
How To Fix A Rolling Elastic Waistband. Its solution is, Elastic waistbands are a common feature in many types of clothing, from pants to skirts and shorts. While these waistbands are comfortable and flexible, they can sometimes start to roll or bunch up, leading to discomfort and frustration.
Creative solutions for fixing a rolling waistband
There are several easy ways to fix a rolling elastic waistband without having to replace the entire garment. In this article, we will discuss How To Fix A Rolling Elastic Waistband and some tips and tricks for fixing a rolling elastic waistband using a variety of techniques.
Sew the Waistband to the Garment:
Another way to fix a rolling waistband is by sewing it to the garment. This technique is especially effective for skirts and dresses that have separate waistbands. Use a sewing machine or hand-sewing needle and thread to attach the waistband to the garment along the top edge. This creative solution will help you How To Fix A Rolling Elastic Waistband.
Use Elastic Thread:
If you don’t want to replace the entire elastic band, you can use elastic thread to fix the rolling waistband. This type of thread stretches as you sew, so it can help to hold the waistband in place. Simply sew a new row of stitches along the top edge of the waistband using the elastic thread. This creative solution will help you How To Fix A Rolling Elastic Waistband.
Prevent Waistband Issues:
Prevention is key when it comes to fixing a rolling waistband. To prevent waistband issues from happening in the first place, be sure to choose garments that fit well and are made from high-quality fabrics. Avoid wearing clothes that are too tight or too loose, as this can put stress on the waistband.
Quick Fixes:
If you’re in a hurry and need a quick fix for a rolling waistband, try using safety pins or clips to hold the waistband in place. This is a temporary fix that can help to prevent further rolling or bunching up until you have time to properly fix the waistband. This creative solution will help you How To Fix A Rolling Elastic Waistband.
Conclusion:
The conclusion is about How To Fix A Rolling Elastic Waistband. A rolling elastic waistband can be a frustrating and uncomfortable experience, but there are several solutions available that can help restore the fit and comfort of your clothes. From applying heat to using silicone tape to replacing the elastic, each of these methods can provide a reliable and effective solution to the problem of a rolling waistband.
Whether you choose to apply heat or use silicone tape for a quick fix, or you decide to replace the elastic in your waistband for a more permanent solution, it’s important to take action to ensure your clothes fit properly and comfortably. By following the steps outlined in this article, you can easily fix a rolling elastic waistband and enjoy a comfortable and secure fit all day long. Say goodbye to the frustration of constantly adjusting your clothes and hello to the convenience of a well-fitted waistband. I hope this article has given you all the answers to your question on How To Fix A Rolling Elastic Waistband.
FAQs:
Q: Why does the elastic waistband roll?
A: Elastic waistbands can roll for a variety of reasons, including regular wear and tear, improper construction, or poor-quality elastic. Over time, the elastic can lose its stretch, causing the waistband to lose its shape and roll down.
Q: How do I know if the elastic in my waistband needs to be replaced?
A: If your waistband is constantly rolling down or feels loose, it’s likely that the elastic has lost its stretch and needs to be replaced. You can test the elasticity of the elastic by pulling it and seeing if it returns to its original shape.
Q: Can I fix a rolling waistband without replacing the elastic?
A: Yes, there are several temporary solutions that can help keep your waistband from rolling. You can try applying heat to the waistband to shrink it back into shape or using silicone tape to hold the waistband in place. However, these methods may not be as effective as replacing the elastic.
Q: What materials do I need to replace the elastic in my waistband?
A: To replace the elastic in your waistband, you’ll need new elastic, a seam ripper, scissors, a safety pin, and a sewing machine or needle and thread. It’s important to choose the right type and width of elastic for your waistband.
Q: Can I replace the elastic in my waistband by hand?
A: Yes, it’s possible to replace the elastic in your waistband by hand, but it may take longer and require more effort. You’ll need to be comfortable with sewing and have a strong needle and thread.
Q: How do I measure the length of elastic needed for my waistband?
A: To measure the length of elastic needed for your waistband, measure the length of your waistband and subtract 2-3 inches to account for the stretch of the elastic. It’s important to make sure the elastic is snug but not too tight.
Q: How do I remove the old elastic from my waistband?
A: To remove the old elastic from your waistband, use a seam ripper to carefully cut the stitching holding the elastic in place. Be sure to remove all of the old elastic to ensure a secure fit.
Q: How do I insert the new elastic into my waistband?
A: To insert the new elastic into your waistband, attach a safety pin to one end of the elastic and use it to guide the elastic through the waistband. Once the elastic is in place, stitch the ends of the elastic together and sew the waistband closed. Be sure to test the fit before finishing the sewing.

