Hand sewing is a valuable skill to have, especially when it comes to making repairs to clothing. One of the most common clothing repairs that require hand sewing is fixing a seam on a pair of pants. Knowing how to hand sew a seam on pants can save you from having to replace a perfectly good pair of trousers.
Whether you’ve accidentally ripped a seam or need to adjust the fit of your pants, knowing how to hand sew a seam is a useful skill that can save you time and money.
While it may seem intimidating to attempt to hand sew a seam on pants, it is actually a straightforward process that can be easily mastered with a bit of practice.
In this article, we will walk you through the steps necessary how to hand sew a seam on pants, from preparing your materials to finishing off your stitching.
How To Sew Pants Seam By Hand
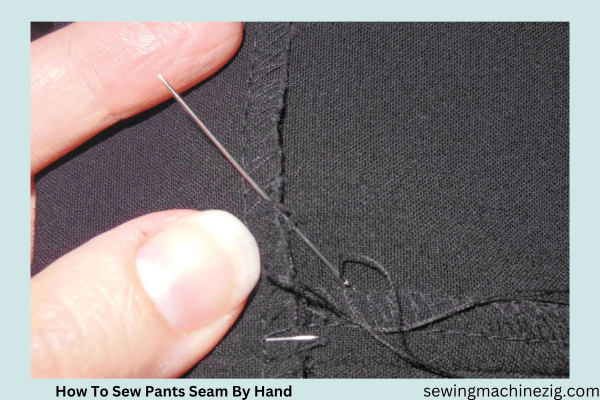
Whether you are an experienced sewer or a beginner, this guide provides you with all the information you need to successfully hand-sew a seam on your pants. So let’s get started and learn how to hand sew a seam on pants!
Materials Needed:
- Needle: Choose a needle appropriate for the weight of the fabric of your pants. A thinner needle is better for lightweight fabric, while a thicker needle is needed for heavier fabrics.
- Thread: Select a thread color that matches the color of the fabric of your pants. Use a strong thread to ensure the seam will hold up to wear and tear.
- Pins: You’ll need a few pins to hold the fabric in place as you sew.
- Scissors: Use scissors to cut the thread and trim excess fabric.
- Pants: Of course, you’ll need the pants that require seam repair.
Steps:
Step 1: Turn Pants Inside Out
The first step in hand sewing a seam on pants is to turn the pants inside out. This will allow you to access the seam that needs to be repaired.
Step 2: Pin Fabric In Place
Using your pins, carefully pin the fabric together along the seam line. Be sure to leave a half-inch seam allowance on both sides of the seam. This means that you should leave a half-inch of fabric to the left and right of the seam line.
Step 3: Knot The Thread
Thread your needle and knot the end of the thread. You’ll want to make a double knot to ensure that the thread doesn’t come undone while you’re sewing.
Step 4: Begin Stitching
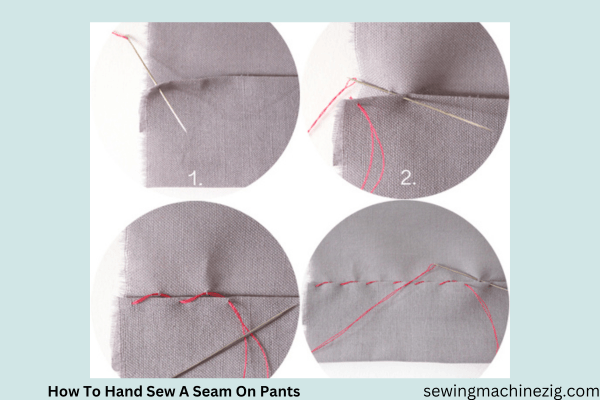
Starting from the inside of the pants, insert the needle through the fabric at the beginning of the seam. Pull the thread through until the knot catches on the fabric. Begin stitching along the seam line, using small and even stitches.
Step 5: Check the Tension
As you sew, check the tension of your thread to ensure that it’s not too loose or too tight. The stitches should be tight enough to hold the seam together, but not so tight that they cause the fabric to bunch or pucker.
Step 6: Finish The Seam
Once you’ve reached the end of the seam, tie off the thread with a knot and trim any excess thread. Be sure to leave a half-inch seam allowance on both sides of the seam.
Step 7: Turn Pants Right Side Out
After you’ve finished sewing the seam, turn the pants right side out to check your work. Inspect the seam to ensure that it’s even and that there are no gaps or puckers.
Step 8: Press the Seam
Finally, press the seam with an iron to make it lay flat. This will give your pants a professional-looking finish.
By following these steps, you can easily learn how to hand sew a seam on pants. Remember to leave a half-inch seam allowance on both sides of the seam line, and be sure to check your tension as you sew. With a bit of practice, you’ll be able to make seamless repairs to your clothing and extend the life of your wardrobe.
How To Sew Pants Crotch Seam By Hand
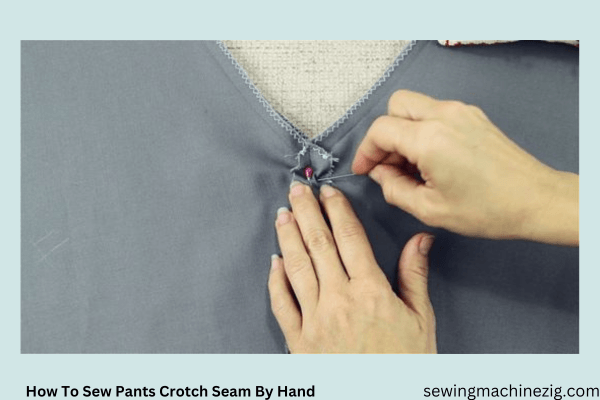
Sewing a crotch seam by hand can seem like a daunting task, but fear not! With a little guidance and the right technique, you’ll be able to master this essential skill. So, let’s dive into the steps of how to hand sew a seam on pants and achieve a professional result.
Whether you’re repairing a tear or adjusting the fit of your pants, being able to sew a crotch seam by hand is a useful skill that can save you time and money. With the right materials and techniques, you can achieve a strong and durable seam that will withstand wear and tear.
In this article, Hand sewing a crotch seam on pants is a valuable skill to have, as it allows you to repair and preserve your clothing with precision and care. By following these steps, you’ll be able to restore the seam seamlessly and ensure a comfortable fit. So, let’s get started on learning how to hand sew a seam on pants.
Whether you’re an experienced sewer or a beginner, this guide will provide you with all the information you need to successfully sew a crotch seam by hand. So let’s get started and learn how to hand sew a seam on pants!
Materials Needed:
- Needle: Choose a needle appropriate for the weight of the fabric of your pants. A thinner needle is better for lightweight fabric, while a thicker needle is needed for heavier fabrics.
- Thread: Select a thread color that matches the color of the fabric of your pants. Use a strong thread to ensure the seam will hold up to wear and tear.
- Pins: You’ll need a few pins to hold the fabric in place as you sew.
- Scissors: Use scissors to cut the thread and trim excess fabric.
- Pants: Of course, you’ll need the pants that require the crotch seam repair.
Steps:
Step 1: Turn Pants Inside Out
The first step in sewing a pants crotch seam by hand is to turn the pants inside out. This will allow you to access the crotch seam that needs to be repaired.
Step 2: Pin Fabric In Place
Using your pins, carefully pin the fabric together along the crotch seam line. Be sure to leave a half-inch seam allowance on both sides of the seam. This means that you should leave a half-inch of fabric to the left and right of the crotch seam line.
Step 3: Knot The Thread
Thread your needle and knot the end of the thread. You’ll want to make a double knot to ensure that the thread doesn’t come undone while you’re sewing.
Step 4: Begin Stitching
Starting from the inside of the pants, insert the needle through the fabric at the beginning of the crotch seam. Pull the thread through until the knot catches on the fabric. Begin stitching along the crotch seam line, using small and even stitches.
Step 5: Check the Tension
As you sew, check the tension of your thread to ensure that it’s not too loose or too tight. The stitches should be tight enough to hold the seam together, but not so tight that they cause the fabric to bunch or pucker.
Step 6: Finish The Seam
Once you’ve reached the end of the crotch seam, tie off the thread with a knot and trim any excess thread. Be sure to leave a half-inch seam allowance on both sides of the seam.
Step 7: Turn Pants Right Side Out
After you’ve finished sewing the crotch seam, turn the pants right side out to check your work. Inspect the seam to ensure that it’s even and that there are no gaps or puckers.
Step 8: Press The Seam
Finally, press the seam with an iron to make it lay flat. This will give your pants a professional-looking finish.
By following these steps, you can easily master this skill. Remember to leave a half-inch seam allowance on both sides of the crotch seam line to ensure a secure and durable stitch.
Take care to check your tension as you sew to maintain an even and consistent stitch throughout the seam. With practice, you’ll become more proficient, allowing you to make seamless repairs to your clothing and extend the life of your wardrobe. So, don’t hesitate to learn how to hand sew a seam on pants and enhance your sewing repertoire.
How To Mend Trouser Seams By Hand
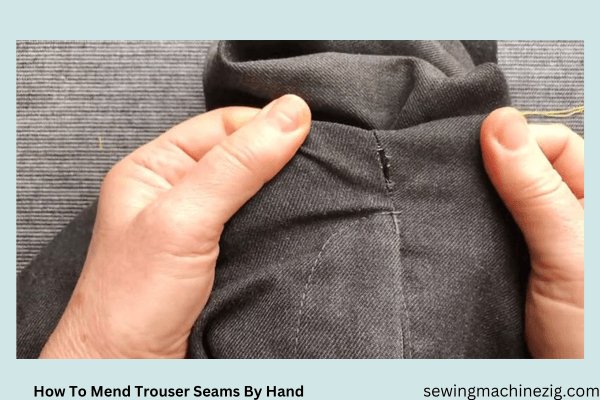
Mending trouser seams by hand is a practical skill that can save you time and money by allowing you to repair your clothes rather than having to replace them. Whether your pants have a small tear or a larger hole, knowing how to hand-sew a seam can be a simple and effective way to fix the problem. Hand sewing allows you to have more control over the repair process and ensures a secure and precise fix.
How To Hand Sew A Seam On Pants involves carefully aligning the edges of the tear or hole and using small
In this article, we will guide you through the process of mending trouser seams by hand, from preparing your materials to completing the repair. You will learn the tools and techniques necessary how to hand sew a seam on pants or trousers and make your pants look as good as new.
Whether you are a beginner or an experienced sewer, this guide will provide you with the information you need on how to hand sew a seam on pants. Mending trouser seams by hand can be a practical and rewarding skill to have. Not only does it allow you to repair small tears or loose seams
In this comprehensive article, we will guide you through the process of mending trouser seams by hand. How To Hand Sew A Seam On Pants is a valuable skill to possess when it comes to clothing repairs.
Materials Needed:
- Needle: Choose a needle appropriate for the weight of your trouser fabric. A thinner needle is better for lightweight fabric, while a thicker needle is needed for heavier fabrics.
- Thread: Select a thread color that matches the color of your trouser fabric. Use a strong thread to ensure the seam will hold up to wear and tear.
- Pins: You’ll need a few pins to hold the fabric in place as you sew.
- Scissors: Use scissors to cut the thread and trim excess fabric.
- Trousers: Of course, you’ll need trousers that require seam repair.
Steps:
Step 1: Identify The Seam To Be Repaired
The first step in mending trouser seams by hand is to identify the seam that needs to be repaired. Look for tears, rips, or holes in the seam and assess the extent of the damage.
Step 2: Turn Trousers Inside Out
Next, turn the trousers inside out. This will allow you to access the seam that needs to be repaired.
Step 3: Pin Fabric In Place
Using your pins, carefully pin the fabric together along the seam line. Be sure to leave a half-inch seam allowance on both sides of the seam. This means that you should leave a half-inch of fabric to the left and right of the seam line.
Step 4: Knot The Thread
Thread your needle and knot the end of the thread. You’ll want to make a double knot to ensure that the thread doesn’t come undone while you’re sewing.
Step 5: Begin Stitching
Starting from the inside of the trousers, insert the needle through the fabric at the beginning of the seam. Pull the thread through until the knot catches on the fabric. Begin stitching along the seam line, using small and even stitches.
Step 6: Check The Tension
As you sew, check the tension of your thread to ensure that it’s not too loose or too tight. The stitches should be tight enough to hold the seam together, but not so tight that they cause the fabric to bunch or pucker.
Step 7: Finish The Seam
Once you’ve reached the end of the seam, tie off the thread with a knot and trim any excess thread. Be sure to leave a half-inch seam allowance on both sides of the seam.
Step 8: Turn the Trousers Right Side Out
After you’ve finished sewing the seam, turn the trousers right side out to check your work. Inspect the seam to ensure that it’s even and that there are no gaps or puckers.
By following these steps, you can easily mend trouser seams by hand. Remember to leave a half-inch seam allowance on both sides of the seam line, and be sure to check your tension as you sew. With a bit of practice, you’ll be able to make seamless repairs to your clothing and extend the life of your wardrobe.
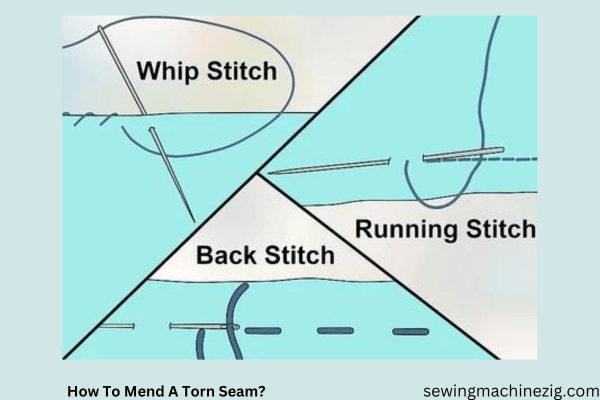
How To Mend A Torn Seam?
Seams are an essential part of most clothing items, holding different pieces of fabric together to create a finished garment. However, over time, wear and tear can cause seams to tear or split apart.
A torn seam not only looks unsightly but can also weaken the structure of the garment. Luckily, mending a torn seam is a relatively simple process that can be done at home with a few basic tools and some sewing skills.
The key to repairing a torn seam is to reinforce the weakened area by stitching it back together, either by hand or with a sewing machine, depending on the extent of the damage. With some patience and attention to detail, you can easily learn how to hand sew a seam on pants or mend a torn seam and prolong the life of your clothing items.
Mending a torn seam is a task that requires basic sewing skills, patience, and attention to detail. Here’s a step-by-step guide on how to mend a torn seam:
Steps:
Step 1: Assess the damage:
First, examine the torn seam to determine the extent of the damage. Is it a small tear or a larger one? Does the seam need to be completely re-stitched, or can it be repaired by just re-sewing a portion of it?
Step 2: Remove any loose threads:
Carefully remove any loose threads around the torn seam using a pair of sharp scissors or a seam ripper. This will make it easier to work with the fabric.
Step 3: Reinforce the seam:
Reinforce the torn seam by adding an extra layer of fabric or interfacing. Cut a small piece of fabric or interfacing to fit the torn area, then place it behind the seam and pin it in place.
Step 4: Stitch the seam:
Using a needle and thread, carefully stitch the torn seam back together. If the seam is a straight one, use a straight stitch. If it’s a curved seam, use a backstitch or a whipstitch to follow the curve of the fabric. Be sure to knot the thread securely at the beginning and end of the seam.
Step 5: Press the seam:
After stitching, use a warm iron to press the seam flat. This will help it lay smoothly and make the repair less noticeable.
By following these steps, you can mend a torn seam and give your clothing item a new lease of life. Remember, practice makes perfect, so don’t be discouraged if your first attempt isn’t perfect. With time and practice, you’ll become more skilled at mending torn seams and learn more about how to hand sew a seam on pants.
Conclusion:
Hand-sewing a seam on pants is a skill that can come in handy for repairing clothing and customizing your wardrobe.
By following the steps outlined in this guide, you can learn how to hand sew a seam on pants with ease. Remember to use the right materials, including a needle and thread appropriate for the weight of your fabric, and to leave a half-inch seam allowance on both sides of the seam line.
With a bit of practice, you can create strong and durable seams that will stand up to wear and tear. So why not give it a try? With a few basic tools and some patience, you can become an expert at hand-sewing seams on pants and other garments.
FAQs:
Here Are Some Frequently Asked Questions About How To Hand Sew A Seam On Pants Along With Detailed Answers:
Q 1: Do I Need A Special Needle To Sew Pants Seams By Hand?
A: No, you don’t necessarily need a special needle to sew pants seams by hand. However, you should choose a needle that is appropriate for the weight of your fabric. For lightweight fabrics, choose a thinner needle, while heavier fabrics require a thicker needle. It’s also important to choose a needle with a sharp point to make it easier to sew through multiple layers of fabric.
Q 2: Can I Use Regular Thread To Sew Pants Seams By Hand?
A: Yes, you can use regular thread to sew pants seams by hand. However, it’s important to choose a strong and durable thread to ensure that your seam holds up to wear and tear. Look for a thread specifically designed for sewing on clothing, such as polyester or nylon thread.
Q 3: How Do I Know How Much Seam Allowance To Leave When Sewing Pants Seams By Hand?
A: As a general rule, it’s best to leave a half-inch seam allowance on both sides of the seam line. This means that you should leave a half-inch of fabric to the left and right of the seam line when pinning the fabric together.
Q 4: How Do I Ensure That My Stitches Are Even And Straight When Hand Sewing Pants Seams?
A: To ensure that your stitches are even and straight, it’s helpful to use a ruler or a seam gauge to measure your seam allowance and mark your stitching line. You can also use a basting stitch to hold the fabric in place before sewing the final seam, which can help ensure that your stitches are straight and even.
Q 5: Can I Use A Sewing Machine To Sew Pants Seams Instead Of Hand Sewing?
A: Yes, you can use a sewing machine to sew pants seams instead of hand sewing. However, hand sewing can be a useful skill to have for repairs and customization, and it allows for more precision and control than a sewing machine.
Q 6: How Do I Finish The Seam After Sewing It By Hand?
A: To finish the seam after sewing it by hand, you can trim any excess fabric or thread and press the seam open with an iron. You can also use a zigzag stitch or a serger to finish the raw edges of the seam and prevent fraying.
Q 7: What If My Hand-Sewn Seam Starts To Unravel?
A: If your hand-sewn seam starts to unravel, you can reinforce it by sewing over the area again with more stitches or by backstitching. You can also use fabric glue or a fray check product to prevent the seam from further unraveling.

