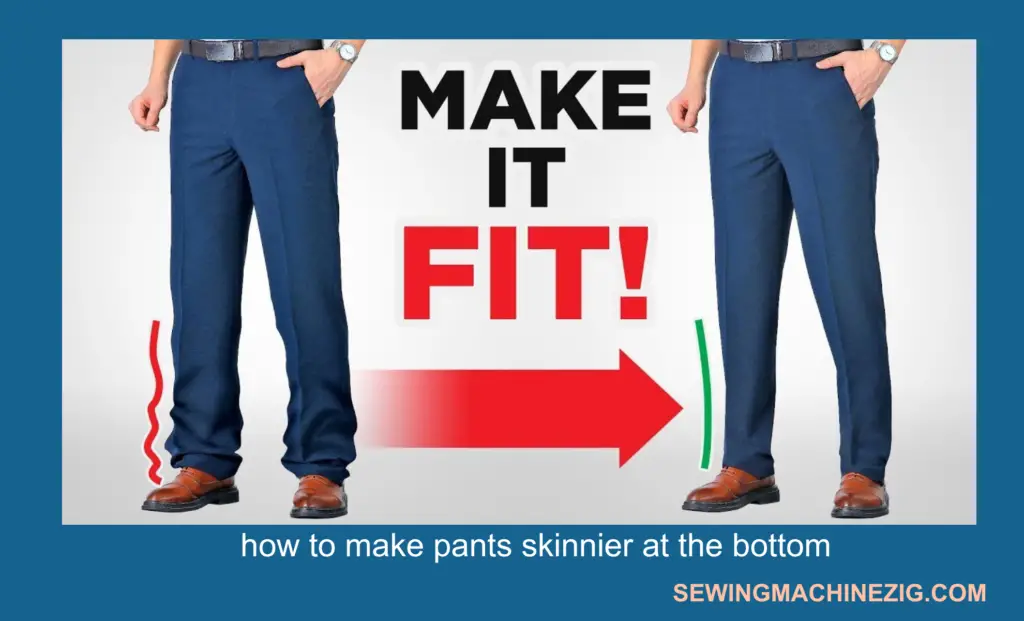
Fashion is constantly evolving, and the trend for skinny pants has been prevalent for some time now. Skinny pants look great, as they are tailored to fit perfectly and provide a sleek, modern look. However, sometimes the pants you buy don’t have the desired taper at the bottom, which can ruin the overall aesthetic. The good news is that you don’t have to go out and buy a new pair of pants to achieve the look you desire. How to make pants skinnier at the bottom, you can easily make your pants skinnier at the bottom with a few simple techniques.
Altering pants for a slimmer fit

In this article, we’ll provide you with step-by-step instructions on How to make pants skinnier at the bottom. We’ll explore different methods for tapering pants, whether they’re jeans, chinos, or dress pants. From simple alterations such as folding and sewing to more advanced techniques such as using a sewing machine, we’ll guide you through the process of achieving the perfect fit. With the right tools and a little bit of patience, you can give your pants a custom fit that will elevate your style and make you feel confident and comfortable.
How to tailor pants at the bottom
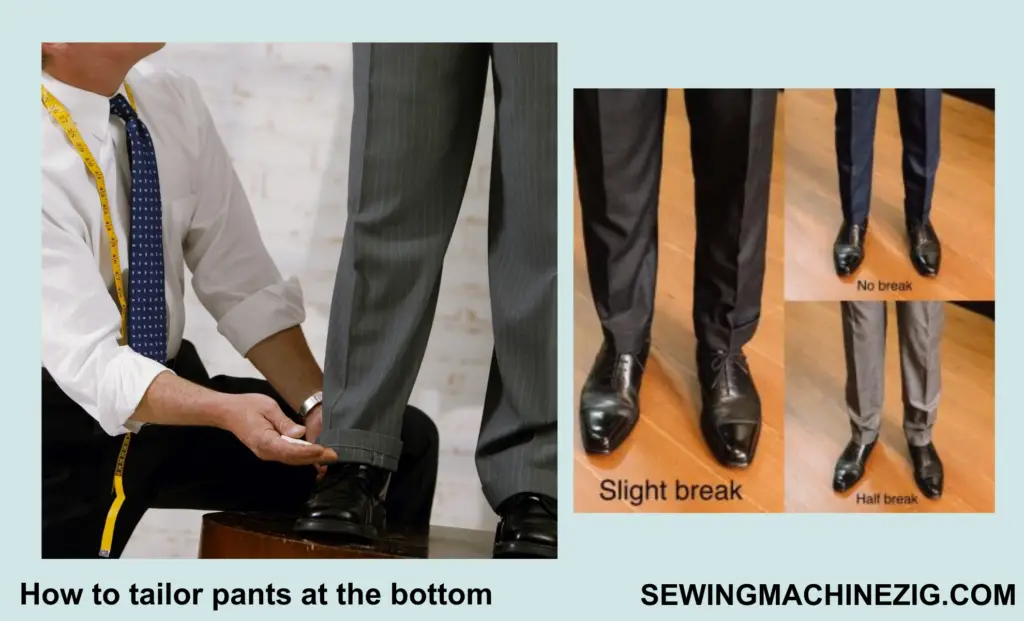
By learning How to make pants skinnier at the bottom, you can also save money by transforming your existing wardrobe. You don’t need to buy new clothes every time a trend changes. Instead, you can make simple modifications to your existing clothes, ensuring that you always look stylish and fashionable. So, whether you want to keep up with the latest trends or simply want to tailor your pants to fit perfectly, read on to learn how to make your pants skinnier at the bottom.
How to slim down pants
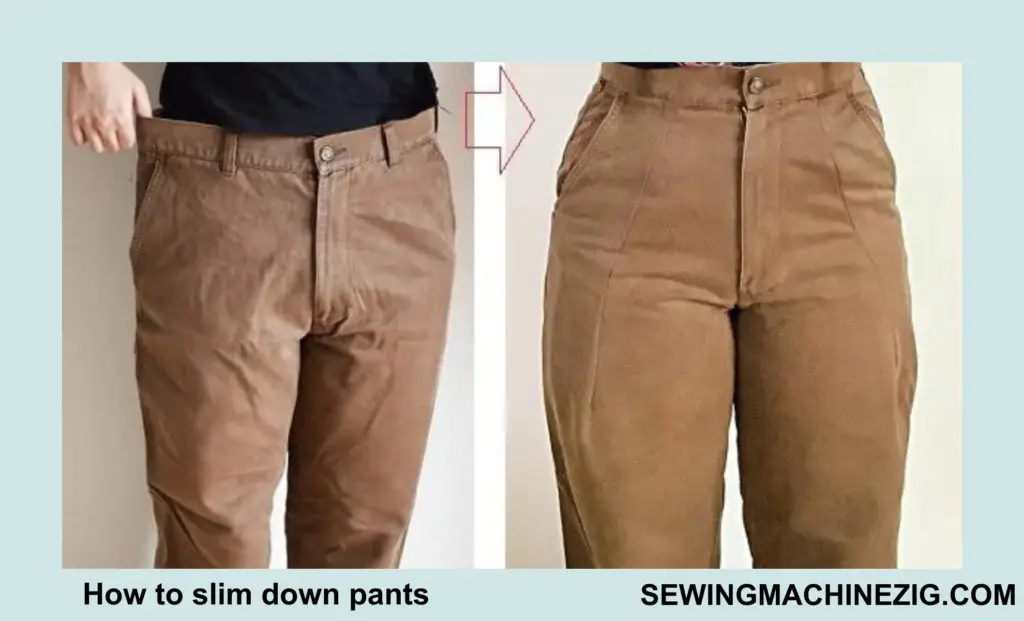
Materials:
- A pair of pants
- Sewing machine
- Seam ripper
- Scissors
- Pins
- Measuring tape
- Chalk or fabric pen
- Thread (matching color)
- Iron
Steps for making pants skinnier:
Step 1: Measure and mark the desired length:
Use a measuring tape to measure the desired length of your pants from the bottom. Mark this length with chalk or a fabric pen on both pant legs.
Example: If you want your pants to be 2 inches shorter at the bottom, measure 2 inches up from the original hemline and mark it with chalk or a fabric pen.
Step 2: Cut the excess fabric:
Cut off the excess fabric below the marked line on both pant legs. Make sure to leave a little extra fabric for hemming.
Example: Use a pair of scissors to carefully cut off the excess fabric below the marked line on both pant legs.
Step 3: Use a seam ripper to detach the hem:
Use a seam ripper to detach the hem from both pant legs. Make sure to only rip out the stitches holding the hem, not the entire seam.
Example: Use a seam ripper to carefully cut the stitches holding the hem in place on both pant legs.
Step 4: Pin the pants:
Pin the pants along the new seam line, starting at the bottom of the leg and tapering in towards the knee. Make sure to try the pants on to check the fit before sewing.
Example: Use straight pins to hold the fabric in place along the new seam line, starting at the bottom of the leg and tapering in towards the knee.
Step 5: Sew along the new seam line:
Use a sewing machine to sew along the new seam line, starting at the bottom of the leg and tapering in towards the knee. Remove the pins as you sew.
Example: Use a sewing machine to sew along the new seam line, using a straight stitch and removing the pins as you go.
Step 6: Trim excess fabric:
Use scissors to trim any excess fabric along the new seam line.
Example: Use a pair of scissors to carefully trim any excess fabric along the new seam line.
Step 7: Hem the pants:
Fold the fabric up to create a new hemline and iron it in place. Then, sew along the hemline using a sewing machine.
Example: Fold the fabric up along the new hemline, iron it in place, and use a sewing machine to sew the hem in place.
Step 8: Iron the pants:
Use an iron to press the new seam and hem, making sure they lie flat.
Example: Use an iron to press the new seam and hem, smoothing out any wrinkles or bumps.
Step 9: Repeat for the other pant leg:
Repeat steps 1-8 for the other pant leg.
Example: Measure and mark the desired length, cut the excess fabric, detach the hem, pin the pants, sew along the new seam line, trim excess fabric, hem the pants, iron the pants, and repeat for the other pant leg.
Step 10: Try on the pants:
Try on the pants to ensure a good fit and adjust if necessary.
Example: Put on the pants and check the fit. If necessary, make adjustments by repeating steps 1-9 on either or both pant legs.
By following these steps and using the necessary materials, you can easily learn How to make pants skinnier at the bottom,
How to taper pants
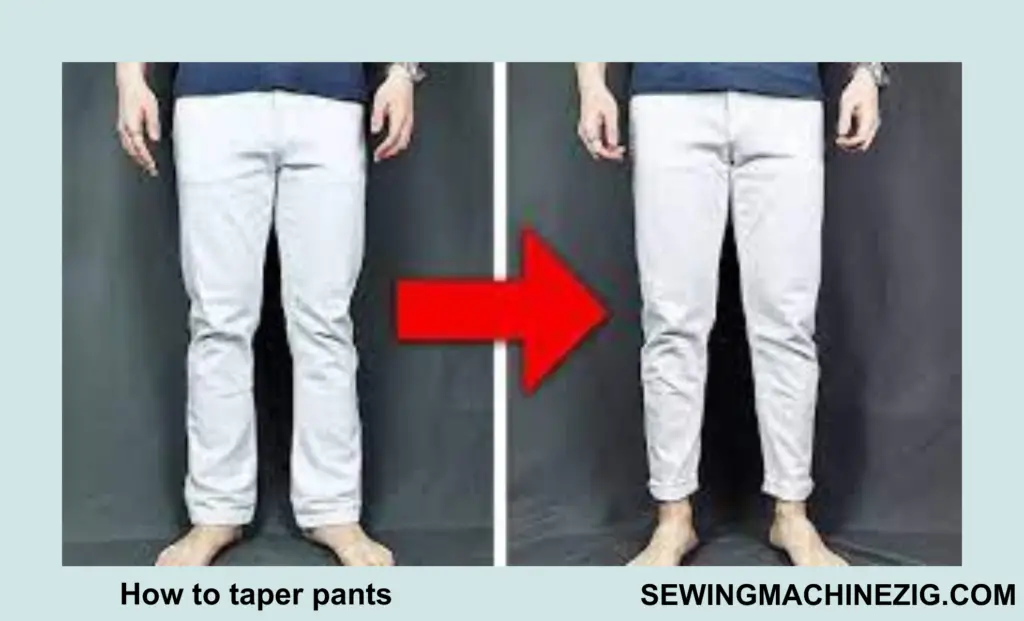
Tapering pants can be a simple and affordable way to achieve a more tailored and custom fit. Whether you want to create a more modern silhouette or adjust the fit of an older pair of pants, tapering can be a great option. In this article, we will go over the steps you need to follow to tapered pants. This is also a method of How to make pants skinnier at the bottom,
Materials:
- A sewing machine
- Thread
- Pins
- Scissors
- Seam ripper
- Measuring tape
- Chalk or fabric pencil
- Iron and ironing board
Altered pants for a modern fit
Step-by-step guide:
Step 1: Determine How Much to Taper
Before starting, you should decide how much you want to taper your pants. Generally, it is recommended to taper the pants from the knee down, leaving the thigh area unchanged. The amount you taper will depend on your personal preference and the style of the pants. You can use a measuring tape to measure the circumference of the pant leg at the knee and ankle to determine how much fabric you need to remove.
Step 2: Mark the Taper Line
Next, use a chalk or fabric pencil to mark the taper line on the pants. Start at the knee and gradually taper down to the ankle. Make sure the line is straight and even. You can use a ruler or straight edge to help you make a precise line.
Step 3: Pin the Pants
Pin the pants along the taper line to hold them in place. Make sure the pins are facing downward, so they do not get caught in the sewing machine.
Step 4: Rip Out the Seam
Use a seam ripper to remove the stitches from the outside seam of the pant leg, starting at the ankle and working your way up to the knee. Be careful not to cut into the fabric. This will allow you to open up the seam and adjust the width of the pant leg.
Step 5: Sew the Tapered Seam
Fold the pants along the taper line, with the right sides of the fabric facing each other. Pin the fabric in place along the taper line. Sew the new seam, starting at the ankle and working your way up to the knee. Use a straight stitch and backstitch at the beginning and end of the seam to secure it.
Step 6: Finish the Seams
Trim any excess fabric from the seam, leaving a 1/2-inch seam allowance. Use a zigzag stitch or serger to finish the raw edges of the seam. This will prevent the fabric from fraying over time.
Step 7: Press the Seams
Use an iron to press the seams open, making sure they lay flat. Iron the entire pant leg, paying special attention to the new seam. This will help the pants maintain their shape and give them a professional finish.
Tapering pants is a simple and cost-effective way to achieve a better fit and modernize your wardrobe. By following these steps, you can achieve a tailored look that complements your body type and personal style. With a little practice, you can even learn How to make pants skinnier at the bottom, and tailor pants for others, creating a unique and custom fit that is sure to impress.
Slimming pants without losing length
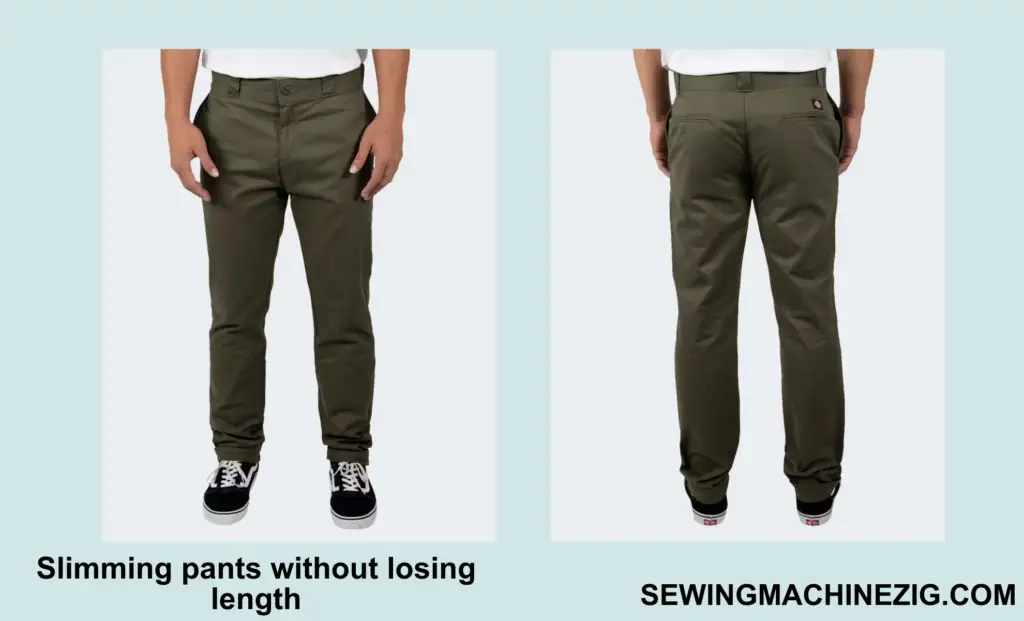
Slimming pants without losing length can be a challenging task, but it is possible with a few adjustments. Whether you want to create a more modern silhouette or just want to adjust the fit of an older pair of pants, slimming the pants can be a great option. In this article, we will go over the steps you need to follow to slim your pants without losing length and How to make pants skinnier at the bottom,
Materials:
- A sewing machine
- Thread
- Pins
- Scissors
- Seam ripper
- Measuring tape
- Chalk or fabric pencil
- Iron and ironing board
Step-by-step Guide:
Step 1: Determine How Much to Slim
Before starting, you should decide how much you want to slim your pants. It is recommended to slim the pants from the knee down, leaving the thigh area unchanged. The amount you slim will depend on your personal preference and the style of the pants. You can use a measuring tape to measure the circumference of the pant leg at the knee and ankle to determine how much fabric you need to remove.
Step 2: Mark the Slimming Line
Next, use a chalk or fabric pencil to mark the slimming line on the pants. Start at the knee and gradually slim down to the ankle. Make sure the line is straight and even. You can use a ruler or straight edge to help you make a precise line.
Step 3: Pin the Pants
Pin the pants along the slimming line to hold them in place. Make sure the pins are facing downward, so they do not get caught in the sewing machine.
Step 4: Rip Out the Seam
Use a seam ripper to remove the stitches from the outside seam of the pant leg, starting at the ankle and working your way up to the knee. Be careful not to cut into the fabric. This will allow you to open up the seam and adjust the width of the pant leg.
Step 5: Sew the Slimmed Seam
Fold the pants along the slimming line, with the right sides of the fabric facing each other. Pin the fabric in place along the slimming line. Sew the new seam, starting at the ankle and working your way up to the knee. Use a straight stitch and backstitch at the beginning and end of the seam to secure it.
Step 6: Finish the Seams
Trim any excess fabric from the seam, leaving a 1/2-inch seam allowance. Use a zigzag stitch or serger to finish the raw edges of the seam. This will prevent the fabric from fraying over time.
Step 7: Press the Seams
Use an iron to press the seams open, making sure they lay flat. Iron the entire pant leg, paying special attention to the new seam. This will help the pants maintain their shape and give them a professional finish.
Step 8: Adjust the Waistband
If the waistband of the pants is too loose after slimming, you can adjust it by removing excess fabric from the sides and reattaching it to the center back seam. This will help the pants fit better and prevent them from slipping down.
Slimming pants without losing length can be a bit challenging, but with these steps, you can achieve a better fit and modernize your wardrobe. With a little practice, you can even slim pants for others, creating a unique and custom fit that is sure to impress. This is also a method of How to make pants skinnier at the bottom,
Here are some detailed tips:
How to make pants skinnier at the bottom,
1. Consider the fabric:
Some fabrics may not be suitable for altering the shape of the pants at the bottom. For example, if the fabric is too thin or stretchy, the alterations may not hold up well.
2. Use a sewing machine:
While it is possible to make alterations by hand, using a sewing machine can make the process faster and more precise.
3. Take measurements:
Measure the width of the pant leg at the desired length to ensure that both legs are altered evenly.
4. Pin the pants:
Pin the pants along the inside seam to mark the desired width of the new pant leg.
5. Use chalk or a fabric marker:
Trace along the pinned line with chalk or a fabric marker to ensure a straight and even line.
6. Cut along the line:
Use sharp scissors to cut along the marked line. Be careful not to cut too much off at once, as it may be difficult to undo the alteration.
7. Try on the pants:
After cutting, try on the pants to ensure that they are the desired width and length. Make adjustments as necessary.
8. Sew along the new seam:
Use a sewing machine to sew along the new seam, starting from the bottom of the pant leg and working your way up.
9. Trim excess fabric:
Trim any excess fabric from the seam to prevent bulkiness.
10. Iron the seam:
Iron the seam flat to give a professional finish.
If you are working with a pair of denim jeans, you may want to use a heavy-duty sewing machine needle to ensure that it can penetrate through the thick fabric. Additionally, you may want to consider using denim thread for a stronger hold. This is also a method of How to make pants skinnier at the bottom,
Conclusion:
Making pants skinnier at the bottom can be an easy and affordable way to give your wardrobe a new look. How to make pants skinnier at the bottom, with the right tools and techniques, you can achieve a tailored and stylish fit without having to purchase new clothing. Remember to take accurate measurements, go slow and steady with your sewing, and try on the pants frequently to ensure the desired fit. Don’t be afraid to experiment with different methods and find what works best for you. With a little patience and practice, you can transform your pants into a trendy and personalized piece of clothing. Happy tailoring!
How to make pants skinnier at the bottom,
FAQs:
Q 1: Can any type of pants be made skinnier at the bottom?
A. Yes, any type of pants can be made skinnier at the bottom as long as there is enough fabric to work with. However, it may be more difficult with pants that have a lot of embellishments or are made of thicker fabrics.
Q 2: What kind of stitch should I use when tapering the pants?
A. It’s best to use a straight stitch or a lockstitch when tapering the pants. These stitches will create a neat and strong seam that will hold up over time.
Q 3: Do I need to use a sewing machine to taper my pants?
A. While it’s possible to taper pants by hand, it’s much easier and more efficient to use a sewing machine. The machine will create a stronger and more even stitch, and the process will be much faster.
Q 4: Can I make pants skinnier at the bottom without cutting them?
A. Yes, you can make pants skinnier at the bottom without cutting them by using elastic or drawstring. This method is perfect for joggers or sweatpants that you want to taper.
Q 5: How much fabric should I take in when tapering pants?
A. The amount of fabric you take in when tapering pants will depend on how skinny you want them to be. It’s best to start with small adjustments and work your way up until you achieve the desired fit.
Q 6: Can I taper pants with zippers at the bottom?
A. It’s possible to taper pants with zippers at the bottom, but it will require a bit more work. You’ll need to remove the zippers, taper the pants, and then reattach the zippers.
Q 7: Should I wash my pants before tapering them?
A. Yes, it’s recommended to wash your pants before tapering them, especially if they’re brand new. This will help to remove any sizing or shrinkage that may occur during the first wash.

