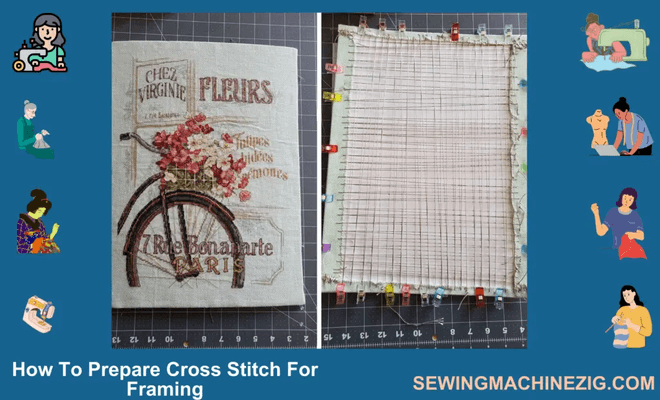
Cross-stitching is a timeless art form that has been enjoyed for generations. Creating a beautiful cross-stitch piece can be a rewarding experience, but the final step of framing it can be daunting. Preparing your cross-stitch for framing is an important process that requires careful attention to detail to ensure that your finished product is displayed at its best.
How to prepare cross stitch for framing, the key to framing your cross stitch is to make sure that it is clean, straight, and free from any creases or wrinkles. This involves gently washing your piece to remove any dirt or oils that may have accumulated during the stitching process. Once your cross-stitch is clean, it is important to iron it carefully, using a low-heat setting, to remove any remaining wrinkles and ensure that the piece is flat and smooth.
In this article, we will guide you through the step-by-step process of How to prepare cross stitch for framing. From washing and ironing to mounting and framing, we will provide you with the knowledge and tools you need to display your beautiful cross-stitch masterpiece with pride. So, let’s get started!
Here are some of the key steps involved in how to prepare cross stitch for framing:
Washing: Gently wash your cross-stitch to remove any dirt or oils that may have accumulated during the stitching process.
Ironing: Use a low-heat setting to iron your cross-stitch carefully to remove any remaining wrinkles and ensure that the piece is flat and smooth.
Mounting: Attach your cross-stitch to a mounting board or foam core board to keep it flat and prevent it from shifting inside the frame.
Framing: Choosing a suitable frame that complements your cross-stitch and provides
Here is a detailed guide on How to prepare cross stitch for framing. We will also provide examples and explain how many inches you should leave from the left and right sides of your cross-stitch.
Materials:
- Clean water
- Mild detergent (such as dish soap)
- Clean towels or paper towels
- Low-heat iron
- Mounting board or foam core board
- Acid-free tape or adhesive
- Suitable frame and matting
Step-By-Step Guide:
Step 1: Wash your cross-stitch

Fill a clean sink or basin with lukewarm water and add a small amount of mild detergent. Gently place your cross-stitch in the water and swish it around for a few minutes to loosen any dirt or oils. Rinse it thoroughly with clean water and gently squeeze out the excess water. Lay your cross-stitch flat on a clean towel or paper towel to dry.
Example: If your cross-stitch is 10 inches wide, you should leave at least 1 inch of space on both the left and right sides to prevent the stitching from being obscured by the frame or matting.
Step 2: Iron your cross-stitch
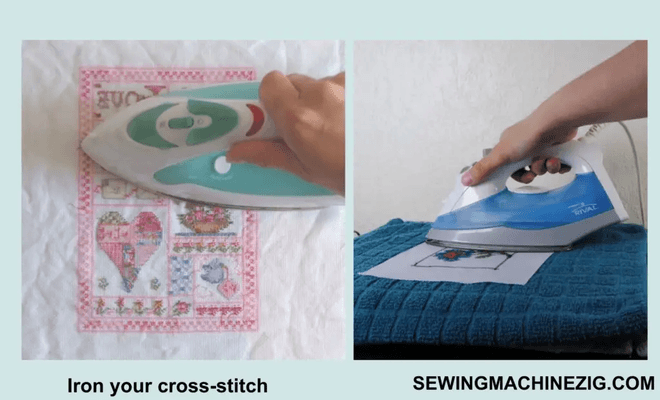
Once your cross-stitch is dry, turn it over and iron it on the reverse side using a low-heat setting. Use a pressing cloth or clean towel between the iron and your cross-stitch to protect it from direct heat. Continue ironing until your cross-stitch is flat and smooth.
Example: If your cross-stitch is 8 inches tall, you should leave at least 1/2 inch of space on both the top and bottom edges to ensure that the stitching is not covered by the frame or matting.
Step 3: How to mount cross stitch for framing
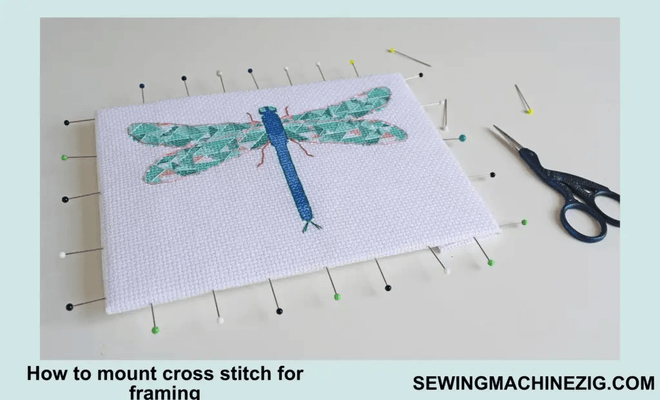
Cut a piece of mounting board or foam core board to fit the size of your cross-stitch. Place your cross-stitch on top of the board, making sure it is centered and straight. Use acid-free tape or adhesive to attach your cross-stitch to the board, being careful not to apply too much pressure or damage the stitching.”How to prepare cross stitch for framing“
Example: If your cross-stitch is 12 inches wide and 16 inches tall, you should leave at least 1 inch of space on all four edges to provide enough room for mounting and framing.
Step 4: Choose a frame and matting
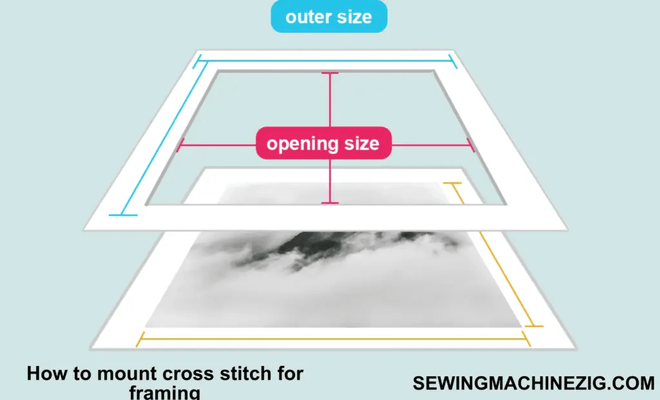
Select a suitable frame that complements your cross-stitch and fits the size of your mounting board. Choose a matting color that enhances the colors of your cross-stitch and provides a professional finish.
Example: If your mounting board is 14 inches wide and 18 inches tall, you should choose a frame that is slightly larger than the board, such as a 16×20 inch frame.
Step 5: Measure and cut the matting
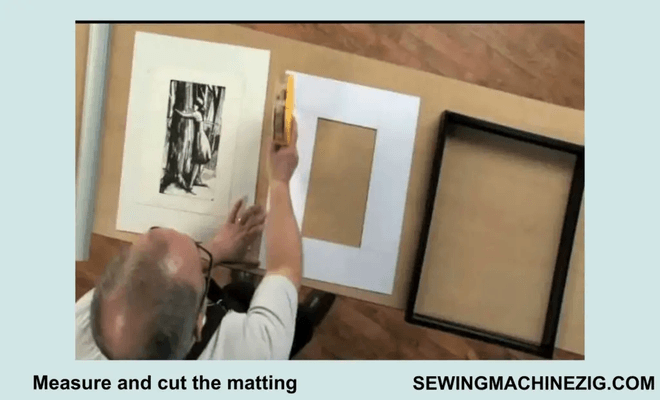
Measure the size of your mounting board and use a mat cutter or sharp scissors to cut the matting to the appropriate size. Make sure to leave enough space around the edges to show off your cross-stitch and provide a professional look.
Example: If your mounting board is 11 inches wide and 14 inches tall, you should cut the matting to 14×18 inches to provide a border around your cross-stitch.
Step 6: Attach the matting to the frame
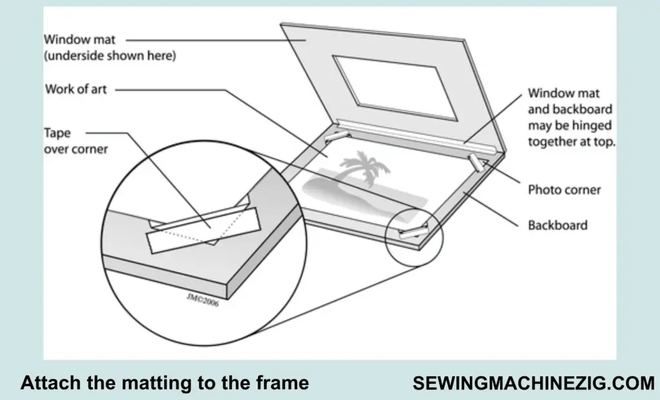
Place your mounting board with your cross-stitch and matting inside the frame. Secure the matting to the frame using tape or adhesive.
Example: If your frame has a 1-inch border around the edge, you should leave at least 1/2 inch of space between the edge of the matting and the edge of the frame to create a visually appealing border.
Step 7: Attach the backboard to the frame
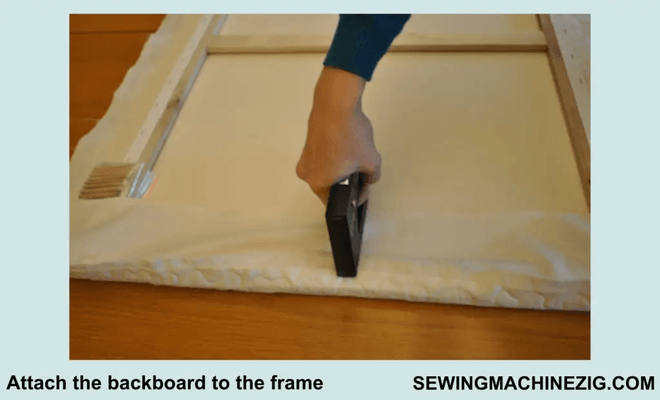
Attach the backboard or backing paper to the frame using the appropriate hardware. This will provide additional support for your cross-stitch and protect it from dust and damage.
Overall, preparing your cross-stitch for framing requires careful attention to detail and the right materials. With these steps and a little bit of patience, you can easily learn How to prepare cross stitch for framing and you can create a beautiful and long-lasting display piece for your home or as a gift for a loved one.
How do you stretch cross stitch before Framing?
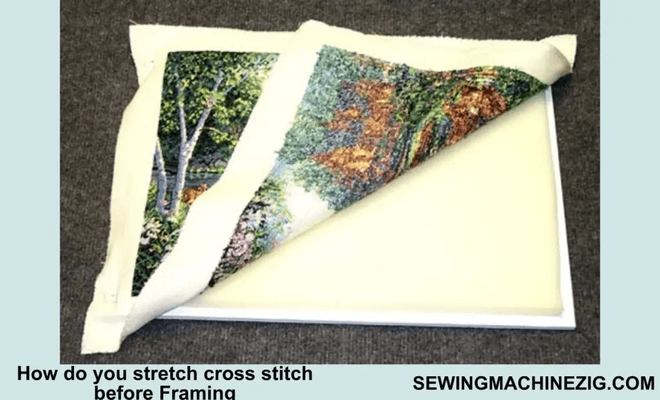
Stretching your cross stitch before framing is an essential step to ensure that your finished work looks its best. When properly stretched, the fabric will be taut and smooth, without any wrinkles or sagging. This will help to showcase the stitching and create a professional-looking finished product. Here are the steps to stretch your cross stitch before framing. but if you wanna know the basics first then read the above article on How to prepare cross stitch for framing:
Step 1: Cut a piece of foam core board slightly larger than your finished stitching.
Step 2: Center your stitched fabric over the foam core board and pin the corners in place with rust-proof pins.
Step 3: Use a spray bottle to dampen the fabric slightly. Be sure not to saturate the fabric, as this can cause it to bleed or warp.
Step 4: Gently pull the fabric taut and pin the sides in place with rust-proof pins. Be sure to stretch the fabric evenly, without pulling too hard or distorting the design.
Step 5: Allow the fabric to dry completely while still pinned to the foam core board. This will help to set the fabric and maintain its shape.
Step 6: Once the fabric is completely dry, remove the pins and carefully trim any excess fabric from the edges.
By following these steps, you can ensure that your cross stitch is stretched properly and ready to be mounted and framed. Be sure to use acid-free materials and handle the fabric with care to protect it from damage over time.
Precaution and Tips
When it comes to preparing your cross stitch for framing, there are a few precautions you should take to ensure that your work looks its best and is protected from damage. Here are some precautionary tips to keep in mind for How to prepare cross stitch for framing:
Use caution when washing
While washing your cross stitch is an important step in preparing it for framing, you should use caution to avoid damaging the fabric or the stitching. Avoid using hot water, harsh detergents, or rubbing or scrubbing the fabric too vigorously. Instead, use lukewarm water and a mild detergent, and gently agitate the fabric to remove dirt and oils. My personal opinion is first to read and follow the above article on How to prepare cross stitch for framing it will cover all simple and easy-to-advance processes then you’re already following these cautions.
Handle the fabric with care
When handling your cross stitch, be sure to use clean hands and avoid touching the stitching as much as possible. The oils from your skin can transfer onto the fabric and stain or damage the stitching over time. If you need to touch the stitching, use a clean, dry cloth or gloves to protect it.
Use acid-free materials
To protect your cross stitch from damage over time, be sure to use acid-free materials when framing. Acidic materials can cause the fabric and stitching to yellow or deteriorate over time. Use acid-free tape, mounting board, and matting to ensure that your work is protected.
Choose a suitable frame
When choosing a frame for your cross stitch, be sure to choose one that complements the design and is the right size for the stitching. A frame that is too small or too large can detract from the design or make it difficult to display. Be sure to choose a frame that is sturdy and well-constructed to protect your work from damage.
Store your work properly
Once your cross stitch is framed, be sure to store it properly to protect it from damage. Avoid hanging your work in direct sunlight or in areas with high humidity, as this can cause the fabric and stitching to fade or deteriorate. Store your work in a dry, cool place where it is protected from dust and moisture. All these cautions will help you work on How to prepare cross stitch for framing and its methods.
By following these precautionary tips, you can ensure that your cross stitch looks its best and is protected from damage for years to come.
Conclusion
Preparing your cross stitch for framing is an essential step in ensuring that your work looks its best when displayed. By following these simple tips and precautions on How to prepare cross stitch for framing, you can prepare your cross stitch properly and protect it from damage over time.
Remember to wash and iron the fabric, trim any excess, add a backing fabric, choose a suitable frame, and store your work properly. Additionally, use caution when washing and handling your fabric, and be sure to use acid-free materials to protect your work. By taking these steps, you can enjoy your cross stitch for years to come, and proudly display it in your home or give it as a gift to someone special. All these steps and methods made you clearly understand How to prepare cross stitch for framing.
FAQs:
Q 1: Should I wash my cross stitch before framing?
A: Yes, it is recommended to wash your cross stitch before framing it. This will remove any dirt or oils that may have accumulated on the fabric and ensure that the final product looks its best. Use lukewarm water and a mild detergent, and avoid scrubbing the fabric too vigorously. After washing, allow the fabric to air dry completely before ironing.
Q 2: Can I use regular tape to mount my cross stitch?
A: No, it is not recommended to use regular tape to mount your cross stitch. Regular tape can damage the fabric and stitch over time, causing it to yellow or deteriorate. Instead, use acid-free tape or a mounting board to secure your work in place.
Q 3: Should I trim the excess fabric before framing my cross stitch?
A: Yes, it is a good idea to trim any excess fabric before framing your cross stitch. This will help the stitching fit better in the frame and prevent any bunching or folding of the fabric. Use sharp scissors and be careful not to cut into the stitching.
Q 4: What is the purpose of a backing fabric when framing a cross stitch?
A: A backing fabric is used to provide support for the stitching and prevent it from sagging or stretching over time. It is also used to cover any unfinished edges of the fabric and create a more polished look. Choose a backing fabric that complements the stitching and is sturdy enough to provide support.
Q 5: Can I use a regular frame for my cross stitch?
A: Yes, you can use a regular frame for your cross stitch. However, it is important to choose a frame that is the right size for the stitching and complements the design. Additionally, be sure to use acid-free materials and avoid hanging the work in direct sunlight or in areas with high humidity.
Q 6: How should I store my cross stitch after it is framed?
A: After your cross stitch is framed, it is important to store it properly to protect it from damage. Avoid hanging it in direct sunlight or in areas with high humidity, as this can cause the fabric and stitching to fade or deteriorate. Store your work in a dry, cool place where it is protected from dust and moisture.
Q 7: How can I ensure that my cross stitch looks its best when framed?
A: To ensure that your cross stitch looks its best when framed, take the time to properly wash and iron the fabric, trim any excess, add a backing fabric, choose a suitable frame, and use acid-free materials. Additionally, be sure to handle the fabric with care and store your work properly to protect it from damage over time. With these steps, you can enjoy your cross stitch for years to come.

