Removing sewing stitches, a task often necessitated by errors or the desire to update a project is a skill every craft enthusiast should master. Whether you’re a seasoned seamstress or just starting out, knowing how to remove stitches is essential. It’s a process that requires precision and patience.
In this guide, we’ll delve into the art of unstitching, offering step-by-step instructions and tips on “how to remove sewing stitches” effectively. From basic hand-sewn stitches to machine stitches, we’ll cover it all, ensuring that your sewing projects remain error-free and polished. Let’s embark on this journey to seamstress perfection.
How To Remove Sewing Stitches Detailed Answer
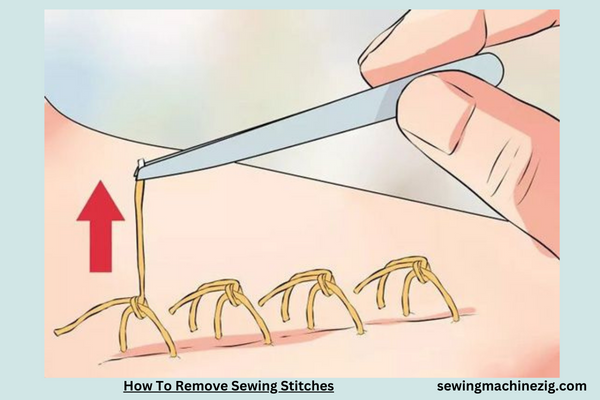
Learning how to remove sewing stitches is an essential skill for anyone who loves to sew. Whether you’re a seasoned seamstress or just starting out on your sewing journey, mistakes happen, and being able to undo stitches is a valuable part of the process.
In this comprehensive guide, we’ll walk you through the step-by-step process of how to remove sewing stitches effectively. Whether you’re dealing with hand-sewn or machine stitches, we’ve got you covered. Let’s get started on mastering this vital sewing technique.
Step 1: Gather Your Tools
Before you begin, make sure you have the necessary tools at your disposal:
- Seam ripper
- Small, sharp scissors
- A pair of tweezers
- Good lighting Having the right tools will make the process much smoother.
Step 2: Identify the Stitches to Remove
Examine your fabric to determine which stitches need to be removed. Look for any errors or imperfections in your work, or if you’re simply taking apart a project, identify the stitches that need to be undone.
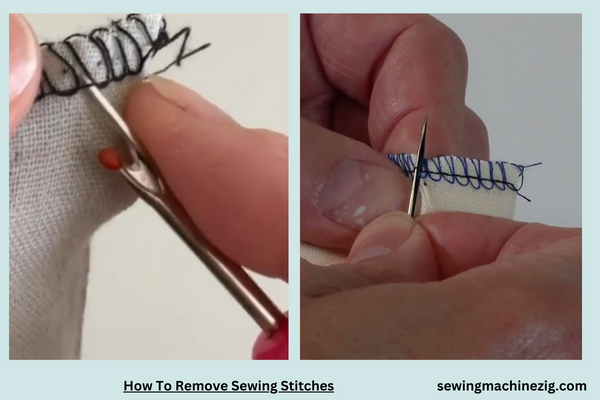
Step 3: Using a Seam Ripper
If you’re dealing with machine stitches, a seam ripper is your best friend. Here’s how to use it:
- Hold your fabric with one hand, taut but not stretched.
- With the other hand, gently insert the seam ripper’s point under a stitch.
- Carefully cut the stitch by pushing the seam ripper through the threads.
- Pull the thread out once the stitch is cut.
Step 4: Removing Hand-Stitched Stitches
When working with hand-sewn stitches, small scissors are your go-to tool:
- Hold your fabric taut with one hand.
- Carefully slide the tip of the scissors under the stitch you want to remove.
- Gently snip the thread.
- Pull out the loose end of the thread.
Step 5: Dealing with Tangled Threads
Sometimes, stitches can get tangled, and removing them can be a bit more challenging. Here’s what to do:
- Use your tweezers to carefully pick apart the tangle.
- Once the threads are separated, continue to remove them following the steps mentioned above.
Step 6: Tidy Up
After you’ve removed all the necessary stitches, it’s essential to tidy up your work:
- Trim any remaining loose threads using your small scissors.
- Inspect the fabric to ensure there are no residual threads or snags.
Step 7: Practice Makes Perfect
Remember that learning how to remove sewing stitches effectively takes practice. Don’t be discouraged if it’s not perfect the first time. Keep honing your skills, and you’ll become more proficient over time.
Step 8: Final Words
Now that you’ve learned how to remove sewing stitches, you have an essential skill in your sewing repertoire. Whether you’re fixing mistakes or repurposing old projects, this knowledge will come in handy. Keep your tools ready, and don’t hesitate to unravel your stitches when needed. Happy sewing!
In this guide on “How to Remove Sewing Stitches,” we’ve covered the step-by-step process, including identifying the stitches to be removed, using a seam ripper or scissors, and handling tangled threads. Remember to practice and refine your skills over time, and you’ll become a pro at this essential sewing task.
How To Remove Sewing Stitches From A Sewing Machine
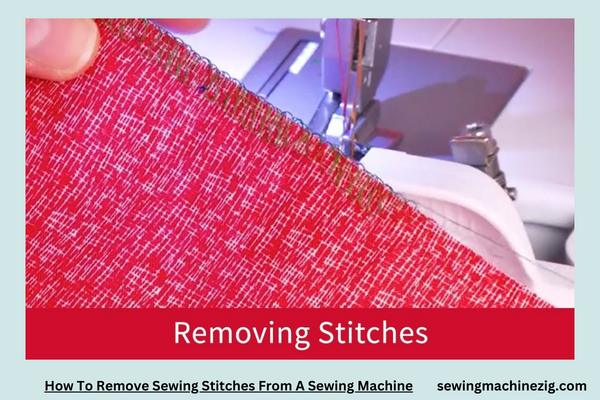
Learning how to remove sewing stitches from a sewing machine is a fundamental skill for every sewing enthusiast. Whether you’ve made an error in your project or need to rework a seam, understanding this process is crucial.
In this detailed step-by-step guide on “How to Remove Sewing Stitches,” we’ll walk you through the procedure of how to remove sewing stitches from a sewing machine effectively. By the end of this tutorial, you’ll be confident in your ability to troubleshoot and rectify any stitching errors with ease.
Step 1: Gather Your Supplies
Before you begin, ensure you have the following tools at hand:
- Seam ripper
- Tweezers
- Small scissors
- A lint brush
- Good lighting
Having the right tools is essential for a smooth “How to Remove Sewing Stitches” process.
Step 2: Prepare Your Sewing Machine
Turn off your sewing machine and unplug it from the power source for safety. Raise the presser foot and remove the presser foot and needle, if possible, to create easier access to the stitches for “How to Remove Sewing Stitches.”
Step 3: Identify the Stitches to Remove
Examine your fabric to locate the stitches you want to remove in the process of “How to Remove Sewing Stitches.” Whether it’s a mistake in your sewing or you’re disassembling a project, pinpoint the stitches that need to be undone.
Step 4: Using the Seam Ripper for “How to Remove Sewing Stitches”
The seam ripper is your primary tool for removing stitches from a sewing machine in the process of “How to Remove Sewing Stitches.” Here’s how to use it:
- Insert the seam ripper’s point under the stitch you want to remove.
- Gently push the seam ripper through the threads, taking care not to damage the fabric.
- Once the stitch is cut, gently pull out the loose threads.
Step 5: Dealing with Tangled Threads
Occasionally, stitches can become tangled or knotted during “How to Remove Sewing Stitches.” In such cases, tweezers are incredibly helpful:
- Use the tweezers to carefully untangle the threads.
- Once they are separated, continue to remove the stitches following the steps mentioned above in “How to Remove Sewing Stitches.”
Step 6: Cleaning Your Sewing Machine
After removing the stitches as part of “How to Remove Sewing Stitches,” take a moment to clean your sewing machine:
- Use a lint brush to remove any loose threads or lint from the bobbin area, feed dogs, and needle plate.
- Ensure that the machine is free of any remnants that could affect your future sewing projects involving “How to Remove Sewing Stitches.”
Step 7: Reassemble Your Machine
Once you’ve removed the unwanted stitches in the “How to Remove Sewing Stitches” process and cleaned your sewing machine, reassemble it by reinserting the needle and presser foot.
Step 8: Test Your Machine
Before resuming your sewing project, it’s a good idea to run a few test stitches on a scrap piece of fabric to ensure your machine is working correctly and your problem is resolved for “How to Remove Sewing Stitches.”
Step 9: Practice Makes Perfect
Like any skill, learning “How to Remove Sewing Stitches” from a sewing machine takes practice. The more you do it, the more proficient you’ll become.
Step 10: Conclusion
Now you have a comprehensive understanding of “How to Remove Sewing Stitches” from a sewing machine. This valuable skill empowers you to fix mistakes and make adjustments with confidence. Keep your tools ready, and don’t hesitate to troubleshoot and unravel stitches when needed. Happy sewing!
How To Remove Sewing Stitches From Clothes
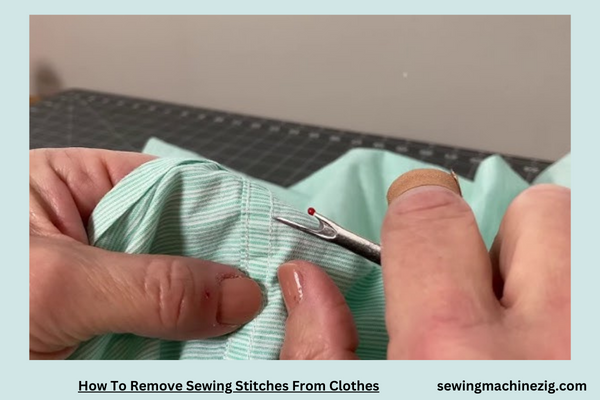
Learning how to remove sewing stitches from clothes is a valuable skill that can help you correct sewing errors, tailor garments, or upcycle old clothing.
In this detailed step-by-step guide on “How to Remove Sewing Stitches from Clothes,” we’ll provide you with the knowledge and techniques necessary to tackle this task effectively. By the end of this guide, you’ll have the confidence to troubleshoot and rectify any stitching issues on your clothing.
Step 1: Gather Your Supplies
Before you begin, ensure you have the following tools and materials ready:
- Seam ripper
- Small, sharp scissors
- Tweezers
- Good lighting Having the right tools is crucial for a smooth stitch-removal process from clothes.
Step 2: Identify the Stitches to Remove
- Examine the garment to identify the stitches that need to be removed. Whether it’s a sewing mistake, alterations, or repurposing a piece, pinpoint the stitches that require undoing.
Step 3: Using the Seam Ripper
The seam ripper is a fundamental tool for “How to Remove Sewing Stitches from Clothes.” Here’s how to use it:
- Carefully insert the seam ripper’s point under the stitch you want to remove.
- Gently push the seam ripper through the threads, ensuring you don’t damage the fabric.
- Once the stitch is cut, gently pull out the loose threads.
Step 4: Dealing with Tangled Threads
In some cases, stitches can become tangled or knotted. For “How to Remove Sewing Stitches from Clothes,” tweezers come to the rescue:
- Use tweezers to carefully untangle the threads.
- Once the threads are separated, continue to remove the stitches following the previously mentioned steps.
Step 5: Cleaning the Fabric
After removing the stitches, it’s a good practice to clean the fabric:
- Use a lint brush or a fabric shaver to remove any remaining loose threads or lint from the area.
- Ensure the fabric is free of any remnants that might affect your clothing’s appearance.
Step 6: Check the Fabric’s Condition
- Examine the fabric to ensure it’s in good condition after removing stitches. In some cases, there might be tiny holes or marks from the removed stitches. Depending on your project, you may need to address these issues.
Step 7: Reassemble or Alter
Once you’ve removed the unwanted stitches from the clothes, you can reassemble the garment or proceed with any alterations or upcycling as needed.
Step 8: Test the Garment
Before wearing or using the garment, consider running a few test stitches on a scrap piece of fabric or in an inconspicuous area of the clothing to ensure the fabric and seams are secure.
Step 9: Practice and Confidence
Remember, becoming skilled at “How to Remove Sewing Stitches from Clothes” takes practice. The more you do it, the more confident and proficient you’ll become.
Step 10: Conclusion
Now that you have a comprehensive understanding of “How to Remove Sewing Stitches from Clothes,” you possess a valuable skill for sewing and clothing maintenance.
Whether you’re fixing mistakes, tailoring, or revamping your wardrobe, this knowledge empowers you to achieve the results you desire. Keep your tools at the ready, and don’t hesitate to troubleshoot and unravel stitches when needed. Happy sewing and clothing transformation!
Conclusion
In the world of sewing, mastering the art of “How To Remove Sewing Stitches” is an essential skill for every enthusiast. Whether correcting errors or making alterations, understanding the removal process is crucial.
This step-by-step guide has equipped you with the knowledge and techniques needed to troubleshoot and rectify stitching mistakes with confidence. From gathering the necessary tools to cleaning your sewing machine, and finally, testing your machine, you’re now well-prepared to maintain the quality of your sewing projects. With this skill in your repertoire, you’ll sew with greater assurance. Happy stitching!
FAQS
Q1: How to remove sewing stitches from a sewing machine?
A1: To remove sewing stitches from a sewing machine, you can follow these steps: First, gather the necessary tools, including a seam ripper, tweezers, small scissors, and a lint brush. Then, turn off the sewing machine and unplug it for safety. Raise the presser foot and remove the presser foot and needle, if possible, for better access to the stitches. Identify the stitches you want to remove, and carefully use the seam ripper to cut them. Ensure your machine is clean and in working order before reassembling it and testing it with scrap fabric.
Q2: Can I use regular scissors to remove sewing stitches?
A2: It’s not recommended to use regular scissors to remove sewing stitches. Small, pointed scissors designed for sewing or a seam ripper are better choices. Regular scissors can easily damage the fabric or cut stitches unevenly, making it challenging to achieve clean and precise stitch removal.
Q3: What do I do if the stitches become tangled or knotted while removing them?
A3: If the stitches become tangled or knotted during the removal process, use tweezers to carefully untangle the threads. Once they are separated, continue to remove the stitches following the steps mentioned earlier. Patience and gentle handling are key to avoiding further complications.
Q4: Why is it important to clean the sewing machine after removing stitches?
A4: Cleaning the sewing machine after removing stitches is crucial to ensure the machine’s longevity and the quality of your future sewing projects. Leftover threads and lint in the bobbin area, feed dogs, or needle plate can affect the machine’s performance and stitch quality. Regular cleaning keeps your machine in optimal working condition.
Q5: How can I prevent stitch removal mistakes in the future?
A5: To prevent stitch removal mistakes in the future, double-check your stitching before proceeding. Take your time and avoid rushing through your sewing projects. Practice precision and consistency, and always use the appropriate tools for stitch removal. Regular maintenance and cleaning of your sewing machine can also help prevent stitching errors.

