Dive into the world of precision stitching as we explore the art of sewing with a sewing machine. “How to Serge with a Sewing Machine” demystifies the intricacies of this versatile technique, offering a guide for both novices and seasoned seamstresses. A serged seam not only ensures durability but also adds a professional touch to your creations.
In this tutorial, we unravel the secrets behind achieving clean, finished edges, elevating your sewing projects to a new level of sophistication. Let’s delve into the realm of serging, where threads intertwine to create a tapestry of seamless beauty.
How To Serge With A Sewing Machine Detailed Answer
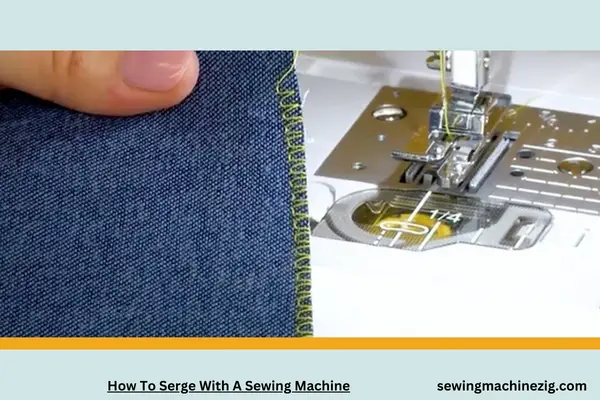
Serging with a sewing machine is a game-changer in the world of sewing, providing a professional finish to your fabric edges while preventing fraying.
In this detailed guide,” How to Serge with a Sewing Machine” we’ll walk through each step to help you master the technique of serging and enhance the quality and durability of your sewing projects.
Materials Needed:
- Sewing machine with a serger function
- Matching thread
- Fabric to be serged
- Fabric scissors
- Seam gauge or ruler
- Tweezers (optional)
Step 1: Set Up Your Sewing Machine:
Ensure your sewing machine is equipped with a serger function. Thread the machine with matching thread and install the appropriate needle for the fabric you’re working with.
Step 2: Adjust Tension Settings:
Serging requires balanced tension. Experiment on a scrap fabric to achieve the ideal tension settings. Adjust the upper and lower looper tensions and differential feed to ensure even stitches.
Step 3: Choose the Right Stitch:
Select the desired serger stitch. Common options include a 3-thread or 4-thread overlock stitch. The choice depends on the type of fabric and the level of seam strength required.
Step 4: Prepare the Fabric:
Trim the fabric edges to ensure they are straight and even. If you’re serging the edge of a garment, do this before assembling the pieces.
Step 5: Align the Fabric:
Place the fabric under the serger foot, aligning the edge with the cutting blade. Ensure the fabric is flat and taut to prevent uneven serging.
Step 6: Begin Serging:
Start serging by gently pressing the foot pedal. Allow the machine to trim the excess fabric with its cutting blade while simultaneously overlocking the edge with stitches.
Step 7: Guide the Fabric:
Guide the fabric smoothly through the machine, keeping a consistent pace. Be attentive to maintain an even distance from the edge to create uniform stitches.
Step 8: Corners and Curves:
For corners, stop with the needle down, lift the presser foot, pivot the fabric, and continue serging. For curves, gently manipulate the fabric to follow the desired shape.
Step 9: Finish the Serged Edge:
Once you reach the end of the fabric, continue serging a few inches beyond the edge. This ensures a secure finish. Trim the threads.
Step 10: Inspect and Adjust:
Inspect the serged edge for any skipped stitches or tension issues. Make necessary adjustments before proceeding with your main project.
Step 11: Practice on Scrap Fabric:
Before applying serging to your actual project, practice on scrap fabric to get a feel for your machine’s settings and to perfect your technique.
Congratulations! You’ve successfully learned How to Serge with a Sewing Machine. With this skill, your projects will boast professionally finished edges that not only prevent fraying but also add a touch of sophistication. As you continue to practice, you’ll find that serging becomes a valuable asset in your sewing repertoire. Happy serging!
How To Serge On Brother Sewing Machine
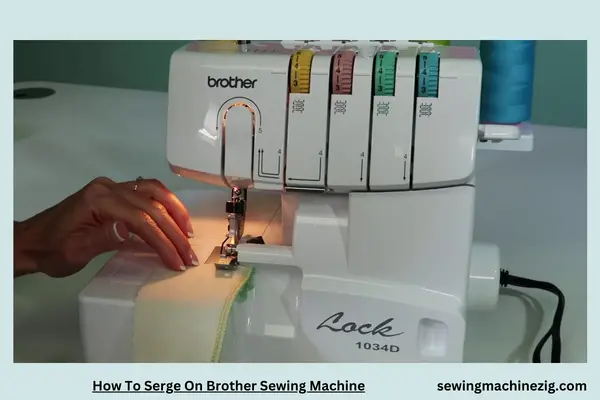
Serging on a Brother sewing machine might seem a bit technical, but it’s a fantastic way to finish fabric edges neatly and prevent fraying. Let’s break down how to serge on a Brother sewing machine in an easy-to-understand way:
Materials You’ll Need:
- Brother sewing machine with serger function
- Matching thread
- Fabric to be serged
- Fabric scissors
- Seam gauge or ruler
- Tweezers (optional)
Step-by-Step Guide:
Set Up Your Brother Sewing Machine:
- Ensure your Brother sewing machine is equipped with a serger function. Thread the machine with matching thread and install the appropriate needle for the fabric you’re working with.
Adjust Tension Settings:
- Serging requires balanced tension. Experiment on a scrap fabric to achieve the ideal tension settings. Adjust the upper and lower looper tensions and differential feed to ensure even stitches.
Choose the Right Stitch:
- On your Brother sewing machine, select the desired serger stitch. Common options include a 3-thread or 4-thread overlock stitch. The choice depends on the type of fabric and the level of seam strength required.
Prepare the Fabric:
- Trim the fabric edges to ensure they are straight and even. If you’re serging the edge of a garment, do this before assembling the pieces.
Align the Fabric:
- Place the fabric under the serger foot, aligning the edge with the cutting blade. Ensure the fabric is flat and taut to prevent uneven serging.
Begin Serging:
- Start serging by gently pressing the foot pedal. Allow the machine to trim the excess fabric with its cutting blade while simultaneously overlocking the edge with stitches.
Guide the Fabric:
- Guide the fabric smoothly through the machine, keeping a consistent pace. Be attentive to maintaining an even distance from the edge to create uniform stitches.
Corners and Curves:
- For corners, stop with the needle down, lift the presser foot, pivot the fabric, and continue serging. For curves, gently manipulate the fabric to follow the desired shape.
Finish the Serged Edge:
- Once you reach the end of the fabric, continue serging a few inches beyond the edge. This ensures a secure finish. Trim the threads.
Inspect and Adjust:
- Inspect the serged edge for any skipped stitches or tension issues. Make necessary adjustments before proceeding with your main project.
Key Tips:
- Practice on scrap fabric before serging your main project.
- Keep the machine well-maintained by cleaning it regularly.
- Experiment with different stitch settings for various fabric types.
Serging on a Brother sewing machine is a valuable skill that enhances the quality and durability of your sewing projects. With a bit of practice, you’ll master the art of serging and enjoy professional-looking, neatly finished edges. “How to Serge with a Sewing Machine”, Happy Serging!Top of Form
How To Serge WithOut A Serger
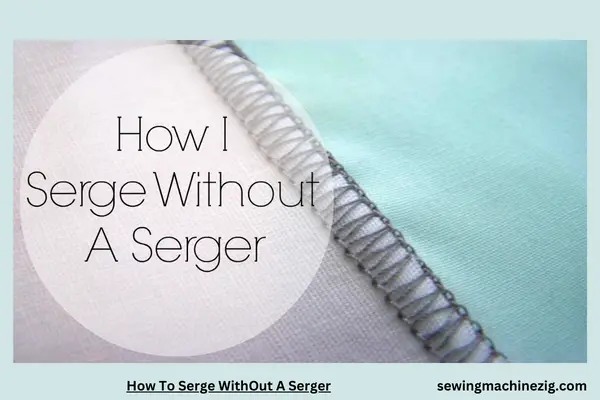
Serging without a serger might seem a bit unconventional, but with a regular sewing machine, you can achieve a similar effect known as a mock or faux-serged edge. Let’s break down how to create this neat finish without a dedicated serger:
Materials You’ll Need:
- Sewing machine
- Matching thread
- Fabric to be serged
- Fabric scissors
- Zigzag stitch or overlock foot (optional)
- Seam gauge or ruler
Step-by-Step Guide:
Choose a Zigzag Stitch:
- On your sewing machine, select the zigzag stitch. This stitch mimics the overlocking effect of a serger. Adjust the stitch width and length based on your preference and the thickness of the fabric.
Prepare the Fabric:
- Trim the fabric edges to ensure they are straight and even. If you’re working on a garment, do this before assembling the pieces.
Align the Fabric:
- Place the fabric under the sewing machine foot, aligning the edge with the needle. If your machine has a zigzag stitch or overlock foot, use it to help guide the fabric and create a cleaner edge.
Start Zigzagging:
- Begin sewing with the zigzag stitch along the edge of the fabric. The needle will move from side to side, creating a stitch that secures the edge and prevents fraying.
Maintain a Consistent Pace:
- Keep a steady pace as you guide the fabric through the machine. The goal is to create a neat and even zigzag stitch along the edge.
Corners and Curves:
- For corners, stop with the needle down, lift the presser foot, pivot the fabric, and continue zigzagging. When working on curves, gently manipulate the fabric to follow the desired shape.
Finish the Zigzag Edge:
- Once you reach the end of the fabric, continue zigzagging a few inches beyond the edge. This ensures a secure finish. Trim the threads.
Inspect and Adjust:
- Inspect the zigzagged edge for any irregularities. If needed, make adjustments to the stitch width or length to achieve the desired look.
Key Tips:
- Practice on scrap fabric to get a feel for the zigzag stitch and make any necessary adjustments.
- Experiment with different stitch settings to find the most suitable zigzag width and length for your project.
- Use a matching thread color for a seamless finish.
Serging without a serger is a practical solution for those without access to specialized equipment. With the zigzag stitch on your sewing machine, you can create a secure and neat edge that prevents fraying, adding a professional touch to your projects. “How to Serge with a Sewing Machine”, Happy sewing!
Conclusion
In conclusion, mastering “How to Serge with a Sewing Machine” unlocks a powerful technique for finishing fabric edges with professional flair. This skill, vital for preventing fraying and adding a polished touch, transforms ordinary seams into durable and aesthetically pleasing edges.
Whether on Brother or any other sewing machine, sewing elevates the quality of your creations. So, thread your machine with confidence, explore various stitches, and let the serger’s magic enhance the durability and visual appeal of your sewing projects. Happy serging!
FAQS
Q1: What does it mean to serge with a sewing machine?
A1: Serging with a sewing machine involves using a serger stitch to finish fabric edges, preventing fraying and creating a professional-looking seam. It adds durability and a neat appearance to various sewing projects. “How to Serge with a Sewing Machine“
Q2: Can I use any sewing machine for serging?
A2: While traditional sewing machines don’t perform a true serger stitch, many have overlock or zigzag stitches that mimic serging. Dedicated serger machines, however, provide specialized features for more intricate serging. “How to Serge with a Sewing Machine“
Q3: How do I set up my sewing machine for serging?
A3: Set your sewing machine to the overlock or zigzag stitch. Adjust stitch length, width, and tension settings based on the fabric. Practice on scrap fabric to ensure the desired serging effect. “How to Serge with a Sewing Machine“
Q4: What is the difference between serging and using a regular straight stitch?
A4: Serging uses multiple threads to secure and finish fabric edges simultaneously, preventing fraying. A straight stitch is a single-threaded stitch primarily used for joining fabric pieces rather than finishing edges.
Q5: Can I use a serger stitch for all types of fabric?
A5: Yes, a serger stitch is versatile and suitable for various fabric types. Adjust the machine settings based on the fabric’s weight and characteristics for optimal serging results.
Q6: What is the purpose of serging, and when should I use it?
A6: The primary purpose of serging is to finish fabric edges, preventing fraying and enhancing durability. Use serging on garment seams, hems, and any project where you want a professional and polished edge.

