Embarking on the meticulous journey of maintaining a Pfaff sewing machine involves unraveling the intricate layers of mechanical prowess. Navigating the labyrinthine world of gears and stitches demands a nuanced approach to ensure the perpetual seamlessness of your crafting companion.
Immerse yourself in the artistry of preservation with this comprehensive guide on “How To Service A Pfaff Sewing Machine,” unveiling the cryptic dance between precision and ingenuity. Explore the mechanics of care as we delve into the labyrinth of gears, discovering the symbiotic relationship between your craft and the meticulously tended Pfaff apparatus.
How To Service A Pfaff Sewing Machine Detailed Answer
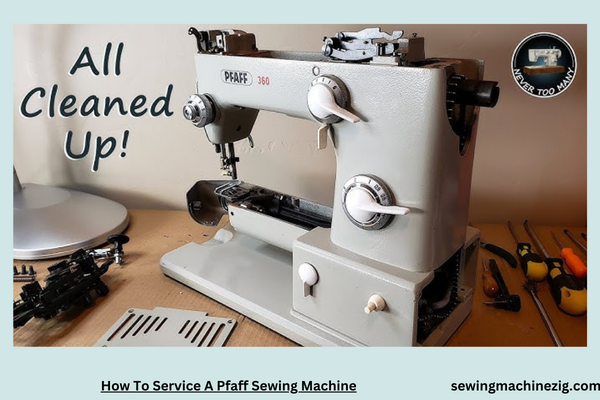
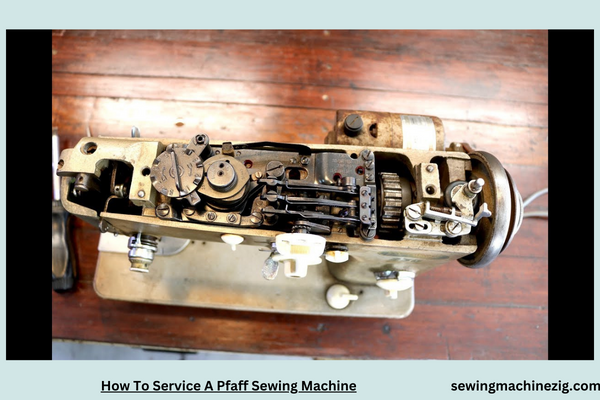
Embarking on the journey of maintaining and servicing your Pfaff sewing machine is essential for ensuring its longevity and optimal performance.
In this comprehensive guide, How To Service A Pfaff Sewing Machine,We’ll walk you through the step-by-step process of servicing your Pfaff machine, providing insights into troubleshooting common issues and keeping your beloved sewing companion in top-notch condition.
Step 1: Gather Your Tools and Materials
Before delving into the service process, ensure you have the necessary tools and materials. This typically includes a screwdriver, lint brush, sewing machine oil, and a soft lint-free cloth. Additionally, refer to your Pfaff sewing machine manual for any specific tools recommended by the manufacturer.
Step 2: Power Off and Unplug the Machine
Safety first. Turn off your Pfaff sewing machine and unplug it from the power source. This ensures your safety while servicing and prevents any accidental activations during the process.
Step 3: Remove the Needle and Presser Foot
Begin the service by removing the needle and presser foot. Follow the instructions in your machine manual for proper removal procedures. This step provides better access to various components for thorough cleaning and lubrication.
Step 4: Clean the Machine Thoroughly
Use a lint brush to remove accumulated lint, dust, and debris from the bobbin area, feed dogs, and other critical parts. A clean machine ensures smooth operation and prevents potential issues caused by obstructions.
Step 5: Oil the Machine
Applying sewing machine oil is a crucial step in servicing your Pfaff machine. Consult your machine manual for guidance on the specific oiling points. Typically, you’ll focus on the hook race, needle bar, and other designated areas. Use only recommended sewing machine oil to avoid damage to the machine.
Step 6: Check and Adjust the Tension
Verify the thread tension settings by testing on a scrap piece of fabric. Adjust the tension dials if needed to achieve balanced and even stitches. Proper tension is vital for the quality of your sewing projects.
Step 7: Inspect and Replace Needles
Inspect the needle for any signs of damage, such as bent or blunt tips. If the needle shows wear, replace it with a new one. Using a fresh needle ensures clean and precise stitching.
Step 8: Check and Adjust the Bobbin Tension
Evaluate the bobbin tension by pulling the thread. The bobbin tension should be balanced with the upper thread tension. Adjust the bobbin tension screw if necessary, following the guidelines in your machine manual.
Step 9: Verify Feed Dog Alignment
Ensure the feed dogs are properly aligned and moving smoothly. Check for any obstructions or irregularities. If the feed dogs show signs of wear, consult your machine manual for guidance on adjustments or replacement.
Step 10: Lubricate Moving Parts
Lubricate all moving parts according to the manufacturer’s recommendations. Pay special attention to gears and joints. Proper lubrication reduces friction, prolongs the life of your machine, and ensures smooth operation.
Step 11: Check Belt Tension (if applicable)
For machines with belts, inspect the tension and condition of the belts. Belts that are too loose or worn may affect the machine’s performance. Adjust or replace the belts as needed, following the instructions in your machine manual.
Step 12: Calibrate Stitch Settings
Calibrate and test various stitch settings to ensure accuracy and consistency. Refer to your Pfaff machine manual for information on adjusting stitch length, width, and other settings. Calibrating these settings enhances the precision of your sewing projects.
Common Issues and Solutions:
Machine Jamming or Skipping Stitches:
- Solution: Clear any fabric or thread jams carefully. Check the needle for damage and ensure it is properly inserted. Re-thread the machine, verifying the correct threading path.
Uneven Stitches or Thread Breakage:
- Solution: Check and adjust the tension settings for both the upper thread and the bobbin. Ensure the needle is suitable for the fabric. Use high-quality thread to prevent breakage.
Loud or Unusual Noises:
- Solution: Inspect the machine for loose screws or foreign objects. Lubricate moving parts, including gears and joints. If the noise persists, consult your machine manual or seek professional assistance.
Bobbin Tension Issues:
- Solution: Adjust the bobbin tension screw following the machine manual’s guidelines. Ensure the bobbin is wound correctly and inserted properly.
Regular Maintenance Schedule:
To keep your Pfaff sewing machine in optimal condition, establish a regular maintenance routine. Consider the following schedule:
- Weekly: Clean the bobbin area, feed dogs, and change the needle.
- Monthly: Oil the machine, and inspect and clean tension discs.
- Every 3-6 Months: Perform a comprehensive service, including cleaning, oiling, and adjusting tension.
By following this guide and adhering to a regular maintenance schedule, you’ll ensure that your Pfaff sewing machine continues to be a reliable and precise tool for your creative endeavors. Regular servicing not only prevents issues but also enhances the longevity of your machine, allowing you to enjoy countless hours of seamless sewing.
How To Use A Brother Sewing Machine Cs6000i
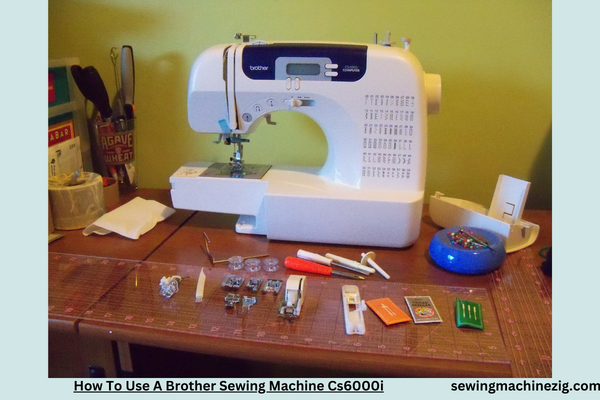
Embarking on a creative journey with your Brother Sewing Machine CS6000i opens the door to a world of possibilities. This detailed guide will walk you through the step-by-step process of using the Brother CS6000i, ensuring you unlock its full potential for seamless and precise sewing. Let’s dive into the intricacies of this versatile machine.
Step 1: Familiarize Yourself with the Brother CS6000i
Before you begin sewing, take some time to acquaint yourself with the Brother CS6000i. Explore its features, including the LCD display, stitch selector, threading system, and the various presser feet that come with the machine. Understanding these components sets the foundation for a smooth sewing experience.
Step 2: Set Up Your Brother CS6000i
Place the machine on a sturdy and well-lit surface. Ensure it is plugged into a power source. Power on the machine using the on/off switch. The LCD display will illuminate, providing you with access to various settings. Adjust the settings, such as stitch length and width, according to your project requirements.
Step 3: Wind the Bobbin
Prepare your Brother CS6000i for threading by winding the bobbin. Place the thread on the spool pin and follow the threading path indicated on the machine. Engage the bobbin winding system and start the machine. Once the bobbin is filled, cut the thread and disable the bobbin winding system.
Step 4: Threading the Upper Thread
Follow the threading path for the upper thread, ensuring it passes through the various guides, the tension discs, and the needle eye. Use the automatic needle threader for efficient threading. Pull the thread gently, ensuring it is securely threaded through the needle.
Step 5: Inserting the Bobbin
Insert the wound bobbin into the bobbin case, following the directional arrow. Draw the thread through the bobbin case’s thread guide, ensuring it fits snugly into the tension spring. Thread the lower thread through the designated guides until it reaches the needle plate.
Step 6: Selecting the Desired Stitch
The Brother CS6000i offers a variety of stitches for different sewing projects. Use the stitch selector dial to choose the desired stitch number displayed on the LCD screen. Whether it’s a straight stitch, zigzag, or a decorative pattern, the CS6000i provides versatility for your creative endeavors.
Step 7: Adjusting Stitch Length and Width
Fine-tune your stitches by adjusting the stitch length and width settings. Experiment with these settings on a scrap piece of fabric to achieve the desired outcome. Shorter stitch lengths are suitable for delicate fabrics, while wider stitches work well for bolder designs.
Step 8: Utilizing the Needle Position Button
Take advantage of the needle position button to control whether the needle stops in the up or down position after sewing. This feature is particularly useful when pivoting fabric or removing it from the machine. Experiment with different needle positions for added flexibility.
Step 9: Placing the Fabric and Lowering the Presser Foot
Prepare your fabric by placing it under the presser foot. Lower the presser foot using the lever on the back of the machine. The presser foot holds the fabric in place during sewing, ensuring even stitches and preventing fabric movement.
Step 10: Sewing Techniques and Controls
Explore various sewing techniques using the Brother CS6000i. Familiarize yourself with the foot pedal for controlling the sewing speed. Practice starting and stopping smoothly, and experiment with the reverse sewing button for reinforcing stitches at the beginning and end of seams.
Common Issues and Solutions:
Thread Tension Problems:
- Issue: Uneven stitches or thread bunching.
- Solution: Adjust the upper and lower thread tension. Consult the machine manual for guidance on proper tension settings.
Needle Breakage:
- Issue: Needles breaking frequently during sewing.
- Solution: Ensure you are using the correct needle type for the fabric. Replace dull or damaged needles promptly.
Bobbin Issues:
- Issue: Bobbin thread tangling or uneven winding.
- Solution: Rethread the bobbin, ensuring it is correctly inserted. Check for any obstructions in the bobbin case.
Machine Jamming:
- Issue: Fabric getting stuck or not feeding smoothly.
- Solution: Clear any fabric or thread jams carefully. Check the feed dogs for obstructions and ensure they are raised.
Step 11: Cleaning and Maintenance
Regular cleaning and maintenance contribute to the longevity of your Brother CS6000i. After each use, remove lint and dust from the bobbin area, feed dogs, and the needle plate. Oil the machine as recommended in the manual, paying attention to the moving parts.
Step 12: Exploring Advanced Features
As you become more comfortable with the basics, explore the advanced features of the Brother CS6000i. Experiment with the various presser feet provided, such as the walking foot for quilting or the zipper foot for precise zipper installation. Consult the manual for guidance on using these accessories.
By following these comprehensive steps“How To Service A Pfaff Sewing Machine,” and troubleshooting techniques, you’ll master the art of using the Brother CS6000i sewing machine. Regular maintenance and a thorough understanding of its features will ensure that your creative sewing projects are executed with precision and ease. Happy sewing!
Top of Form
Conclusion
In conclusion, grasping How To Service A Pfaff Sewing Machine, akin to securing the longevity and optimal performance of a trusted crafting companion. Regular maintenance ensures precision in every stitch and longevity in every project.
The Pfaff Sewing Machine, with its innovative features, demands care and attention to unleash its full potential. Embracing the art of servicing enables a seamless sewing experience, elevating your craft to new heights. So, service your Pfaff Sewing Machine diligently, and let your creativity thread its way into perfection.
FAQS
Q1: How frequently should I service my Pfaff Sewing Machine?
A1: Regular servicing is recommended every 12 to 18 months, depending on usage. If you use the machine extensively, consider more frequent servicing to maintain optimal performance. “”How To Service A Pfaff Sewing Machine,
Q2: Can I service my Pfaff Sewing Machine at home, or should I consult a professional?
A2: While basic maintenance can be done at home, professional servicing is advisable for in-depth inspections and adjustments. A certified Pfaff technician ensures thorough care for your machine. “”How To Service A Pfaff Sewing Machine,
Q3: What signs indicate that my Pfaff Sewing Machine needs servicing?
A3: Signs include unusual noises, decreased stitch quality, or difficulty in feeding fabric. If you notice any irregularities, it’s time for a service to prevent potential issues. “How To Service A Pfaff Sewing Machine,“
Q4: How do I oil my Pfaff Sewing Machine as part of routine maintenance?
A4: Use Pfaff-approved oil and follow the user manual’s instructions. Apply oil to designated areas, such as the hook race and needle bar, to maintain smooth operation.
Q5: Can I use generic sewing machine oil for my Pfaff machine?
A5: It’s recommended to use oil specifically designed for Pfaff Sewing Machines. Generic oils may not provide the necessary lubrication, affecting the machine’s performance. “”How To Service A Pfaff Sewing Machine,“How To Service A Pfaff Sewing Machine,“
Q6: Is it normal for my Pfaff Sewing Machine to make some noise during operation?
A6: While some noise is typical, any sudden or excessive noise may indicate an issue. If the noise persists after cleaning and oiling, consult a professional for a thorough inspection. “How To Service A Pfaff Sewing Machine,“

