Embarking on a sewing project is an exciting venture, but the initial hurdle lies in the setup of your machine. The pivotal question arises: “How to set up a sewing machine?” This guide meticulously unravels the steps from unpacking to threading, ensuring a seamless start to your creative journey.
As we navigate through the intricacies of machine preparation, you’ll gain the expertise to fine-tune settings for optimal performance. Join us on this foundational expedition where the art of setting up a sewing machine becomes an essential skill, setting the stage for countless stitching triumphs.
How To Set Up A Sewing Machine Detailed Answer
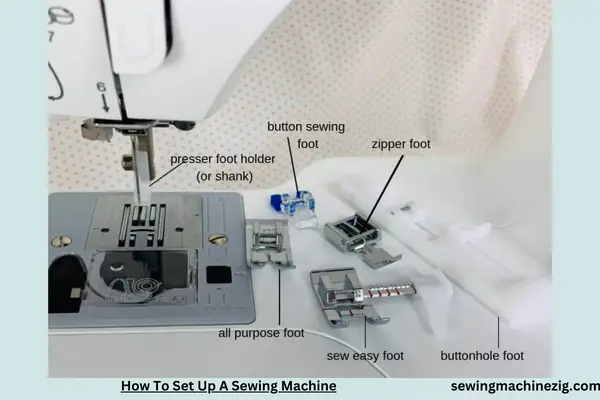
Embarking on a sewing journey is an exciting endeavor, and mastering the art of setting up a sewing machine is the initial stitch in creating beautiful garments or crafts.
In this detailed step-by-step guide, How to set up a sewing machine, we’ll unravel the intricacies of setting up a sewing machine, ensuring a smooth start to your creative endeavors. From unpacking to threading the needle, every step is crucial to unleashing the full potential of your sewing machine.
Step 1: Unboxing and Inspection
The first step in setting up your sewing machine is the unboxing process. Carefully remove the machine and its accessories from the packaging. Inspect the contents to ensure that all components, including power cords, foot pedals, and any included accessories, are present and in good condition.
Step 2: Choose the Right Location
Selecting the right location for your sewing machine is essential for a comfortable and efficient sewing experience. Choose a well-lit area with adequate space for your machine, allowing easy access to the working area and ensuring proper ventilation.
Step 3: Familiarize Yourself with Machine Components
Take a few moments to familiarize yourself with the various components of your sewing machine. Identify the handwheel, spool pin, bobbin winder, needle clamp, presser foot, and stitch selection dial. Understanding these components will make the setup process more straightforward.
Step 4: Place the Machine on a Stable Surface
Ensure that your sewing machine is placed on a stable and level surface. This provides a secure foundation for your machine and prevents unnecessary vibrations during operation. If your sewing machine comes with a hard case or extension table, attach it according to the manufacturer’s instructions.
Step 5: Install the Needle
Installing the needle is a fundamental step in setting up your sewing machine. Ensure the needle is suitable for the fabric you plan to sew. Loosen the needle clamp using the included screwdriver, insert the needle with the flat side facing the back, and tighten the clamp securely.
Step 6: Wind the Bobbin
Proper bobbin winding is crucial for smooth stitching. Place the thread spool on the spool pin and pass the thread through the bobbin winding guide. Place an empty bobbin on the bobbin winder spindle, disengage the handwheel, and follow your machine’s instructions to wind the bobbin evenly. Once wound, cut the thread and remove the bobbin.
Step 7: Load the Bobbin
Insert the wound bobbin into the bobbin case following the machine’s threading diagram. Pull the thread through the bobbin tension slot, ensuring proper placement. Consult your machine’s manual for guidance on bobbin insertion, as the process may vary between different models.
Step 8: Thread the Upper Thread
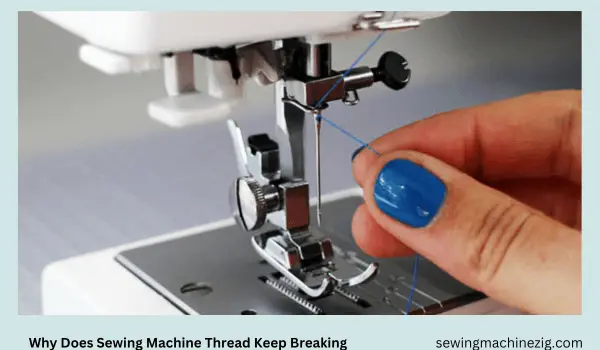
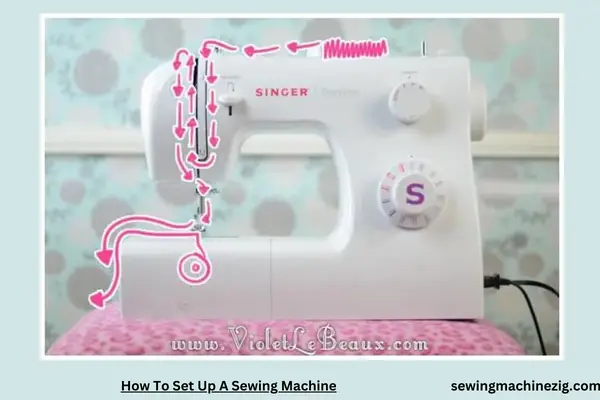
Threading the upper thread correctly is essential for successful sewing. Follow the threading path indicated in your machine’s manual, passing the thread through the thread guides, tension discs, and the needle bar thread guide. Use the built-in needle threader if your machine is equipped with one, or thread the needle manually.
Step 9: Set the Stitch Length and Width
Adjust the stitch length and width settings on your machine based on your project requirements. For basic sewing, a medium stitch length is often suitable. Experiment with the stitch width to achieve the desired result. Refer to your machine’s manual for specific guidance on stitch settings.
Step 10: Thread the Machine for the First Stitch
With both the upper thread and bobbin threaded, raise the presser foot and turn the handwheel towards you to bring the needle to its highest position. Hold the end of the upper thread and turn the handwheel again to lower the needle and bring up the bobbin thread. Pull both threads towards the back of the machine.
Step 11: Test Stitch on Scrap Fabric
Before diving into your actual project, conduct a test stitch on a scrap piece of fabric. This allows you to verify that the machine is properly threaded, the tension is adjusted correctly, and the selected stitch settings meet your requirements. Adjust as needed to achieve the desired stitch quality.
Step 12: Explore Stitch Options
Most sewing machines offer a variety of stitches beyond the basic straight stitch. Explore the stitch options available on your machine by adjusting the stitch selection dial. Familiarize yourself with utility stitches, decorative stitches, and any specialty stitches your machine may offer.
Step 13: Attach Accessories
If your sewing machine comes with additional accessories, such as presser feet or quilting guides, attach them according to the manufacturer’s instructions. Different presser feet serve specific purposes, so understanding their functions enhances your sewing capabilities.
Step 14: Adjust Tension as Needed
Proper tension is crucial for achieving balanced and even stitches. Adjust the tension settings based on the type of fabric and thread you are using. Consult your machine’s manual for guidance on adjusting tension, and make incremental changes while testing on scrap fabric.
Step 15: Master Threading for Different Fabrics
As you progress in your sewing journey, you’ll likely work with various fabrics. Master the art of threading your machine for different fabric types. Adjust the needle size, thread tension, and stitch length based on whether you’re working with lightweight fabrics, denim, knits, or other materials.
Step 16: Oil and Clean Regularly
To ensure the longevity and smooth operation of your sewing machine, incorporate regular maintenance. Consult your machine’s manual for guidance on oiling specific points. Clean out any lint or debris in the bobbin area and around the feed dogs. Regular maintenance contributes to consistent performance.
Step 17: Troubleshoot and Consult the Manual
If you encounter issues during setup or while sewing, don’t hesitate to troubleshoot. Check for common issues such as thread jams, incorrect threading, or bobbin problems. Consult your machine’s manual for troubleshooting tips and solutions to common sewing machine challenges.
Step 18: Join Sewing Communities for Tips
Sewing communities, both online and local, can be valuable sources of tips and advice. Join forums, social media groups, or attend sewing classes to connect with experienced sewists. Sharing experiences and learning from others can enhance your understanding of sewing machine setup and operation.
Step 19: Personalize Your Machine Setup
Every sewist has preferences for machine setup and operation. Personalize your machine by exploring additional features, adjusting settings, and finding the setup that aligns with your sewing style. Experiment with different presser feet, stitches, and techniques to make your sewing experience uniquely yours.
Step 20: Continuous Learning and Mastery
Setting up a sewing machine is just the beginning of your sewing journey. Embrace continuous learning and mastery of new techniques. Explore advanced features on your machine, experiment with different fabrics and projects, and challenge yourself with creative endeavors.
Weaving Creativity with Precision
In setting up a sewing machine is a foundational step in the journey of creating beautiful garments and crafts.
Mastering the intricacies of your machine, from threading to stitch selection, empowers you to unleash your creativity with precision. As you embark on this creative journey, remember that each stitch is a step towards mastery. Happy sewing!
How To Start A Sewing Machine
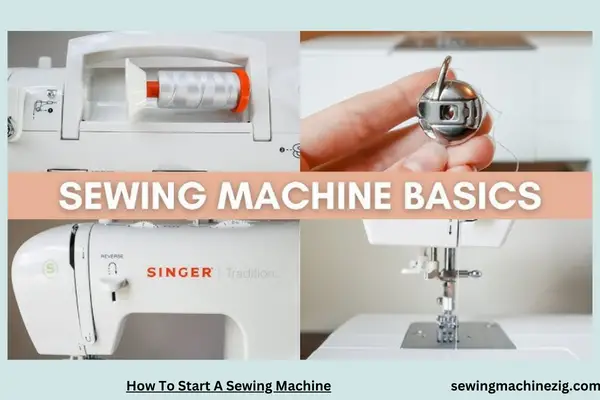
When you reach the end of your seam or need to reposition the fabric, stop sewing and lift the presser foot using the lever. This allows you to pivot the fabric or adjust its placement without stitching. Lower the presser foot again when ready to resume sewing.
Step 21: Complete the Seam and Secure the End
When you reach the end of your sewing task, use the backstitch function again to secure the stitches. Stitch backward for a few stitches and then forward to lock the thread. Cut the thread using the machine’s built-in thread cutter or small scissors.
Step 22: Power Off the Machine
After completing your sewing task, power off the machine using the designated power switch or button. This is an essential step in conserving energy and ensuring the safety of your sewing machine.
Step 23: Continuous Learning and Troubleshooting
As you progress in your sewing journey, continue learning about your machine’s features and functions. Refer to the machine’s manual for troubleshooting tips if you encounter any issues during operation. Understanding the nuances of your sewing machine enhances your overall sewing experience.
Stitching Dreams into Reality
Starting a sewing machine is the gateway to transforming your creative dreams into reality. By following these detailed steps, you can approach your sewing machine setup with confidence and precision. Each stitch is a step towards mastery, and with practice, you’ll unlock the full potential of your sewing machine. Happy stitching!
Conclusion
In conclusion, How to set up a sewing machine grasping the essentials of “How To Set Up A Sewing Machine” is the key to a seamless and enjoyable stitching experience. This comprehensive guide provides the necessary steps, from unboxing to mastering different features, ensuring your machine is configured for optimal performance.
By familiarizing yourself with the components and personalizing your setup, you embark on a creative journey where each stitch becomes a testament to your mastery. Embrace continuous learning, experiment with diverse techniques, and set up your sewing machine with confidence and precision. “How to set up a sewing machine“
FAQs for “How To Set Up A Sewing Machine”
Q1: What does “setting up” a sewing machine entail?
A1: Setting up a sewing machine involves preparing it for use, including assembling components, threading, and adjusting settings.
Q2: Can I set up my sewing machine without the user manual?
A2: While a user manual is helpful, basic setup steps are usually intuitive. However, consulting the manual ensures correct configuration and optimal performance.
Q3: How do I assemble the different components during sewing machine setup?
A3: Follow the user manual’s guidelines for assembling components such as the needle, presser foot, and bobbin case. Each machine model may have specific assembly steps. “How to set up a sewing machine“
Q4: Is there a specific order to follow when setting up a sewing machine?
A4: Yes, generally, the setup order involves assembling components, threading the machine, adjusting tension, and testing stitches. Refer to your manual for the correct sequence. “How to set up a sewing machine“
Q5: Can I adjust the sewing machine’s settings during the setup process?
A5: Yes, setting up includes adjusting stitch length, width, and tension according to your project. The manual provides guidance on making these adjustments. “How to set up a sewing machine“

