Sewing a pillowcase with a sewing machine is a fun and rewarding project that allows you to express your creativity and add a personal touch to your bedding and decor. Whether you’re a beginner or an experienced seamstress, making a pillowcase is a great way to hone your sewing skills and produce a practical and beautiful item.
A pillowcase is essentially a cover for a pillow, and it can be made in a variety of sizes, colors, and fabrics to suit your personal style and preferences. By making your own pillowcases, you can create a cohesive look for your bedroom, customize your bedding to match your decor, and even make thoughtful and personalized gifts for your loved ones.
If you’re new to sewing, and don’t know how to sew a pillowcase with sewing machine, don’t worry – sewing a pillowcase is a great project for beginners. It’s a simple and straightforward process that requires only a few basic tools and materials. With a little bit of practice, you can create a beautiful and functional pillowcase that looks and feels professional.
Sewing a pillowcase is a relatively simple process, but there are a few things to keep in mind before you should know how to sew a pillowcase with sewing machine to ensure that your pillowcase looks neat and professional. For example, you’ll need to make sure that your seams are straight and even, and that your corners are properly mitered. You may also want to consider adding decorative touches such as embroidery, applique, or trim.
Sewing a pillowcase with a sewing machine is a simple and straightforward process that requires only a few basic tools and materials. With a little bit of patience and practice, you can create a pillowcase that looks and feels professional, and that will stand the test of time. In this article, we will walk you through the steps of how to sew a pillowcase with sewing machine and provide you with tips and tricks to help you achieve the best possible results. So, let’s get started!
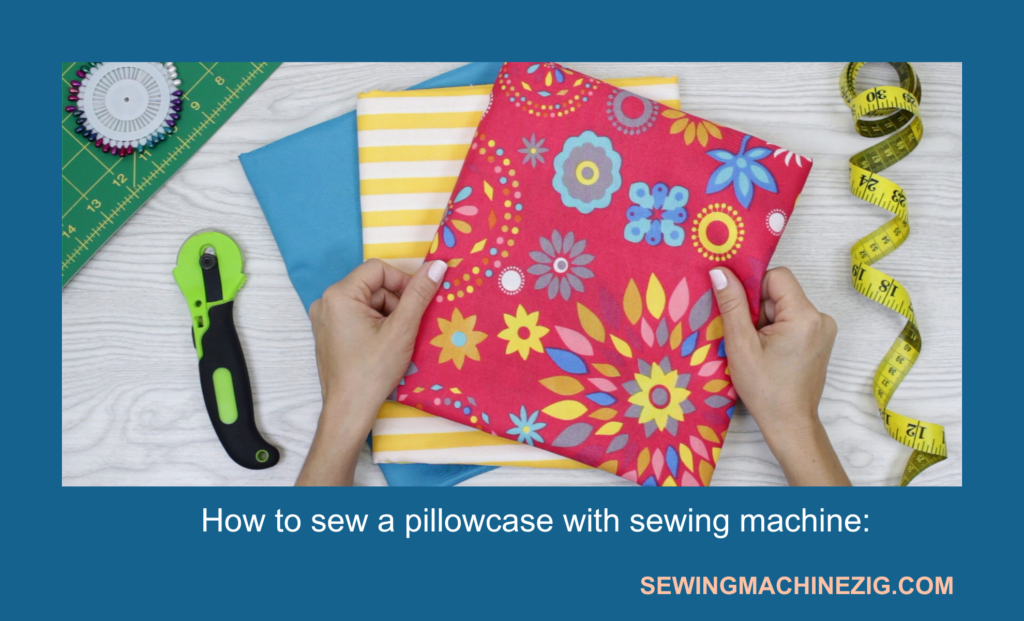
Materials for how to sew a pillowcase with sewing machine:
- Fabric (cotton, linen, silk, flannel)
- Thread (matching or contrasting color)
- Fabric scissors
- Pins
- Measuring tape
- Sewing machine
Step-by-Step:
Choose your fabric and determine the size of your pillowcase:
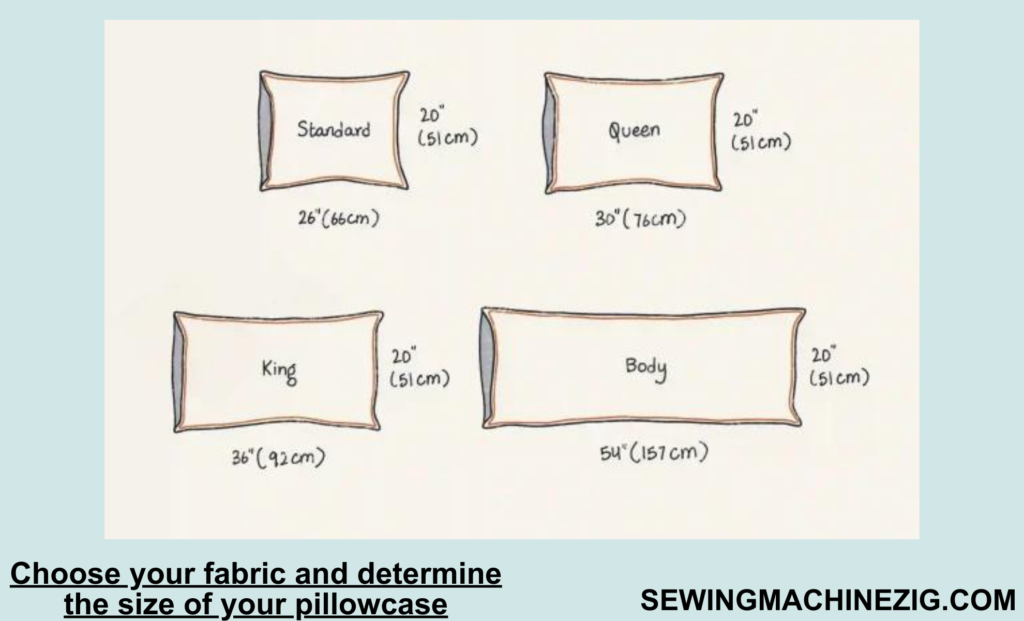
Select a fabric that is comfortable to sleep on and fits your personal style. Cotton or linen fabrics are great choices for pillowcases.
Measure your pillow from seam to seam across the middle of the pillow. This is the width.
Measure from the top of the pillow to the bottom of the pillow. This is the length.
Add 1 inch to both the width and length measurements. This will give you enough fabric to create a 1/2-inch seam allowance on all sides.
Step 1: Cut your fabric to size:
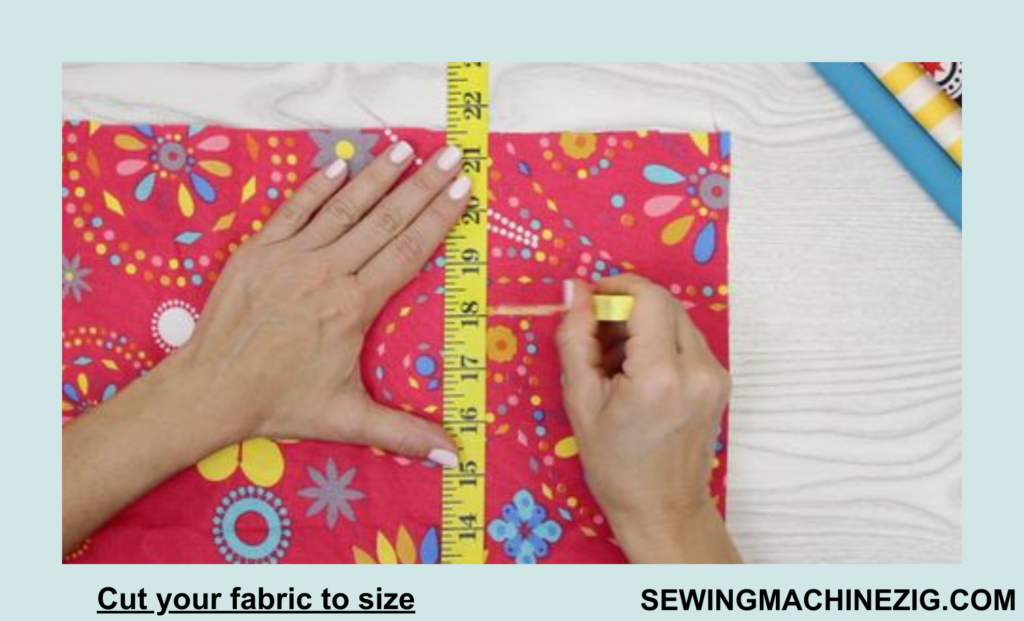
- Cut two pieces of fabric to the size you just determined. These pieces should be identical in size.
- Place the two pieces of fabric together with the right sides facing each other.
- Pin the fabric together around the edges, leaving a 4-inch opening on one side.
Step 2: Sew the fabric together:
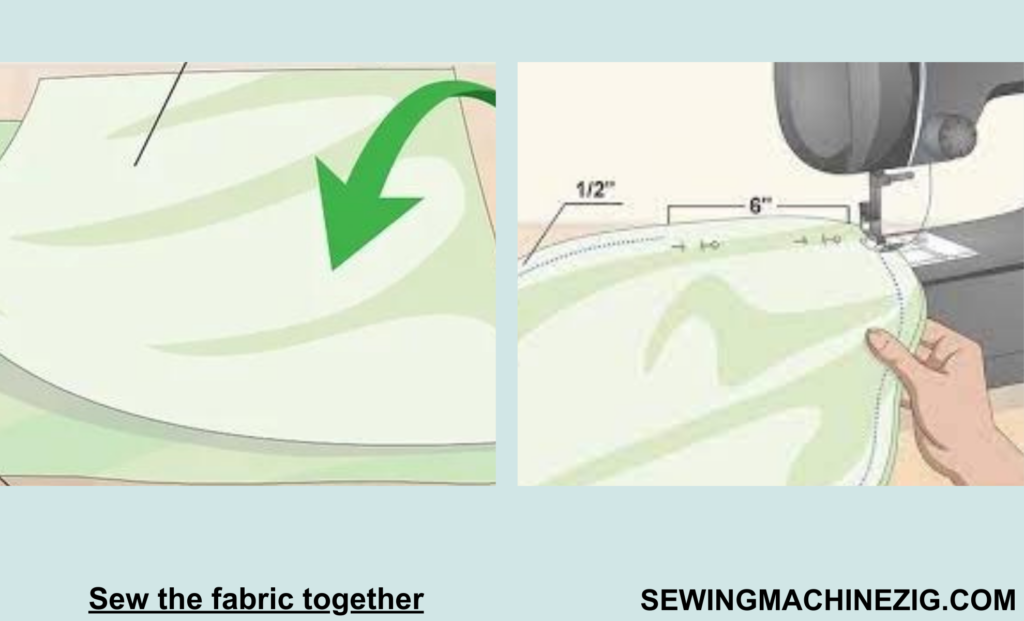
- Thread your sewing machine with matching or contrasting thread.
- Set your machine to a straight stitch with a stitch length of 2.5-3.0.
- Start sewing at one end of the opening and sew all the way around the fabric, stopping at the other end of the opening.
- Use the presser foot as a guide to creating a 1/2-inch seam allowance. Make sure to backstitch at the beginning and end of your seam to secure it.
Step 3: Finish the pillowcase:
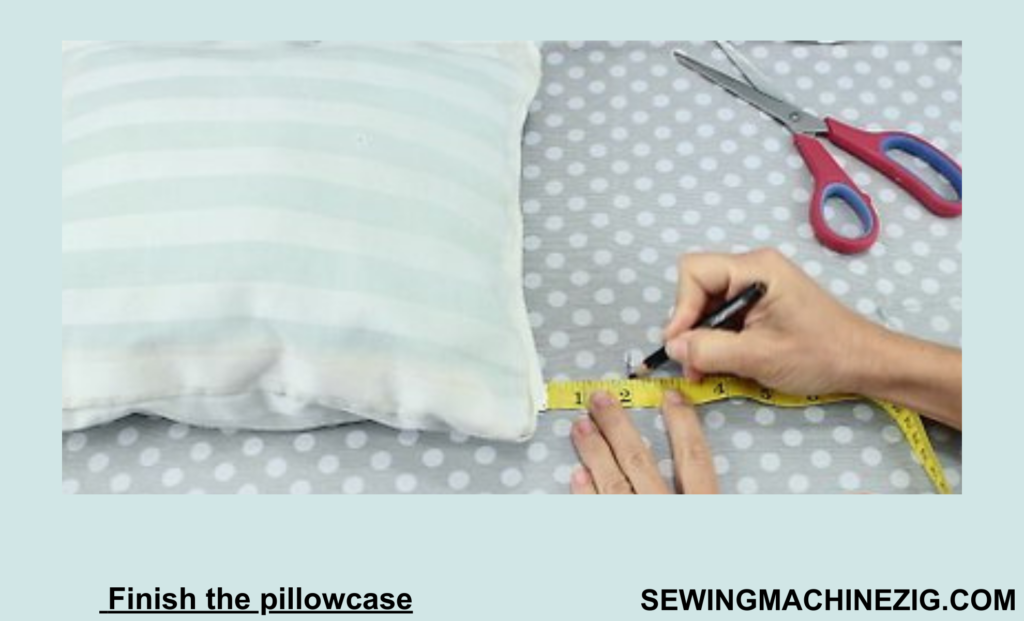
- Trim the corners of the pillowcase to reduce bulk. Cut off the excess fabric to within 1/4 inch of the stitching.
- Turn the pillowcase right side out and press the seams flat with an iron.
- Fold the fabric over to create a flap that will keep the pillow in place. The flap should be about 4 inches wide.
- Pin the flap in place along the bottom of the pillowcase.
Step 4: Sew the flap to the pillowcase:
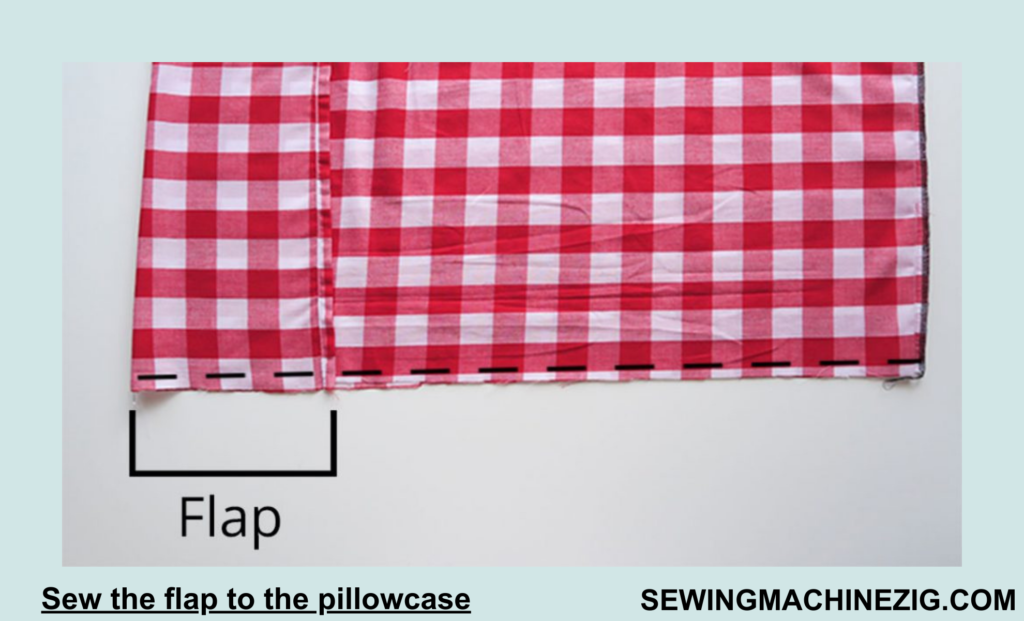
- Set your sewing machine to a straight stitch with a stitch length of 2.5-3.0.
- Starting at one end of the flap, sew around the edges of the pillowcase, making sure to catch the flap in your stitching.
- Backstitch at the beginning and end of your seam to secure it.
Step 5: Trimming and iron:
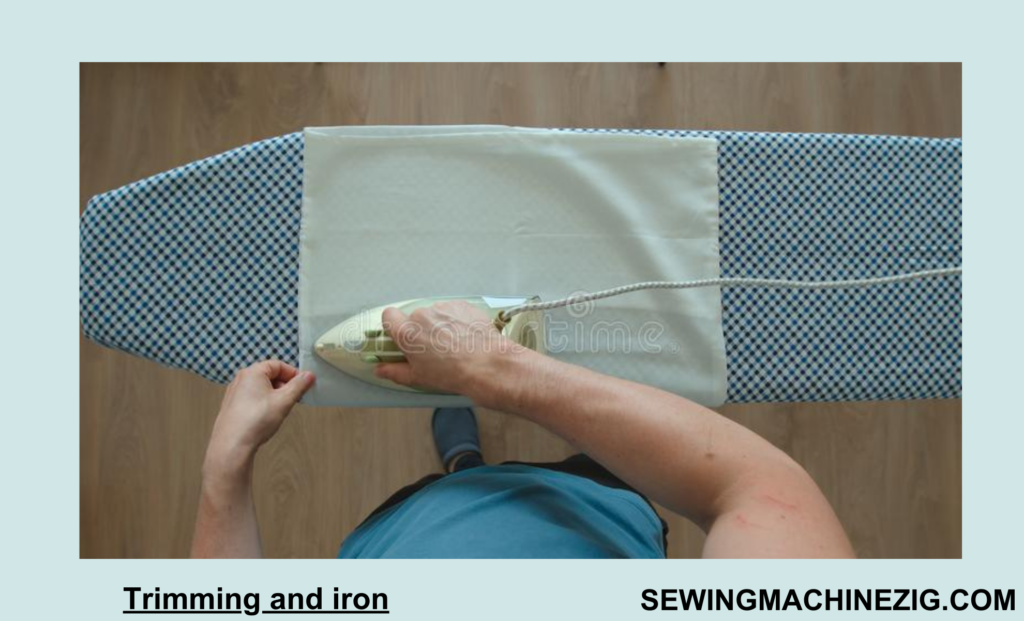
Trim any excess threads and turn your pillowcase right side out. Press your pillowcase flat with an iron, making sure to press the edges and corners well. Insert your pillow into the pillowcase through the opening you left earlier.
That’s it. Your new pillowcase is now ready to use and you don’t need to ask anyone how to sew a pillowcase with sewing machine. Enjoy your sewing
Note:
- Always prewash your fabric to prevent shrinkage.
- Cut your fabric straight and accurately using fabric scissors, not regular scissors.
- Use pins to hold your fabric together while sewing to prevent shifting and ensure even seams.
- Maintain an even seam allowance to ensure a professional-looking finished product.
- Don’t hesitate to practice on scrap fabric before starting on your pillowcase to get comfortable with the sewing machine.
- Experiment with different fabrics, thread colors, and designs to make your pillowcases unique and personalized.
Remember to have fun and enjoy the creative process !
Important Tips For How To Sew A PillowCase With Sewing Machine:
- Read and understand the manual of your sewing machine before starting. Make sure you are familiar with its operation, settings, and maintenance.
- Choose the right type of fabric for your pillowcase. Different fabrics may require different needle sizes or thread tensions. Also, consider the weight, texture, and durability of the fabric for the intended use of the pillowcase.
- Wash and dry the fabric before sewing. This will help prevent shrinkage and color bleeding.
- Use a cutting mat and rotary cutter or fabric scissors to cut your fabric pieces to the appropriate size. Be careful not to cut yourself or damage your work surface.
- Pin your fabric pieces together before sewing to ensure they stay aligned. Use straight pins or clips and place them perpendicular to the seam line.
- Use the appropriate type and size of needle for your fabric. A universal needle may work for most fabrics, but heavier or delicate fabrics may require a specific needle type. Also, make sure the needle is properly installed and tightened.
- Adjust the thread tension and stitch length according to your fabric and desired finish. Test on a scrap piece of fabric before starting to sew your pillowcase.
- Keep your hands away from the needle area and the moving parts of the machine while sewing. Use the foot pedal to control the speed of the machine.
- Take breaks if you feel tired or uncomfortable. Sewing can be a repetitive task, and it’s important to take care of your body.
- Finally, inspect your finished pillowcase for loose threads, uneven seams, or other imperfections. Trim any loose threads and iron your pillowcase for a polished look.
Conclusion:
Sewing a pillowcase with a sewing machine is a simple and rewarding project that can be completed by even the most novice sewers. With just a few materials and some basic sewing skills, you can create a custom pillowcase that fits your personal style and decor.
Remember to take your time, measure carefully, and follow the steps closely to ensure a polished and professional-looking finished product. Don’t be afraid of how to sew a pillowcase with sewing machine always experiment with different fabrics and embellishments to make your pillowcase truly unique. With these tips and tricks, you’ll be on your way to creating beautiful pillowcases in no time!
FAQs :
Q: What fabric should I use for my pillowcase?
A: It depends on your personal preference and the intended use of the pillowcase. Cotton, linen, and flannel are popular choices for pillowcases.
Q: What size should I cut my fabric pieces?
A: This will depend on the size of your pillow insert. For a standard-size pillow, cut your fabric to 20 inches by 26 inches. However, if you have a different size pillow, adjust your fabric size accordingly.
Q: How do I know which size needle to use for my fabric?
A: The general rule is to use a needle size that is appropriate for the weight and texture of your fabric. A universal needle may work for most fabrics, but heavier or delicate fabrics may require a specific needle type. Check your sewing machine manual or consult a sewing expert for more specific recommendations.
Q: Can I use a regular thread for sewing my pillowcase?
A: Yes, you can use regular all-purpose thread for sewing your pillowcase. However, if you are using a heavier or thicker fabric, you may want to consider using a heavier thread or doubling up on your thread to ensure a strong seam.
Q: How do I finish the seams of my pillowcase?
A: You can finish the seams of your pillowcase by either using a serger or by zigzag stitching along the raw edges to prevent fraying. Alternatively, you can sew French seams for a neat and polished finish.
Q: Can I use a decorative stitch to sew my pillowcase?
A: Yes, you can use a decorative stitch to add a personal touch to your pillowcase. However, be sure to test the stitch on a scrap piece of fabric before sewing your pillowcase to ensure it looks the way you want it to.
Q: Can I wash my pillowcase in the washing machine?
A: Yes, most pillowcases can be washed in the washing machine. Be sure to follow the care instructions on your fabric and any additional embellishments or decorations.

