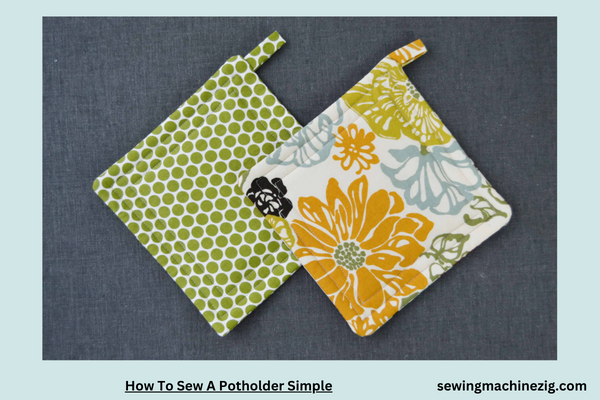
Sewing a potholder can be a simple and enjoyable DIY project for both beginners and experienced crafters. This step-by-step guide will walk you through the process of creating a functional and stylish potholder. Whether you’re looking to add a personal touch to your kitchen or make a thoughtful homemade gift, learning how to sew a potholder simple is a useful skill to have. Let’s get started with this easy and rewarding sewing project.
How To Sew A Potholder Simple Detailed Answer
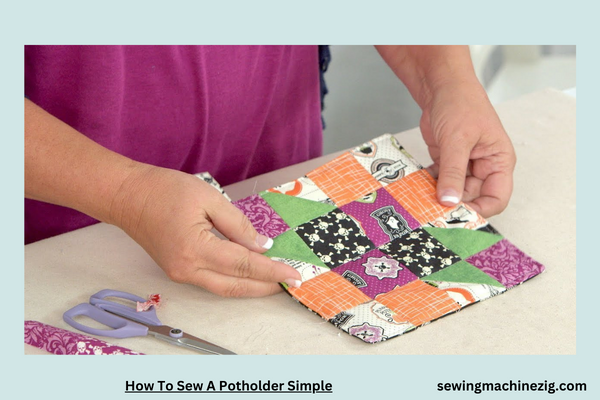
Creating a potholder through simple sewing is a rewarding and practical DIY project. Potholders protect your hands from hot dishes and add a personal touch to your kitchen. Here’s a detailed guide on how to sew a potholder with ease:
Materials You’ll Need:
- Fabric: Choose two pieces of fabric, one for the front and one for the back. Heat-resistant fabric, like cotton, is ideal.
- Insulating Material: You’ll need insulating material like thermal batting or insulated fleece to provide heat resistance.
- Binding Fabric: Fabric strips for the binding. You can coordinate it with the potholder or use a contrasting color.
- Thread: A coordinating thread for sewing.
- Sewing Machine or Needle: You can hand-sew or use a sewing machine.
- Scissors: For cutting fabric.
- Ruler: For measuring and cutting fabric pieces accurately.
Step-by-Step Instructions:
1. Cut Fabric and Insulating Material:
Measure and cut two square pieces of fabric and one square piece of insulating material, each measuring around 8×8 inches. This size is suitable for a standard potholder.
2. Layer the Fabric:
Place the two fabric pieces right sides together, with the insulating material on top. Ensure they are all aligned.
3. Pin and Stitch:
Pin around the edges, leaving a small opening for turning. Stitch around the edges, about ¼ inch from the edge, leaving the opening.
4. Trim Corners:
Trim the corners diagonally to reduce bulk and create crisp corners when you turn the potholder inside out.
5. Turn Inside Out:
Through the opening you left, turn the potholder inside out, so the right sides of the fabric are facing out.
6. Press and Close Opening:
Press the potholder to flatten it and neatly fold the edges of the opening inside. Pin it closed.
7. Topstitch:
Sew a topstitch around the edges, about ¼ inch from the edge. This not only closes the opening but also adds a decorative touch.
8. Quilt the Potholder:
Create a quilted pattern by sewing lines or a decorative design across the potholder. This stitching helps secure the insulating material.
9. Attach the Binding:
Cut fabric strips for the binding. Fold each strip in half lengthwise and press. Pin the binding along the edge of the potholder, covering the raw edges. Stitch it in place, mitering the corners.
10. Loop for Hanging (Optional):
To add a loop for hanging, cut a small piece of binding fabric, fold it in half, and stitch it to one corner of the potholder.
11. Final Touches:
Trim any loose threads and press your potholder to make it look crisp and professional.
Sewing a potholder is an enjoyable project, perfect for beginners or anyone looking for a quick and useful sewing endeavor. By following these steps, you can create functional and stylish potholders to enhance your kitchen or share as thoughtful gifts. With practice, you can experiment with different fabrics, colors, and quilting patterns to make unique potholders.
PotHolder With Pocket Pattern
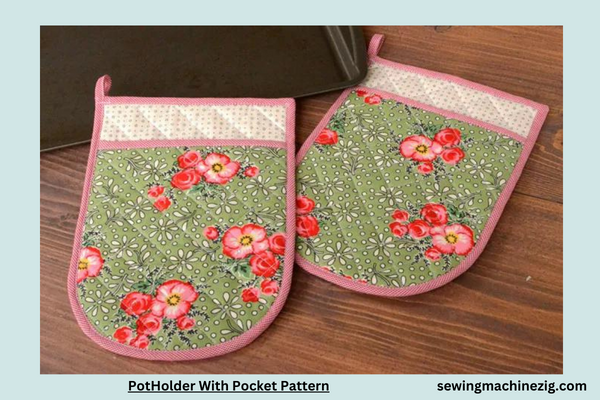
Creating a potholder with a pocket is a practical and fun sewing project that allows you to not only protect your hands while handling hot pots and pans but also conveniently store utensils, recipe cards, or other small items. Here’s a simple pattern and step-by-step guide on how to sew a potholder simple with a pocket while keeping it simple:
Materials You’ll Need:
- Fabric: Choose two pieces of fabric for the potholder front and back. Heat-resistant fabric like cotton is ideal.
- Insulating Material: You’ll need insulating material like thermal batting or insulated fleece to provide heat resistance.
- Pocket Fabric: Select a contrasting or coordinating fabric for the pocket.
- Binding Fabric: Fabric strips for the binding.
- Thread: Coordinating thread for sewing.
- Sewing Machine or Needle: You can hand-sew or use a sewing machine.
- Scissors: For cutting fabric.
- Ruler: For measuring and cutting fabric pieces accurately.
Step-by-Step Instructions on How to sew a potholder simple:
1. Cut Fabric and Insulating Material:
Measure and cut two square pieces of fabric and one square piece of insulating material, each measuring around 8×8 inches. These will be used for the potholder front, back, and insulation.
2. Layer the Fabric:
Place the two fabric pieces (front and back) right sides together, with the insulating material on top. Ensure they are all aligned.
3. Pin and Stitch:
Pin around the edges, leaving a small opening for turning. Stitch around the edges, about ¼ inch from the edge, leaving the opening.
4. Trim Corners:
Trim the corners diagonally to reduce bulk and create crisp corners when you turn the potholder inside out.
5. Turn Inside Out:
Through the opening you left, turn the potholder inside out so that the right sides of the fabric are facing out.
6. Press and Close Opening:
Press the potholder to flatten it and neatly fold the edges of the opening inside. Pin it closed.
7. Topstitch:
Sew a topstitch around the edges, about ¼ inch from the edge. This not only closes the opening but also adds a decorative touch.
8. Quilt the Potholder:
Create a quilted pattern by sewing lines or a decorative design across the potholder. This stitching helps secure the insulating material and keeps it simple.
9. Create the Pocket:
- Take the contrasting fabric you’ve chosen for the pocket. Cut a piece measuring around 8×6 inches.
- Fold the pocket fabric in half, right sides together, to create a 4×6-inch rectangle.
- Stitch along the two sides, leaving the top open. This step keeps the pocket-making process simple.
10. Attach the Pocket:
Place the pocket on one side of the potholder, aligning the top of the pocket with the top of the potholder. Stitch along the sides and bottom of the pocket to attach it to the potholder, making it a simple addition.
11. Attach the Binding:
Cut fabric strips for the binding. Fold each strip in half lengthwise and press. Pin the binding along the edge of the potholder, covering the raw edges and pocket top, keeping it neat and simple.
12. Loop for Hanging (Optional):
To add a loop for hanging, cut a small piece of binding fabric, fold it in half, and stitch it to one corner of the potholder. It’s a simple way to make your potholder even more practical.
13. Final Touches:
Trim any loose threads and press your potholder to make it look crisp and professional. Keeping the final touches simple adds to the overall appeal of your creation.
With this simple pattern and detailed instructions on how to sew a potholder simple, you can create a practical potholder with a pocket to make your cooking and baking experiences more convenient and stylish. Customize your potholder with fabrics and colors that match your kitchen decor or give it as a simple and thoughtful homemade gift.
How To Make A PotHolder WithOut Binding
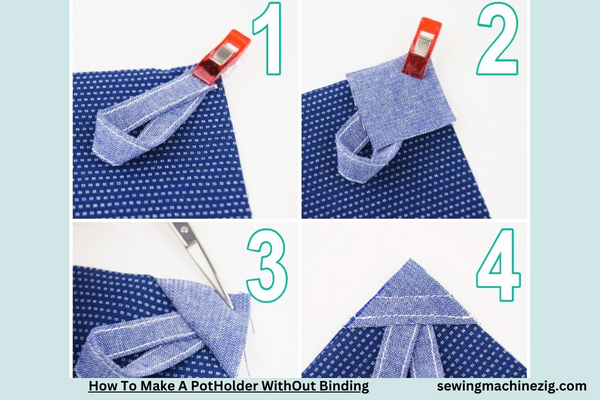
Creating a potholder without binding is a simple and straightforward sewing project that results in a clean and simple finish. Here are the steps on how to sew a potholder simple without binding:
Materials You’ll Need:
- Two pieces of fabric for the potholder front and back (approximately 8×8 inches each).
- Insulating material like thermal batting or insulated fleece (also around 8×8 inches).
- Coordinating thread for sewing.
- Sewing machine or needle for hand-sewing.
- Scissors for cutting fabric.
- Ruler for measuring and cutting fabric pieces accurately.
Step-by-step instructions on how to sew a potholder simple without binding:
1. Cut Fabric and Insulating Material:
- Measure and cut two square pieces of fabric and one square piece of insulating material, each measuring around 8×8 inches. These will be used for the potholder front, back, and insulation.
2. Layer the Fabric:
- Place one piece of fabric (the potholder front) right side up on your work surface.
- Lay the insulating material on top of the fabric, aligning the edges.
3. Add the Second Fabric Layer:
- Place the other piece of fabric (the potholder back) right side down on top of the insulating material. Ensure that all the edges are aligned.
4. Pin and Stitch:
- Pin all around the edges to secure the layers in place.
- Stitch around the edges, leaving a small opening (about 3 inches) on one side for turning the potholder inside out. Use a ¼ inch seam allowance. Keeping it simple.
5. Turn Inside Out:
- Through the opening you left, carefully turn the potholder inside out so that the right sides of the fabric are facing out.
6. Press and Close Opening:
- Press the potholder to flatten it and neatly fold the edges of the opening inside.
- Use a ladder stitch or slip stitch to hand-sew the opening closed. This method keeps it simple.
7. Quilt the Potholder:
- Create a quilted pattern by sewing lines or a decorative design across the potholder. This stitching helps secure the insulating material and adds a decorative touch. Keeping the quilting simple.
8. Final Touches:
- Trim any loose threads and press your potholder to make it look crisp and professional.
By following these simple steps, you can create a potholder without binding. This straightforward method results in a sleek and simple potholder that is perfect for protecting your hands when handling hot pots and pans in the kitchen. Customize your potholder with fabrics and colors that match your kitchen decor or give it as a simple and thoughtful homemade gift.
Conclusion
crafting a potholder without binding is a simple and effective way to ensure kitchen safety and add a personal touch to your culinary space. The step-by-step guide on how to sew a potholder simple provides a clear path for creating this essential kitchen accessory with minimal hassle. Whether you’re a seasoned sewer or a beginner, the simple approach outlined here ensures a clean and practical outcome. Customize your potholders to match your kitchen’s decor, making them both functional and visually pleasing additions to your cooking routine.
FAQS
1. Do I need a sewing machine to make a potholder?
No, you can sew a potholder by hand using a needle and thread. However, a sewing machine can make the process faster and more efficient.
2. What kind of fabric should I use for a potholder?
It’s best to use heat-resistant fabric like cotton for both the front and back of the potholder. This will help protect your hands from heat.
3. Can I use regular batting for insulation?
It’s recommended to use insulating material like thermal batting or insulated fleece specifically designed for potholders. Regular batting may not provide sufficient heat resistance.
4. Do I need to quilt the potholder?
Quilting the potholder is optional but can help secure the insulating material and add a decorative touch. You can choose to skip this step for a simpler design.
5. How can I personalize my potholder?
You can personalize your potholder by choosing fabrics and colors that match your kitchen decor. Adding a loop for hanging or embroidery can also add a personal touch.
6. Are there different sizes for potholders?
Potholders typically come in standard sizes of around 8×8 inches, but you can adjust the size according to your preference.


