Navigating the world of crafting often involves sending cherished tools to new destinations. If you’re pondering the logistics, the question of “How To Ship A Sewing Machine” arises. Ensuring the safe passage of these intricate devices requires a delicate touch. Join us on this expedition through packaging and shipping strategies, exploring the art of safeguarding sewing machines during transit.
Whether it’s a vintage heirloom or a modern marvel, mastering the methods to ship a sewing machine is the key to ensuring its arrival at its destination intact, ready to continue stitching stories of creativity.
How To Ship A Sewing Machine Detailed Answer

Step-by-Step Guide: Safely Shipping Your Treasured Sewing Machine
Sending a sewing machine to a new destination requires meticulous care to ensure it arrives intact and ready for continued creative endeavors.
In this comprehensive guide, “How To Ship A Sewing Machine” We’ll explore the detailed process of “How To Ship A Sewing Machine,” guiding you through each step to safeguard your cherished crafting companion.
Step 1: Gather Essential Supplies
Before commencing the packing process, gather all necessary supplies. You’ll need a sturdy box, bubble wrap, packing peanuts, packing tape, and labels. Ensure the box is appropriately sized, providing enough space for protective layers without excessive movement.
Step 2: Prepare the Sewing Machine
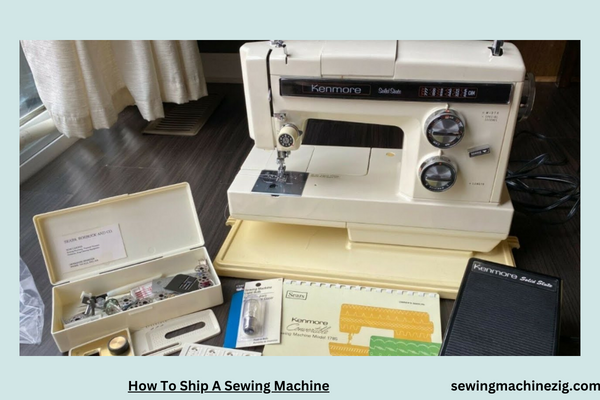
Begin by securing all movable parts of the sewing machine. Lower the needle, lock the presser foot, and remove any detachable components. If your machine has an extension table, detach and pack it separately. Secure the power cord and foot pedal to prevent tangling.
Step 3: Protect with Bubble Wrap
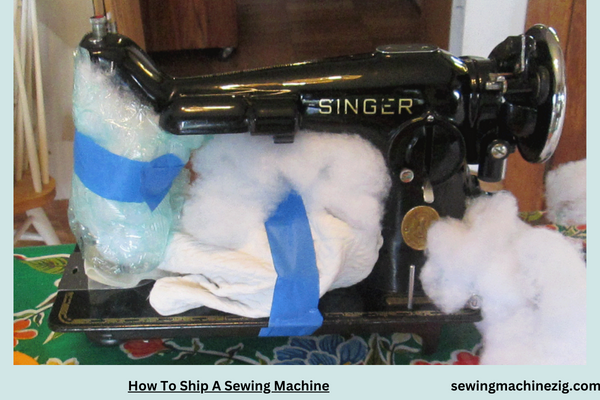
Wrap the sewing machine in multiple layers of bubble wrap. Pay extra attention to delicate parts such as the needle, presser foot, and any exposed knobs or levers. Use packing tape to secure the bubble wrap in place, creating a protective barrier against potential impacts.
Step 4: Place in the Box
Carefully place the wrapped sewing machine in the center of the box. Surround it with packing peanuts or crumpled newspaper to provide a cushion against shocks. Ensure there’s minimal movement within the box by filling any gaps with additional packing material.
Step 5: Secure Detachable Parts
If you’ve removed detachable parts like the extension table, pack them in bubble wrap and place them alongside the sewing machine. Ensure they are snug within the box but not directly pressing against the machine to avoid damage.
Step 6: Seal the Box Securely
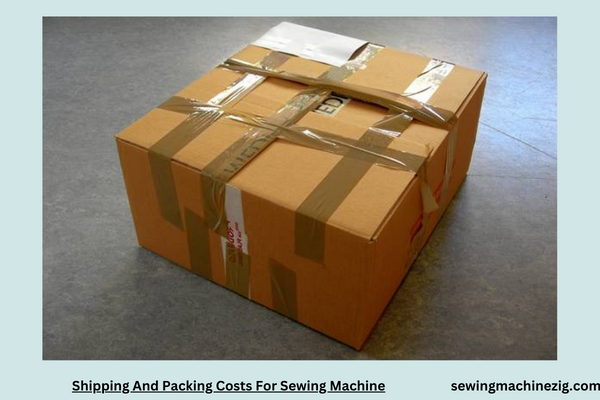
Once the sewing machine and its components are securely in place, seal the box using strong packing tape. Reinforce the corners and edges to prevent the box from opening during transit. Label the box clearly with both the sender’s and recipient’s addresses.
Step 7: Choose a Reliable Shipping Carrier
Select a reputable shipping carrier with experience in handling fragile items. Opt for a service that provides tracking information and insurance coverage for added security. Consider the estimated delivery time and choose a shipping option that aligns with your preferences.
Step 8: Insure Your Shipment
Given the delicate nature of sewing machines, it’s advisable to purchase additional insurance for your shipment. This extra precaution ensures financial protection in case of any unforeseen incidents during transit.
Step 9: Document the Shipment
Before dispatching the package, document the condition of the sewing machine and its components. Take clear photos from multiple angles, capturing any existing scratches or blemishes. This documentation serves as evidence in case of damage claims.
Step 10: Track Your Shipment
Once the sewing machine is in transit, use the provided tracking information to monitor its journey. Stay informed about its location and estimated delivery date, allowing you to anticipate its arrival and address any concerns promptly.
Shipping a sewing machine requires careful planning and execution to safeguard your valuable equipment. Following this step-by-step guide on “How To Ship A Sewing Machine” ensures that your crafting companion reaches its destination in pristine condition, ready for many more stitching adventures.
Shipping And Packing Costs For Sewing Machine

Embarking in the process of shipping a sewing machine involves careful planning, meticulous packing, and a clear understanding of the associated costs. In this comprehensive step-by-step guide on “Shipping and Packing Costs for Sewing Machine,” we will navigate through the essential considerations, ensuring a smooth and cost-effective shipping experience for your valuable sewing equipment.
Step 1: Measure and Weigh Your Sewing Machine
Before diving into shipping preparations, accurately measure and weigh your sewing machine. This information is crucial for determining shipping costs, as carriers often calculate charges based on size and weight. Use a tape measure and a reliable scale to obtain precise measurements.
Step 2: Choose the Right Shipping Carrier
Research and select a reputable shipping carrier that aligns with your budget and delivery preferences. Compare shipping rates, delivery times, and available services. Popular carriers include UPS, FedEx, and the United States Postal Service (USPS), each offering various shipping options.
Step 3: Where to Find Shipping Costs for Sewing Machine – Carrier Websites
Visit the official websites of the chosen shipping carriers to access their shipping calculators. Input the dimensions and weight of your sewing machine to obtain accurate cost estimates for different shipping services. This step helps you make informed decisions based on your budget and timeline.
Step 4: Select Appropriate Packaging Materials
Carefully choose packaging materials that provide adequate protection for your sewing machine during transit. Opt for a sturdy box that accommodates the machine’s size and includes extra space for cushioning materials. Bubble wrap, foam, and packing peanuts are effective for securing the machine inside the box.
Step 5: Safely Disassemble if Necessary
If your sewing machine has detachable parts or accessories, consider disassembling them for safer packing. Place small items, like foot pedals or power cords, in sealable plastic bags and secure them within the packaging. This reduces the risk of damage during transit.
Step 6: Where to Include Shipping Costs in Your Budget – Cost Allocation
When budgeting for shipping, allocate a specific portion of your overall budget to cover shipping costs. Be mindful of additional expenses such as insurance, tracking, and delivery confirmation, which contribute to the overall shipping expenditure.
Step 7: Pack the Sewing Machine Securely
Place the sewing machine in the center of the box, surrounded by cushioning materials to absorb shocks and prevent movement. Ensure that the machine is well-secured within the box to minimize the risk of damage. Seal the box securely with strong packing tape.
Step 8: Print and Attach Shipping Labels
Use the shipping carrier’s online platform to generate and print shipping labels. Attach the labels securely to the package, ensuring that all information, including addresses and tracking numbers, is clear and legible. This step expedites the shipping process and provides essential tracking capabilities.
Step 9: Schedule a Pickup or Drop Off at Carrier Location
Choose the most convenient option for sending your package: schedule a pickup with the carrier or drop off the package at a designated carrier location. Some carriers offer pickup services, while others may require you to visit their service points.
Step 10: Monitor the Shipment and Track Costs
Once your sewing machine is in transit, regularly monitor its journey using the carrier’s tracking system. This allows you to stay informed about the shipment’s progress and estimated delivery date. Keep track of any additional costs incurred during the shipping process.
Successfully navigating the shipping and packing costs for your sewing machine involves careful planning, attention to detail, and utilizing available resources from reputable carriers.
By following this step-by-step guide, “How To Ship A Sewing Machine” you can streamline the shipping process, ensuring your sewing machine reaches its destination safely and within budget.
Conclusion
In conclusion, “How To Ship A Sewing Machine“unraveling the process of shipping a sewing machine involves a careful orchestration of steps to ensure its safe arrival at the intended destination. Knowing “How To Ship A Sewing Machine” is vital for both sellers and enthusiasts, ensuring the machine’s integrity during transit. From meticulous packaging to choosing reliable carriers, this knowledge contributes to a smooth and secure shipping experience.
By mastering these steps, individuals can confidently share or receive sewing machines, fostering a community connected by their passion for creativity.
FAQS
Q1: What are the key steps in shipping a sewing machine?
A1: The key steps in shipping a sewing machine include proper packaging, choosing a reliable carrier, securing the machine’s moving parts, and clearly labeling the package with shipping details.
Q2: Can I ship a sewing machine in its original case?
A2: It’s recommended to place the sewing machine and its case in a larger box with additional padding for extra protection. This ensures the machine is secure and minimizes the risk of damage during transit.
Q3: Should I disassemble the sewing machine before shipping?
A3: Partial disassembly, such as removing the needle, presser foot, and bobbin, is advisable. Consult the machine manual for specific instructions on disassembling and securing moving parts. “How To Ship A Sewing Machine“
Q4: What type of packaging material is best for shipping a sewing machine?
A4: Use sturdy packaging materials such as bubble wrap, foam padding, and packing peanuts to cushion the sewing machine. Ensure that all parts are well-protected to prevent damage. “How To Ship A Sewing Machine“
Q5: Can I use a regular cardboard box for shipping a sewing machine?
A5: It’s recommended to use a double-walled cardboard box for added strength and protection. Ensure the box is large enough to accommodate the sewing machine and provide space for padding. “How To Ship A Sewing Machine“
Q6: How should I label the package when shipping a sewing machine?
A6: Clearly label the package with the recipient’s address, contact information, and any special handling instructions. Additionally, mark the package as fragile to alert carriers to handle it with care. “How To Ship A Sewing Machine“


