Embarking on quilting ventures unveils the need for precision, and mastering “How To Stitch In The Ditch With A Walking Foot” is a game-changer. This guide transcends basic sewing, delving into the artistry of quilting. Your walking foot becomes a trusted ally as we navigate the intricacies of stitching in the ditch, achieving flawless seams.
Unveiling the secrets of this technique empowers your quilting journey, ensuring your creations are a testament to both skill and creativity. Let’s explore the synergy between walking foot finesse and quilting mastery, stitch by stitch.
How To Stitch In The Ditch With A Walking Foot Detailed Answer
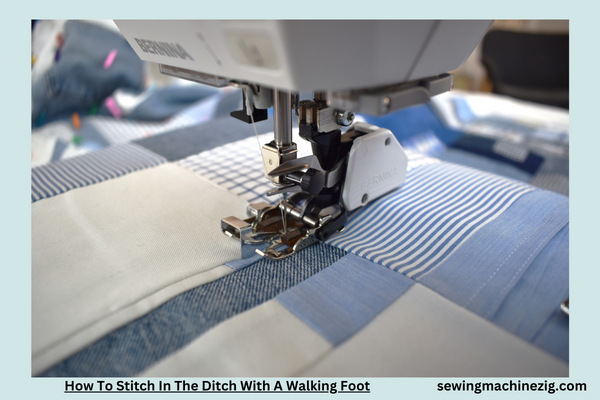
Quilting is an art that demands precision, and the technique of stitching in the ditch with a walking foot is a game-changer.
Follow this comprehensive step-by-step guide to seamlessly navigate through the process, enhancing the quality and professional finish of your quilting projects.
Step 1: Understand the Walking Foot
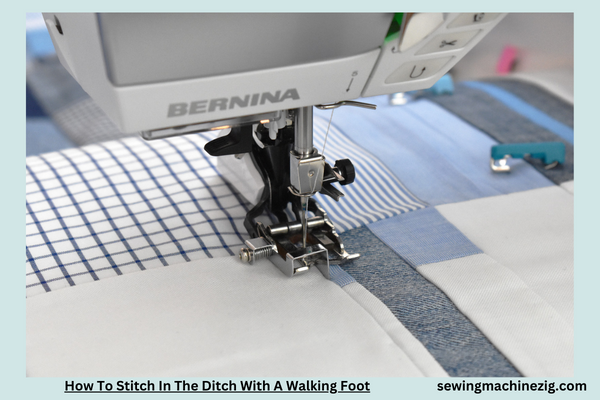
Before diving into stitching in the ditch, acquaint yourself with the walking foot. This specialized foot is designed to feed multiple layers of fabric evenly, preventing shifting or stretching during quilting.
Step 2: Select the Right Walking Foot
Different walking feet are available for various sewing machine models. Ensure you have the correct walking foot compatible with your machine. Consult your machine’s manual if needed.
Step 3: Prepare Your Quilt Sandwich
Layer your quilt sandwich with the quilt top, batting, and backing fabric. Baste the layers together to prevent shifting during stitching. Ensure the layers are smooth and well-aligned.
Step 4: Attach the Walking Foot
Securely attach the walking foot to your sewing machine according to the manufacturer’s instructions. This step is crucial for the proper functioning of the walking foot.
Step 5: Choose the Stitching Line
Identify the seam or “ditch” you want to stitch along. This is typically the seam between two pieced quilt blocks or along the edge of a quilted design.
Step 6: Set Your Sewing Machine
Select a straight stitch on your sewing machine. Adjust the stitch length based on your quilting preferences, keeping in mind that shorter stitches provide better reinforcement.
Step 7: Begin Stitching
Start stitching slowly along the chosen seam line. Allow the walking foot to guide the fabric layers evenly. The walking foot’s built-in feed dogs work in conjunction with your machine’s feed dogs to prevent uneven feeding.
Step 8: Pivot at Corners and Junctions
When you reach corners or junctions, pivot the quilt carefully to maintain a continuous stitch line. This ensures a seamless appearance in your quilted design.
Step 9: Maintain Consistent Seam Allowance
Pay attention to your seam allowance to achieve uniform stitching. The walking foot’s even feeding mechanism helps prevent variations in seam allowance, resulting in a polished finish.
Step 10: Check Alignment Regularly
Periodically check that the walking foot stays aligned with the seam line. This visual check ensures that your stitches remain in the ditch for a clean and professional look.
Step 11: Backstitch at the End
When you reach the end of the stitching line, backstitch to secure the stitches. Trim the threads neatly for a tidy finish.
Step 12: Press the Quilt
After stitching in the ditch, press the quilt top to set the stitches and give your project a polished appearance.
Step 13: Admire the Professional Finish
Stand back and admire your quilt. The stitches in the ditch add a subtle yet impactful dimension to your quilting, enhancing the overall aesthetic.
By following these detailed steps on How To Stitch In The Ditch With A Walking Foot, you elevate your quilting game, achieving a level of precision and professionalism that sets your projects apart.
Whether you’re a quilting enthusiast or a seasoned pro, mastering this technique with a walking foot opens doors to endless possibilities in quilt design and execution. Stitch away with confidence and watch your quilting endeavors flourish!
Stitching In The Ditch With The Ditch Quilting Foot
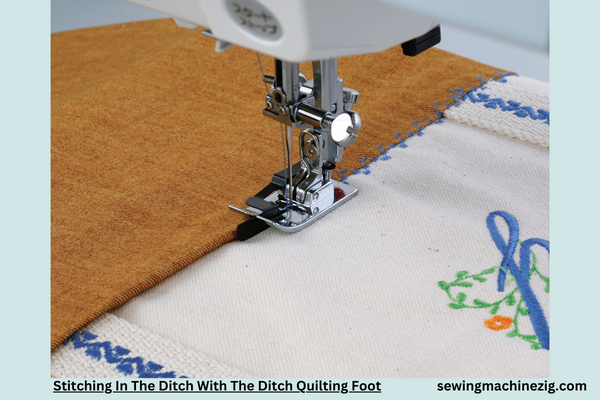
When you’re quilting and want to emphasize the seams between fabric pieces, the walking foot becomes your best friend. Here’s how you can stitch in the ditch with this special foot:
Attach the Walking Foot:
- Secure the walking foot to your sewing machine. It has its own set of feed dogs that work in harmony with your machine’s feed dogs.
Select Your Seam:
- Choose the seam you want to emphasize, also known as “the ditch.” It’s the line where two fabric pieces are sewn together.
Align Your Fabric:
- Place your quilt under the needle, making sure the walking foot is right over the chosen seam. This ensures your stitches land in the ditch.
Start Sewing:
- Begin stitching slowly, allowing the walking foot to guide the fabric evenly. The foot’s special design prevents layers from shifting, giving you a smooth and even stitch.
Pivot at Intersections:
- When you come to intersections or corners, pause and pivot your quilt to maintain a continuous stitch along the chosen seam.
Maintain Consistency:
- Keep an eye on the seam as you sew. The walking foot ensures your stitches stay right in the ditch, giving your quilt a professional and polished look.
Backstitch at the End:
- Once you’ve stitched the entire seam, backstitch at the end to secure your stitches.
By following these steps, you’ll master the art of stitching in the ditch with a walking foot. It’s a fantastic technique for quilting that adds a beautiful dimension to your projects, showcasing your sewing skills with precision. Happy stitching.
How To Stitch In The Ditch By Hand
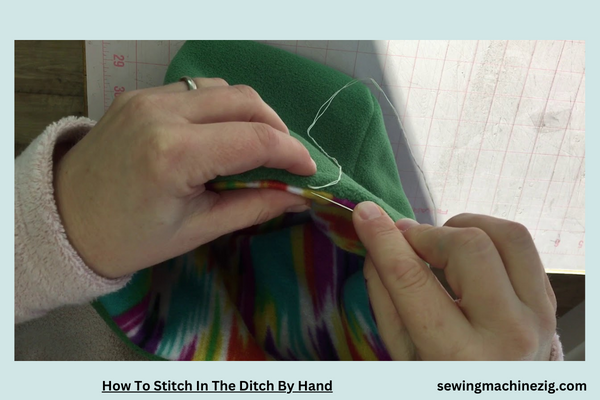
Stitching in the ditch by hand is a traditional and precise sewing technique that adds a handmade touch to your projects. Here’s a simple guide on how to do it:
How To Stitch In The Ditch By Hand:
Thread and Needle:
- Choose a thread that matches your fabric and a hand-sewing needle. Make sure the needle is suitable for the weight of your fabric.
Knot the Thread:
- Thread your needle and tie a knot at the end of the thread.
Start in the Ditch:
- Position your fabric pieces so the seam you want to stitch is accessible. Start your needle in the ditch, bringing it up from the back to the front.
Stitch Along the Seam:
- Move your needle along the seam, taking small, even stitches. The goal is to keep your stitches within the ditch for a subtle, concealed look.
Consistent Stitch Length:
- Aim for consistent stitch lengths. This helps maintain an even appearance and reinforces the seam.
Secure the End:
- When you reach the end of the seam, secure your stitches by creating a small knot on the backside of the fabric.
Press the Seam:
- After stitching, press the seam with an iron to set the stitches and create a clean, polished finish.
Why Stitch in the Ditch By Hand?
Precision:
- Hand stitching allows for precise control, making it easier to follow the exact line of the seam.
Delicate Fabrics:
- For delicate fabrics or intricate projects, hand stitching is gentler and minimizes the risk of damaging the material.
Handmade Aesthetic:
- Stitching in the ditch by hand imparts a handmade, artisanal quality to your work, adding a personal touch to your creations.
By stitching in the ditch by hand, you not only achieve a neat and refined appearance but also infuse your projects with a sense of craftsmanship and attention to detail. It’s a timeless technique that connects you to the rich tradition of hand sewing. Happy stitching!
Conclusion
In summary “How To Stitch In The Ditch With A Walking Foot“, mastering how to stitch in the ditch with a walking foot is a game-changer in quilting and sewing. This technique ensures precise seam embellishment without fabric shifting, producing a polished, professional finish. The walking foot’s even-feed mechanism simplifies the process, making it accessible for sewists of all levels. “How To Stitch In The Ditch With A Walking Foot“
Elevate your quilting projects by seamlessly stitching in the ditch, letting the walking foot be your trusty companion for creating stunning, well-defined seams. Happy stitching!
FAQS
Q1: What is the purpose of stitching in the ditch, and how does a walking foot assist in this technique?
A1: Stitching in the ditch involves sewing along the seams for a subtle finish. A walking foot aids in this technique by evenly feeding both the upper and lower fabric layers, preventing shifts and ensuring precise alignment in the seam.
Q2: Can I use any walking foot for stitching in the ditch, or is there a specific type I should look for?
A2: While most walking feet can be used for stitching in the ditch, a guide on the foot can enhance accuracy. Look for a walking foot with a center guide that aligns with the seam, making it easier to stitch precisely in the ditch.
Q3: How do I attach a walking foot to my sewing machine for stitching in the ditch?
A3: Attaching a walking foot is straightforward. Turn off your sewing machine, raise the presser foot, and remove the existing foot. Align the walking foot’s fork over the needle bar, lower the presser foot lever, and secure the foot with the provided screw. Consult your machine’s manual for specific instructions.
Q4: Can I adjust the stitch length when using a walking foot for stitching in the ditch?
A4: Yes, you can adjust the stitch length according to your preference and project requirements when using a walking foot. Experiment with different stitch lengths to achieve the desired appearance while stitching in the ditch. “How To Stitch In The Ditch With A Walking Foot“
Q5: Are there any tips for maintaining even stitches while stitching in the ditch with a walking foot?
A5: To maintain even stitches, sew slowly and let the walking foot feed the fabric. Keep an eye on the seam, ensuring it stays aligned with the center guide on the foot. If needed, stop and pivot at intersections to maintain a continuous and precise stitch line. “How To Stitch In The Ditch With A Walking Foot“
Q6: Can I use a walking foot for stitching in the ditch on different types of fabrics?
A6: Yes, a walking foot is versatile and can be used for stitching in the ditch on various fabrics, including cotton, denim, and knit. Adjust the foot’s pressure as needed for different fabric thicknesses, ensuring smooth and even stitching on diverse materials. “How To Stitch In The Ditch With A Walking Foot“

