Embarking on the enthralling journey of sewing artistry unveils the crucial chore of threading, with a specific focus on a Singer sewing machine. Navigating the labyrinth of spools, guides, and tension mechanisms, this guide demystifies the query: “How To Thread A Singer Sewing Machine?”
Unravel the intricacies of this threading ballet, where each twist and turn intricately aligns with precision. From bobbin intricacies to needle weaving, threading becomes the silent overture to your stitching symphony. Join this tactile journey as we decode the meticulous dance of thread through the eye of a Singer sewing machine.
How To Thread A Singer Sewing Machine Detailed Answer
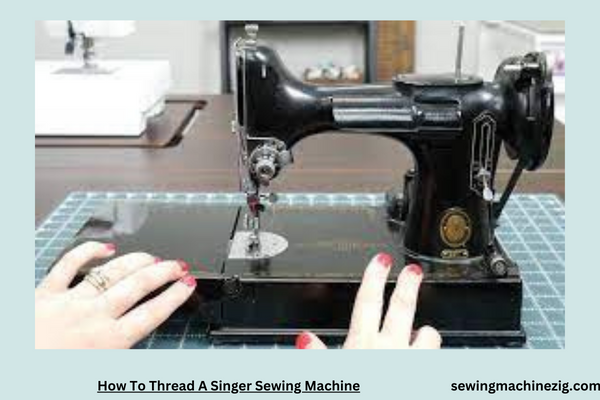
Threading a sewing machine may seem like a daunting task, especially for beginners, but with the right guidance, it becomes a fundamental skill that unlocks the world of sewing.
In this step-by-step guide, we’ll delve into the intricacies of threading a Singer sewing machine, demystifying the process and providing valuable insights for a seamless threading experience. “How To Thread A Singer Sewing Machine“
Step 1: Familiarize Yourself with the Machine
Before diving into the threading process, take a moment to familiarize yourself with the different components of your Singer sewing machine:
- Spool Pins:
- Identify the spool pins where you’ll place your thread spools.
- Thread Guides:
- Locate the thread guides, usually marked with numbers, indicating the threading sequence.
- Tension Discs:
- Find the tension discs responsible for maintaining proper thread tension during sewing.
- Take-Up Lever:
- Identify the take-up lever, a moving lever that helps with the distribution of thread.
- Bobbin Winding Mechanism:
- If your machine has a top-loading bobbin, familiarize yourself with the bobbin winding mechanism.
Step 2: Choose the Right Thread and Needle
Ensure you have the appropriate thread and needle for your sewing project:
- Thread Selection:
- Choose a thread that matches the fabric you’re working with. Different threads are suitable for various materials.
- Needle Selection:
- Select a needle suitable for your fabric type and weight. Refer to your machine’s manual for recommended needle sizes.
Step 3: Place the Thread Spool
- Spool Pins:
- Place the thread spool on the designated spool pin. If you’re using two threads for a double needle stitch, use both spool pins.
- Thread Guide:
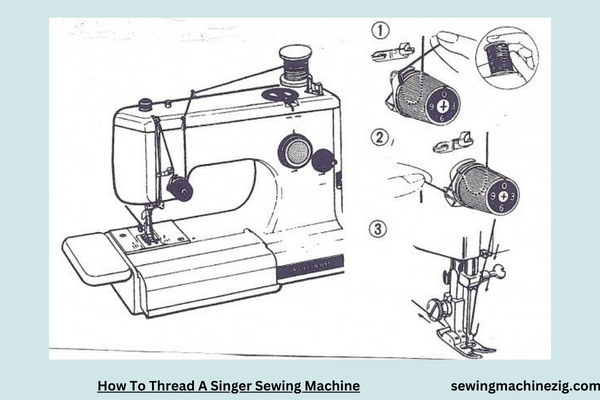
- Guide the thread through the first thread guide, following the indicated sequence.
Step 4: Thread the Tension Discs
- Tension Discs:
- Thread the machine by passing the thread through the tension discs. It’s crucial to ensure the thread is securely seated between the discs for proper tension.
- Check Tension Settings:
- Refer to your machine’s manual to set the appropriate thread tension for your specific sewing project.
Step 5: Guide the Thread Through the Take-Up Lever
- Take-Up Lever:
- Pass the thread through the take-up lever. Ensure the thread follows the correct path to facilitate smooth stitching.
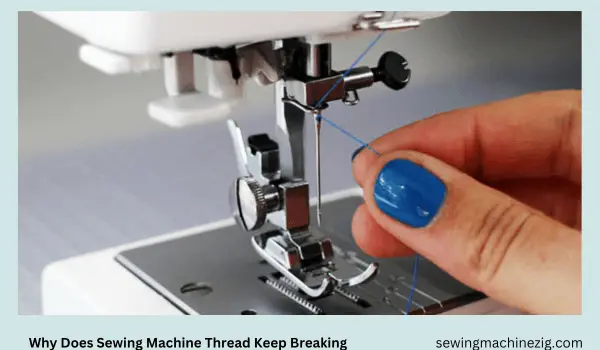
Step 6: Thread the Needle
- Needle Threader (if available):
- Some Singer machines come equipped with a needle threader. If so, use it according to the machine’s manual.
- Manual Threading:
- If your machine doesn’t have an automatic needle threader, carefully thread the needle by hand. Ensure the thread passes from front to back.
Step 7: Lower the Needle and Raise the Bobbin Thread
- Turn the Handwheel:
- Gently turn the handwheel towards you to lower the needle into the bobbin area.
- Bring Up the Bobbin Thread:
- With the needle in its lowest position, pull up the bobbin thread by grasping it with your fingers or using a needle threader.
Common Issues and Solutions:
- Thread Breakage:
- Issue: The thread frequently breaks during sewing.
- Solution: Check for any snags in the thread path. Ensure the thread spool rotates freely. Adjust the tension settings if needed.
- Uneven Stitches:
- Issue: Stitches appear uneven or irregular.
- Solution: Re-thread the machine, paying close attention to the thread path. Check the bobbin for proper winding and placement. Adjust tension settings.
- Needle Jamming:
- Issue: The needle frequently jams or hits the bobbin case.
- Solution: Inspect the needle for damage or bending. Ensure it’s the correct size for your fabric. Check for any debris in the bobbin area.
- Bobbin Winding Issues:
- Issue: The bobbin doesn’t wind evenly or is loose.
- Solution: Ensure the bobbin is correctly placed on the winding mechanism. Adjust the tension on the bobbin winding if your machine has this feature.
Step 8: Bobbin Threading (Top-Loading Bobbin)
- Open the Bobbin Case:
- If your Singer machine has a top-loading bobbin, open the bobbin case cover.
- Insert the Bobbin:
- Place the wound bobbin into the bobbin case, following the directional guide indicated on the case.
- Thread the Bobbin:
- Guide the thread through the bobbin case’s threading path. Pull the thread through the tension spring for proper winding.
Step 9: Test Stitch on Scrap Fabric
- Scrap Fabric:
- Before starting your actual project, perform a test stitch on a scrap piece of fabric to ensure proper tension and stitching quality.
Step 10: Regular Maintenance
- Clean the Machine:
- Regularly clean the sewing machine, removing lint and debris that may accumulate in the bobbin area and around the feed dogs.
- Oil the Machine (if applicable):
- Follow your machine’s manual for oiling instructions. Some Singer machines may require periodic oiling for optimal performance.
Step 11: Troubleshooting Threading Issues
- Tangled Thread Underneath:
- If you notice tangled threads underneath the fabric, re-thread the machine, and check the bobbin for proper winding.
- Thread Bunching:
- Adjust the tension settings if you experience thread bunching on the fabric surface.
- Needle Unthreading:
- If the needle becomes unthreaded during sewing, re-thread it carefully, ensuring the thread is securely seated in the needle eye.
Step 12: Experiment with Stitch Settings
- Stitch Length and Width:
- Experiment with different stitch lengths and widths based on your sewing project. Refer to your machine’s manual for guidance on adjusting these settings.
- Decorative Stitches (if applicable):
- Explore any decorative stitches your Singer machine offers. Follow the manual for instructions on selecting and adjusting these stitches.
Empowering Your Sewing Journey
Threading a Singer sewing machine is a foundational skill that sets the stage for successful and enjoyable sewing experiences. By understanding the components, following a systematic threading process, and addressing common issues, you empower yourself to explore the diverse realms of sewing with confidence.
As you embark on your stitching journey, may your Singer machine become a trusted companion, turning your creative visions into tangible masterpieces. Happy sewing!
How To Thread A Singer Heavy Duty Sewing Machine
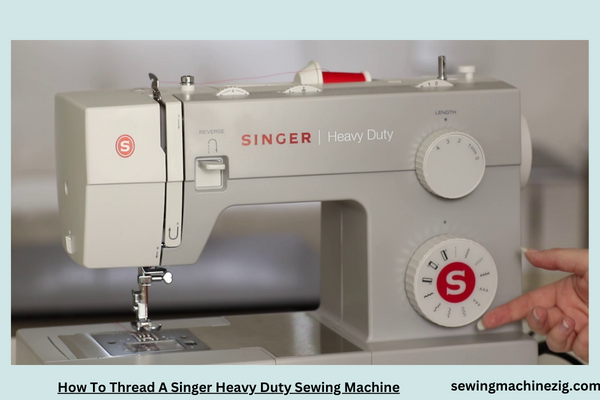
Embarking on the journey of threading a Singer Heavy Duty Sewing Machine may seem like a formidable task, especially given its robust build designed for handling tough sewing projects.
Fear not! In this step-by-step guide, we will unravel the intricacies of threading this powerhouse of a machine, ensuring you can tackle heavy-duty sewing tasks with confidence and precision.
Step 1: Get Acquainted with Your Singer Heavy Duty Machine
Before threading, take a moment to familiarize yourself with the specific features of your Singer Heavy Duty Sewing Machine:
- Threading Diagram:
- Refer to the threading diagram provided in your machine’s manual. This visual guide illustrates the threading sequence and the path the thread should follow.
- Thread Tension Dial:
- Locate the thread tension dial on your machine. The Heavy Duty models often come with adjustable tension, allowing you to fine-tune the thread tension based on your fabric and project.
- Bobbin Winding Mechanism:
- Identify the bobbin winding mechanism. Singer Heavy Duty machines typically have a top-loading bobbin system.
Step 2: Gather the Right Materials
Ensure you have the necessary materials at hand:
- Quality Thread:
- Choose a heavy-duty thread suitable for the fabric you’ll be sewing. This ensures durability and prevents breakage during heavy-duty projects.
- Heavy Duty Needle:
- Select an appropriate heavy-duty needle. The needle size should match the thickness of the fabric you’re working with.
Step 3: Place the Thread Spool
- Spool Pin:
- Place the heavy-duty thread spool on the designated spool pin. If your machine has two spool pins, use both when working with a twin needle or for projects that require two threads.
- Thread Guide:
- Follow the threading diagram to pass the thread through the initial thread guide. Heavy Duty machines often have numbered guides to aid in the correct threading sequence.
Step 4: Thread the Tension Discs
- Tension Discs:
- Thread the heavy-duty thread through the tension discs. Proper threading between the tension discs is crucial for achieving balanced stitches.
- Adjust Tension:
- Set the tension dial to an appropriate level. For heavy fabrics, you may need to increase the tension slightly. Refer to your machine’s manual for guidance on adjusting tension.
- Thread Guides:
- Follow the numbered thread guides on your Heavy Duty machine. Ensure the thread is secured in each guide to prevent snags or uneven tension.
- Take-Up Lever:
- Pass the thread through the take-up lever. The take-up lever plays a vital role in maintaining proper thread tension during sewing.
Step 6: Threading the Needle
- Needle Threader (if available):
- Some Singer Heavy Duty models come with a built-in needle threader. If your machine has this feature, utilize it for efficient and accurate needle threading.
- Manual Threading:
- If your machine lacks an automatic needle threader, carefully thread the needle by hand. Ensure the heavy-duty thread passes through the eye of the needle from front to back.
Step 7: Lower Needle and Raise Bobbin Thread
- Turn the Handwheel:
- Gently turn the handwheel towards you to lower the needle into the bobbin area.
- Bring Up the Bobbin Thread:
- With the needle in its lowest position, pull up the bobbin thread by grasping it with your fingers or using a needle threader. This step is crucial for creating a balanced stitch.
Common Issues and Solutions:
- Thread Breakage:
- Issue: The heavy-duty thread frequently breaks during sewing.
- Solution: Check for any snags in the thread path. Ensure the heavy-duty thread is of high quality and compatible with your needle. Adjust the tension settings if needed.
- Skipped Stitches:
- Issue: The machine skips stitches, especially when sewing through heavy fabrics.
- Solution: Ensure you’re using the correct heavy-duty needle for the fabric. Check the needle for damage or dullness. Adjust the tension to accommodate the thickness of the fabric.
- Uneven Stitches:
- Issue: Stitches appear uneven or irregular.
- Solution: Re-thread the machine, paying close attention to the thread path. Check the bobbin for proper winding and placement. Adjust tension settings.
- Bobbin Winding Issues:
- Issue: The bobbin doesn’t wind evenly or is loose.
- Solution: Ensure the bobbin is correctly placed on the winding mechanism. Adjust the tension on the bobbin winding if your machine has this feature.
Step 8: Threading the Bobbin (Top-Loading Bobbin)
- Open the Bobbin Case:
- If your Singer Heavy Duty machine has a top-loading bobbin, open the bobbin case cover.
- Insert the Bobbin:
- Place the wound bobbin into the bobbin case, following the directional guide indicated on the case.
- Thread the Bobbin:
- Guide the thread through the bobbin case’s threading path. Pull the thread through the tension spring for proper winding.
Step 9: Test Stitch on Heavy Fabric
- Heavy Fabric Scrap:
- Before starting your actual project, perform a test stitch on a scrap piece of the heavy fabric you’ll be working with. This ensures proper tension and stitching quality.
Step 10: Regular Maintenance
- Clean the Machine:
- Regularly clean the Singer Heavy Duty machine, removing any accumulated lint or debris in the bobbin area and around the feed dogs.
- Oil the Machine (if applicable):
- Follow your machine’s manual for oiling instructions. Some heavy-duty machines may require periodic oiling for optimal performance.
Step 11: Troubleshooting Heavy-Duty Stitching Issues
- Thread Tension on Heavy Fabrics:
- Adjust the tension settings to accommodate heavy fabrics. Experiment with different tension levels on a scrap piece before starting your project.
- Needle Choice for Heavy Materials:
- Ensure you’re using the correct heavy-duty needle for the specific heavy fabric you’re working with. A dull or damaged needle can cause stitching issues.
- Thread Jamming in the Bobbin Area:
- Check for any obstructions or tangled thread in the bobbin area. Ensure the bobbin case is correctly inserted.
Step 12: Explore Heavy-Duty Stitch Options
- Stitch Length and Width:
- Experiment with different stitch lengths and widths based on your heavy-duty sewing project. Adjust these settings for reinforced seams or decorative stitching.
- Heavy-Duty Stitch Patterns:
- Singer Heavy Duty machines often come with a variety of stitch patterns. Explore these options for added versatility in your projects.
Summary: Empowering Heavy-Duty Sewing Mastery
Threading a Singer Heavy Duty Sewing Machine is a crucial skill for those seeking to tackle robust sewing projects with confidence.
By understanding the specific features, following a systematic threading process, and addressing common heavy-duty stitching issues, you empower yourself to unleash the full potential of this formidable sewing companion. As you embark on your heavy-duty stitching journey, may your Singer Heavy Duty machine become a reliable partner, effortlessly transforming your creative visions into sturdy and impressive masterpieces. Happy heavy-duty sewing!
Conclusion
In conclusion, “How To Thread A Singer Sewing Machine“grasping How To Thread A Singer Sewing Machine is akin to unlocking the melody of a creative symphony. Threading this iconic machine seamlessly intertwines the elements of precision and artistry. As you weave through the threading process, the Singer Sewing Machine becomes a harmonious partner, translating your designs into reality with each carefully threaded stitch.
So, thread with confidence, and let your Singer Sewing Machine serenade your sewing aspirations into a seamless composition of craftsmanship. “How To Thread A Singer Sewing Machine“
FAQS
Q1: How do I thread a Singer sewing machine step by step?
A1: Threading a Singer sewing machine involves several steps. Begin by raising the presser foot, following the thread guides, and passing the thread through the needle’s eye. Consult your Singer sewing machine manual for a detailed, step-by-step guide.
Q2: Can I use any type of thread for threading a Singer sewing machine?
A2: Singer sewing machines are versatile and can generally accommodate various thread types. However, it’s recommended to use high-quality, all-purpose thread suitable for your specific sewing project. “How To Thread A Singer Sewing Machine“
Q3: Is there a specific needle I should use when threading a Singer sewing machine?
A3: Singer sewing machines typically use universal needles suitable for most fabrics. Choose the appropriate needle type and size based on the fabric you are working with for optimal stitching. “How To Thread A Singer Sewing Machine“
Q4: What should I do if the thread keeps breaking while threading a Singer sewing machine?
A4: If thread breakage occurs, check for proper threading, use the correct needle type, and ensure appropriate tension settings. Regular machine maintenance and consulting the user manual for troubleshooting tips can help address thread breakage issues. “How To Thread A Singer Sewing Machine“
Q5: Can I use different colors of thread in the bobbin and upper thread when threading a Singer sewing machine?
A5: Yes, you can use different colors for the bobbin and upper thread. Experimenting with color combinations allows for creative and decorative stitching, enhancing the visual appeal of your sewing projects. “How To Thread A Singer Sewing Machine“
Q6: How do I wind a bobbin when threading a Singer sewing machine?
A6: To wind a bobbin on a Singer sewing machine, place an empty bobbin on the winding spindle, thread the machine following the guides, and engage the bobbin winding mechanism. Start the machine, and it will automatically wind the bobbin. Refer to the user manual for specific instructions. “How To Thread A Singer Sewing Machine“

