Stepping into the realm of industrial sewing is a journey where precision and efficiency converge. At the heart of this mechanical symphony lies a crucial skill: “How To Thread An Industrial Sewing Machine.” Beyond the familiar hum of household machines, industrial counterparts demand a nuanced approach.
As we navigate the industrial stitching landscape, we’ll unravel the intricacies of threading, transforming the seemingly complex into a rhythmic dance of threads and mechanisms. Join this exploration into the technical prowess required, where mastering the art of threading becomes a gateway to elevated craftsmanship in the industrial sewing realm.
How To Thread An Industrial Sewing Machine Detailed Answer
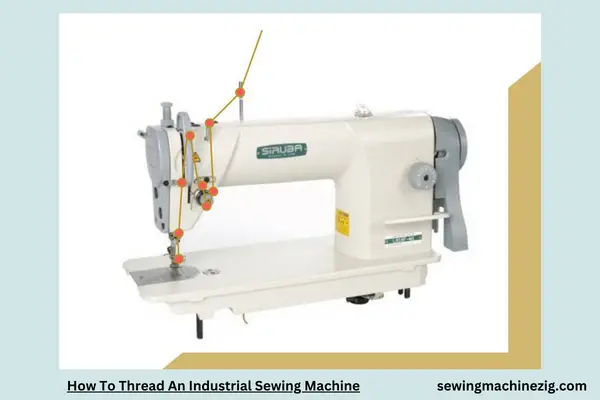
Threading an industrial sewing machine may seem daunting, but with the right guidance, you can streamline the process for efficient and precise stitching. Mastering “How To Thread An Industrial Sewing Machine” is crucial for seamstresses and manufacturers alike.
Follow this detailed guide to confidently thread your industrial sewing machine and optimize its performance.
Step 1: Prepare Your Machine
Begin by turning off the industrial sewing machine and unplugging it for safety. Clear the work area of any debris, ensuring a clean and organized space for threading.
Step 2: Gather Supplies
Collect the necessary supplies, including the appropriate thread for your project, a new needle if needed, and the machine’s manual. Refer to the manual for specific threading instructions and recommended thread types.
Step 3: Raise the Presser Foot
Lift the presser foot using the lever or knob located behind or on the side of the machine. This releases the tension on the thread, facilitating smoother threading.
Step 4: Thread the Upper Thread
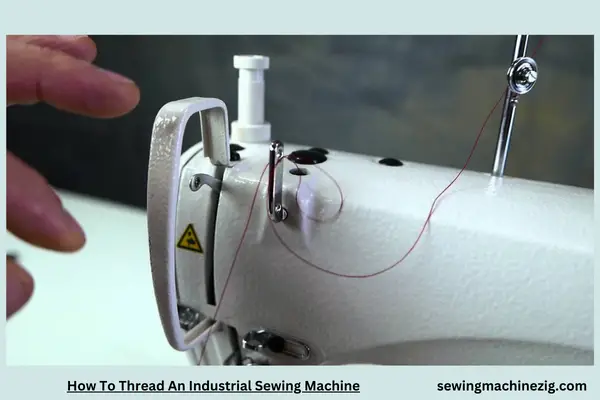
Start with the upper thread. Place the spool on the designated spool pin, ensuring it rotates freely. Follow the threading diagram in your machine’s manual, guiding the thread through the thread guides, tension discs, and the take-up lever.
Step 5: Thread the Needle
Thread the upper thread through the needle’s eye. Pull a few inches of thread through and leave a tail hanging. This tail will be used to pull the bobbin thread through later.
Step 6: Load the Bobbin
If your industrial sewing machine has a drop-in bobbin, load it according to the manual’s instructions. Ensure the bobbin rotates counterclockwise. For front-loading bobbins, follow the threading path outlined in the manual.
Step 7: Thread the Bobbin Case
Pull the bobbin thread through the bobbin case, following any indicated channels or guides. Leave a few inches of thread extending from the bobbin case.
Step 8: Bring Up the Bobbin Thread
Hold the upper thread with your left hand and turn the handwheel towards you with your right hand. As the needle descends and ascends, it will catch the bobbin thread. Use a pair of tweezers or a similar tool to pull up the bobbin thread.
Step 9: Check Tension Settings
Ensure that the tension settings for both the upper and lower threads are appropriately adjusted. Refer to your machine’s manual for recommended tension settings based on your fabric and thread choices.
Step 10: Test Stitch on Scrap Fabric
Perform a test stitch on a scrap piece of fabric to check the tension and ensure the threads are properly engaged. Adjust the tension if necessary until you achieve balanced stitches.
Step 11: Fine-Tune as Needed
Experiment with different thread types and fabric weights to fine-tune your threading technique. Adjust the tension and threading path accordingly for optimal results.
Step 12: Regular Maintenance
Incorporate regular maintenance into your sewing routine. Clean the machine, change needles, and oil moving parts as specified in the manual to keep your industrial sewing machine in top condition.
Step 13: Troubleshoot Issues
If you encounter issues such as skipped stitches or tension problems, consult your machine’s troubleshooting guide in the manual. Address issues promptly to maintain consistent stitching quality.
Step 14: Practice Threading Routine
Practice threading your industrial sewing machine regularly to become more efficient and confident in the process. A smooth threading routine contributes to overall productivity.
By following these comprehensive steps, you’ll confidently navigate “How To Thread An Industrial Sewing Machine.” Whether you’re a seasoned professional or a newcomer to industrial machines, mastering this process ensures optimal performance and reliable stitching in your sewing endeavors.
How Do You Thread An Old Industrial Singer Sewing Machine?
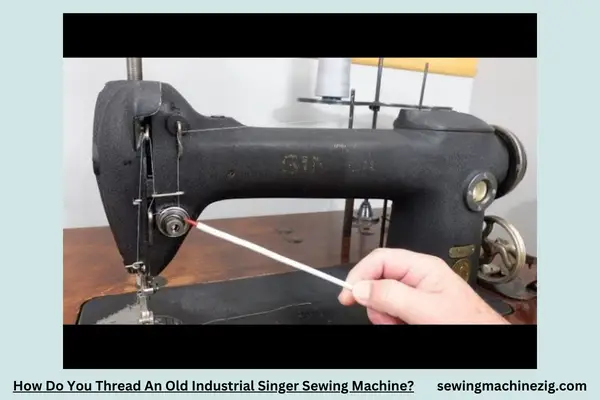
Threading an old industrial Singer sewing machine may seem like a daunting task, but with the right steps, it becomes a straightforward process.
Let’s explore “How To Thread An Industrial Sewing Machine,” focusing on the unique aspects of an old industrial Singer model.
Step 1: Consult the Manual:
Locate the manual for your specific Singer model. If you don’t have one, you may find it online. The manual provides invaluable guidance on the threading process and machine specifications.
Step 2: Raise the Presser Foot:
Before threading, raise the presser foot. This releases the tension disks, allowing the thread to pass through smoothly.
Step 3: Wind the Bobbin:
Ensure the bobbin is properly wound. Follow the manual’s instructions for bobbin winding, making sure the thread is evenly distributed.
Step 4: Place the Bobbin:
Insert the wound bobbin into the bobbin case, ensuring it rotates counterclockwise. Follow any specific threading paths indicated by your machine.
Step 5: Thread the Upper Thread:
Follow the threading guide as outlined in the manual. Typically, you’ll guide the thread through various points, including tension disks, thread guides, and the needle bar.
Step 6: Thread the Needle:
Thread the needle from front to back. Use tweezers or a needle threader if needed, especially with smaller needles common in industrial machines.
Step 7: Tension Adjustment:
Older industrial Singer machines might feature a tension knob. Adjust it based on your fabric and thread type, aiming for balanced tension.
Step 8: Confirm Needle Position:
Ensure the needle is in the correct position. Industrial machines often allow you to adjust needle position for different sewing requirements.
Step 9: Test Stitch on Scrap Fabric:
Before starting your actual project, perform a test stitch on scrap fabric. This allows you to check for any tension issues or misalignments.
Step 10: Familiarize with Attachments:
Older industrial Singers may have various attachments like presser feet and needle plates. Familiarize yourself with these components and use the appropriate ones for your project.
Step 11: Regular Maintenance:
Keep your old industrial Singer sewing machine well-maintained. Regularly oil moving parts and clean out any accumulated lint to ensure smooth operation.
Step 12: Seek Expert Advice:
If you encounter challenges or are uncertain about certain features of your machine, seek advice from sewing machine experts or join online forums where experienced users share tips.
By following these steps on “How Do You Thread An Old Industrial Singer Sewing Machine,” you can confidently thread your vintage industrial Singer, unlocking its sewing prowess for your creative endeavors.
What Type Of Thread Is Used For Industrial Machines?
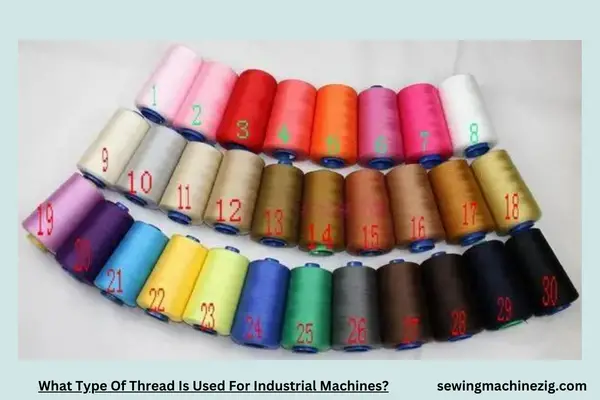
Selecting the right thread for your industrial sewing machine is crucial for achieving optimal results. Let’s explore “How To Thread An Industrial Sewing Machine” with a focus on the type of thread suitable for these powerful machines.
Choosing the Right Thread:
Thread Weight and Size:
- Industrial machines accommodate a range of thread weights and sizes. Thicker threads work well for heavy fabrics and projects, while finer threads are suitable for lighter materials. Consult your machine’s manual for recommended thread sizes.
Material Compatibility:
- Consider the material you’ll be sewing. Cotton, polyester, nylon, and other blends are commonly used. Ensure the thread material complements the fabric to achieve durable and balanced stitches.
Thread Construction:
- Industrial machines can handle various thread constructions, including core-spun, cotton-wrapped polyester, and monofilament. The construction affects the thread’s strength, elasticity, and appearance in the final stitch.
Threading Your Industrial Machine:
Consult the Manual:
- Always refer to your machine’s manual for specific threading instructions and thread recommendations. The manual provides insights into the machine’s capabilities and limitations.
Raise the Presser Foot:
- Before threading, lift the presser foot. This action releases the tension disks, allowing the thread to pass through smoothly.
Thread Path:
- Follow the threading path as indicated in the manual. Typically, industrial machines have clear threading guides, including tension disks, thread guides, and the needle bar.
Needle Threader (if available):
- Some industrial machines come with built-in needle threaders. If your machine has this feature, use it for efficient and accurate threading, especially when dealing with finer threads.
Tension Adjustment:
- Adjust the thread tension based on the thickness and type of thread. Proper tension is essential for balanced stitches.
Thread Cutter:
- Many industrial machines have a built-in thread cutter. Utilize this feature for efficient thread trimming between stitches.
Best Practices for Industrial Thread Use:
Quality Matters:
- Invest in high-quality threads to ensure smooth operation and durability. Cheap or low-quality threads may cause breakage or uneven stitches.
Regular Maintenance:
- Keep your industrial machine well-maintained. Clean out any lint, debris, or residue regularly, and oil moving parts as recommended in the manual.
Experiment and Test:
- If you’re using a new type of thread, conduct tests on scrap fabric. This allows you to observe how the thread behaves and ensures it’s suitable for your specific project.
Bobbin Thread:
- Choose a bobbin thread that complements your upper thread. Consistent thread types enhance the overall quality and appearance of your stitches.
By understanding “How To Thread An Industrial Sewing Machine” and selecting the right type of thread, you can harness the full potential of your machine for various sewing projects, achieving professional and reliable results.
Conclusion
In conclusion, mastering “How To Thread An Industrial Sewing Machine” opens the door to efficient and precise sewing in commercial settings. By diligently following the threading process and understanding the specific requirements of industrial machines, users ensure optimal performance and stitch quality.
This skill is essential for professionals and businesses relying on industrial sewing, contributing to seamless production processes and high-quality finished products. Threading an industrial sewing machine with precision empowers users to harness the full potential of these robust machines, enhancing productivity and craftsmanship.
FAQS
Q1: How do I thread an industrial sewing machine?
A1: Threading an industrial sewing machine involves specific steps to ensure proper operation. Consult your machine’s manual for a detailed threading diagram. Generally, it includes guiding the thread through designated paths, tension discs, and the needle, followed by threading the bobbin. Practice threading carefully to avoid tension issues and achieve optimal stitch quality.
Q2: Are there differences in threading industrial sewing machines compared to home machines?
A2: Yes, industrial sewing machines may have a more intricate threading path and additional features. Pay close attention to the threading diagram in the manual, as it provides specific instructions tailored to your industrial machine model.
Q3: Can I use different thread types with my industrial sewing machine?
A3: Industrial sewing machines are designed to handle various thread types. However, it’s crucial to select the appropriate needle and adjust the machine’s tension settings based on the thread’s thickness and material. Refer to your machine’s manual for specific recommendations.
Q4: What should I do if the thread keeps breaking during sewing on my industrial machine?
A4: If thread breakage occurs, rethread the machine, ensuring the thread is correctly placed in the tension discs and guides. Check the needle for any damage and replace it if necessary. Adjust the tension settings according to the thread type and confirm that the bobbin is correctly wound and inserted.
Q5: Is there a specific way to thread the bobbin on an industrial sewing machine?
A5: Threading the bobbin on an industrial sewing machine typically involves winding the thread around the bobbin, placing it on the bobbin winder, and engaging the winding mechanism. Follow your machine’s manual for the correct bobbin winding procedure to ensure an evenly wound bobbin. “How To Thread An Industrial Sewing Machine“
Q6: Can I use pre-wound bobbins with my industrial sewing machine?
A6: Yes, industrial sewing machines can often accommodate pre-wound bobbins. Ensure the pre-wound bobbins are compatible with your specific industrial machine model and follow the threading instructions in your manual when inserting them. “How To Thread An Industrial Sewing Machine“

