In the rhythm of sewing, encountering a frozen machine can disrupt the creative flow. The pivotal question emerges: “How to unfreeze a sewing machine?” This guide meticulously dissects the potential causes and offers a strategic thawing process.
As we navigate through the troubleshooting steps, you’ll gain insights into reviving your machine seamlessly. Join us on this troubleshooting journey where the seemingly daunting task of unfreezing a sewing machine transforms into an empowering skill, ensuring your stitching endeavors flow smoothly without the chill of technical setbacks.
How To Unfreeze A Sewing Machine Detailed Answer
Embarking on a sewing project can be an exciting endeavor, but what happens when you encounter a frozen sewing machine? Whether it’s due to seasonal changes or infrequent use, a frozen sewing machine can throw a wrench into your creative plans.
In this step-by-step guide, How to unfreeze a sewing machine We’ll explore the intricacies of unfreezing a sewing machine, providing you with the knowledge and techniques to thaw out mechanical hiccups and get back to the smooth rhythm of stitching.
Step 1: Assess the Situation – Identify the Freezing Point
Before diving into the unfreezing process, take a moment to assess the situation. Identify the specific areas of the sewing machine that seem to be frozen. It could be the handwheel, the needle mechanism, or other moving parts. Understanding where the freezing occurs will guide your troubleshooting efforts.
Step 2: Disconnect the Power Source
For safety reasons, always disconnect your sewing machine from the power source before attempting any troubleshooting. This ensures that there is no risk of electrical accidents while you work on unfreezing the machine. Unplug the machine or, if it’s a vintage model, ensure that it is switched off.
Step 3: Check for Thread Jams
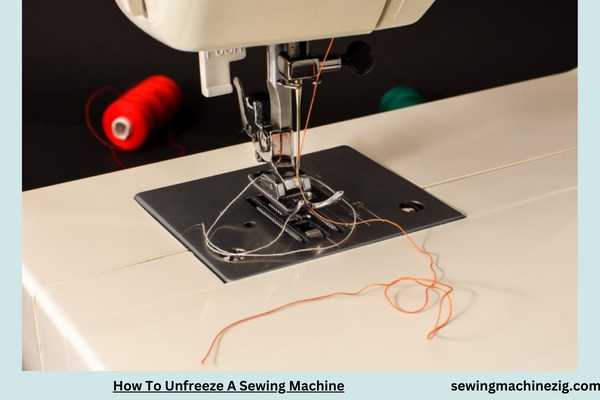
One common cause of a frozen sewing machine is a thread jam. Carefully inspect the bobbin area and the needle plate for any tangled threads or lint buildup. Use a pair of tweezers or a small brush to gently remove any obstructions. Clearing thread jams is a crucial first step in resolving freezing issues.
Step 4: Lubricate Moving Parts
Freezing can occur due to lack of lubrication, especially if the sewing machine hasn’t been used for an extended period. Apply a small amount of sewing machine oil to the moving parts, including the handwheel, needle bar, and other pivot points. Allow the oil to penetrate and lubricate the mechanisms to facilitate smoother movement.
Step 5: Warm-Up the Machine
If the freezing is caused by cold temperatures, allow the sewing machine to warm up gradually. Move it to a room with a moderate temperature and let it acclimate for some time. Avoid exposing the machine to rapid temperature changes, as this can cause condensation, leading to further issues.
Step 6: Gently Rock the Handwheel
The handwheel is often the control center for the sewing machine’s movements. Gently rock the handwheel back and forth. Apply steady but gentle pressure, avoiding forceful movements. This can help loosen any stuck components and encourage the machine to start moving freely.
Step 7: Use a Hairdryer for External Freezing
In cases where the freezing is due to external factors like cold weather, you can use a hairdryer to warm up the machine. Set the hairdryer to a low heat setting and direct the warm air towards the machine, particularly focusing on the moving parts. Ensure that the hairdryer is not too close to prevent overheating.
Step 8: Inspect the Motor and Belts
If the freezing persists, it’s time to inspect the motor and belts. Remove the machine’s cover, following the manufacturer’s instructions. Check for any visible issues such as loose belts or debris around the motor. If belts appear loose, tighten them according to the machine’s manual.
Step 9: Utilize Sewing Machine-Specific De-Icers
Some sewing machine manufacturers offer specialized de-icers or lubricants designed to address freezing issues. Check if your machine’s manufacturer recommends or provides such products. Follow the instructions on the product for safe and effective application.
Step 10: Exercise Caution with Vintage Machines
If you’re dealing with a vintage sewing machine, exercise caution when unfreezing it. Older machines may have delicate components, and excessive force or incorrect lubrication can cause damage. Consult the machine’s manual or seek advice from experts familiar with vintage sewing machines.
Step 11: Consult the Manual for Troubleshooting Tips
Every sewing machine comes with a manual that includes troubleshooting tips and guidelines. Refer to the manual specific to your machine model for manufacturer-recommended steps to address freezing issues. Manufacturers often provide valuable insights tailored to their machines.
Step 12: Seek Professional Assistance if Needed
If all else fails or if you’re uncomfortable with DIY troubleshooting, consider seeking professional assistance. A certified sewing machine technician can assess and address more complex issues, ensuring that your machine is restored to optimal working condition.
Step 13: Preventive Measures for Future Freezing
Once you’ve successfully unfrozen your sewing machine, it’s wise to implement preventive measures to avoid future occurrences:
a. Regular Use: Use your sewing machine regularly to keep the mechanisms active and prevent stagnation.
b. Proper Storage: When not in use, cover your sewing machine with a dust cover to protect it from lint and dust accumulation.
c. Climate Control: Maintain a stable and moderate temperature in the sewing area to prevent temperature-related freezing.
d. Lubrication Schedule: Adhere to the manufacturer’s recommendations for lubricating your sewing machine. Regular lubrication helps prevent friction and ensures smooth operation.
Thawing Out the Creativity
In summary, unfreezing a sewing machine requires a systematic and careful approach. By assessing the situation, identifying the freezing point, and following the appropriate steps, you can thaw out your machine and get back to your creative projects.
Whether it’s a modern electronic machine or a vintage beauty, the key is precision and care in troubleshooting. With this guide, you’re equipped to navigate the chill of mechanical hiccups and keep the creativity flowing. Happy sewing! “How to unfreeze a sewing machine“
How To Unfreeze A Vintage Sewing Machine
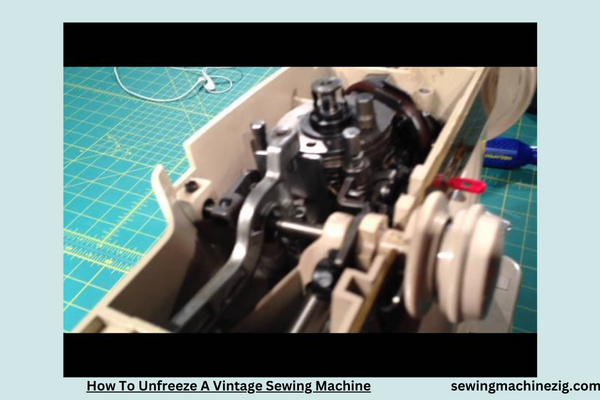
Vintage sewing machines, with their timeless elegance and sturdy craftsmanship, are treasured possessions for many sewing enthusiasts. However, encountering a frozen vintage sewing machine can be disheartening.
In this step-by-step guide, we will delve into the intricacies of unfreezing a vintage sewing machine, blending precision with patience to revive these classic beauties and preserve their heritage for generations to come.
Step 1: Understand the Anatomy of Your Vintage Sewing Machine
Before embarking on the unfreezing journey, it’s crucial to familiarize yourself with the specific anatomy of your vintage sewing machine. Each model may have unique components and mechanisms, and understanding them will guide your troubleshooting efforts.
Step 2: Gentle Inspection for Obstructions
Begin by gently inspecting the visible parts of the vintage sewing machine for any obstructions or debris. Old lint, dried oil, or dust may have accumulated over the years, contributing to the freezing. Use a soft brush or a vacuum with a nozzle attachment to carefully remove any loose particles.
Step 3: Disconnect Power Sources and Remove Accessories
Prioritize safety by disconnecting the vintage sewing machine from any power sources. Unplug the machine and remove any accessories such as presser feet or needles. Creating a clear workspace allows for a more thorough inspection and troubleshooting process.
Step 4: Apply Lubrication with Precision
Lack of proper lubrication is often a culprit in frozen vintage sewing machines. Select a high-quality sewing machine oil and apply it with precision to key moving parts. Focus on the handwheel, pivot points, and any gears that may be visible. Allow the oil to penetrate and work its magic, easing the stiffness in the mechanisms.
Step 5: Warm-Up Gradually
Vintage sewing machines, especially those stored in colder environments, may benefit from a gradual warm-up. Move the machine to a room with a moderate temperature and let it acclimate slowly. Avoid exposing the machine to rapid temperature changes, as this can cause condensation, potentially exacerbating freezing issues.
Step 6: Gently Rock the Handwheel Back and Forth
The handwheel is a central component in vintage sewing machines, controlling the machine’s movements. Gently rock the handwheel back and forth, applying steady but cautious pressure. This gentle rocking motion can help loosen any stuck components and encourage smoother movement.
Step 7: External Heating Methods
If the vintage sewing machine remains frozen, external heating methods can be employed cautiously. Use a hairdryer set to a low heat setting and direct warm air towards the machine, paying special attention to moving parts. Ensure the hairdryer is not too close to prevent overheating.
Step 8: Assess the Motor and Belts
For vintage sewing machines with motors and belts, inspect these components for visible issues. Remove the machine’s cover according to the manufacturer’s instructions and check for loose belts, debris around the motor, or any signs of wear. If belts appear loose, follow the vintage machine’s manual for proper tightening.
Step 9: Specialized Products for Vintage Machines
Some manufacturers offer specialized lubricants or de-icers designed for vintage sewing machines. Check if your machine’s manufacturer recommends or provides such products. Follow the instructions on the product for safe and effective application.
Step 10: Handle with Care – Vintage Sensitivity
Vintage sewing machines may have delicate components, and excessive force or incorrect lubrication can cause damage. Exercise extra caution when working with these machines. Refer to the vintage sewing machine’s manual for specific guidelines and recommendations.
Step 11: Seek Guidance from Vintage Sewing Communities
Vintage sewing communities can be valuable resources for guidance. Online forums, social media groups, and specialized vintage sewing machine communities often have experienced enthusiasts who can share insights and advice based on their own restoration experiences.
Step 12: Consult the Manual for Manufacturer Recommendations
Every vintage sewing machine comes with a manual that includes manufacturer recommendations for maintenance and troubleshooting. Refer to the manual specific to your vintage machine model for guidelines and steps recommended by the manufacturer.
Step 13: Gradual Movement Exercises
Encourage gradual movement by manually turning the handwheel. This helps distribute lubrication throughout the machine and encourages the loosening of any residual stiffness. Repeat this process while observing any changes in the machine’s responsiveness.
Step 14: Professional Restoration Services
If the vintage sewing machine remains unresponsive or if you are uncomfortable with DIY restoration, consider seeking professional restoration services. Certified sewing machine technicians specializing in vintage models have the expertise to address complex issues and ensure delicate restoration.
Step 15: Preservation Techniques for Future Generations
Once you’ve successfully unfrozen your vintage sewing machine, consider implementing preservation techniques to ensure its longevity:
a. Regular Operation: Periodically operate your vintage sewing machine to keep the mechanisms active and prevent stagnation.
b. Climate-Controlled Storage: Store your vintage machine in a climate-controlled environment to avoid extreme temperature fluctuations.
c. Protective Cover: Use a dust cover when the machine is not in use to prevent dust and debris from settling on its surfaces.
d. Periodic Maintenance: Adhere to a periodic maintenance schedule as recommended by the vintage sewing machine’s manual. Regular care helps preserve its functionality.
Breathing New Life into Vintage Elegance
In unfreezing a vintage sewing machine is a delicate dance between precision and patience. By understanding the machine’s anatomy, applying careful lubrication, and exercising caution in troubleshooting, you can breathe new life into these timeless treasures.
The restoration of a vintage sewing machine is not just a repair; it’s a celebration of heritage and craftsmanship. With this guide, you’re equipped to embark on the journey of reviving vintage elegance. Happy stitching with your restored vintage sewing machine!
Conclusion
In conclusion, mastering “How to unfreeze a sewing machine” is a skill that rescues your trusted companion from stagnation. By applying precision and patience to the detailed steps outlined in this guide, you revive your sewing machine’s functionality and ensure a smooth stitching experience.
Unfreezing a machine is not just a repair but a testament to your dedication to the craft. With this newfound ability, you embark”How to unfreeze a sewing machine” on a journey where each stitch is a testament to the resilience and care invested in your sewing endeavors.
FAQs for “How To Unfreeze A Sewing Machine”
Q1: What causes a sewing machine to freeze or become stuck during operation?
A1: A sewing machine may freeze due to thread jams, lack of lubrication, or mechanical issues. Identifying the cause is crucial for effective resolution. “How to unfreeze a sewing machine“
Q2: Can I use force to unfreeze a stuck sewing machine?
A2: Avoid using excessive force as it may cause damage. Gentle troubleshooting methods are recommended to prevent further issues. “How to unfreeze a sewing machine“
Q3: How can I prevent my sewing machine from freezing in the future?
A3: Regular maintenance, such as cleaning, oiling, and using quality thread, helps prevent freezing issues. Follow the manufacturer’s guidelines for upkeep. “How to unfreeze a sewing machine“
Q4: Is it common for sewing machines to freeze in cold temperatures?
A4: Extreme cold may affect lubricants, potentially causing freezing. It’s advisable to keep the sewing area at a moderate temperature and follow maintenance recommendations. “How to unfreeze a sewing machine“
Q5: What steps can I take to unfreeze a sewing machine with a thread jam?
A5: Gently remove the fabric, clear any visible thread jams, and ensure the bobbin area is free from entangled threads. Check the needle and rethread the machine. “How to unfreeze a sewing machine“

