Ever found yourself in a pinch with a loose thread or a small tear, yearning for an uncomplicated solution? We’ve all been there, grappling with the inconvenience of a sewing task and wishing for an easier fix. Fear not—I comprehend the desire for simplicity in these moments.
In this guide, “How To Use A Handheld Sewing Machine ” We’ll unravel the mystery of using a handheld sewing machine, turning what seems like a daunting task into a painless endeavor. No need for complex setups or elaborate procedures; just straightforward steps to empower you with the convenience of handheld sewing. Let’s make mending a breeze!
How To Use A Handheld Sewing Machine Detailed Answer
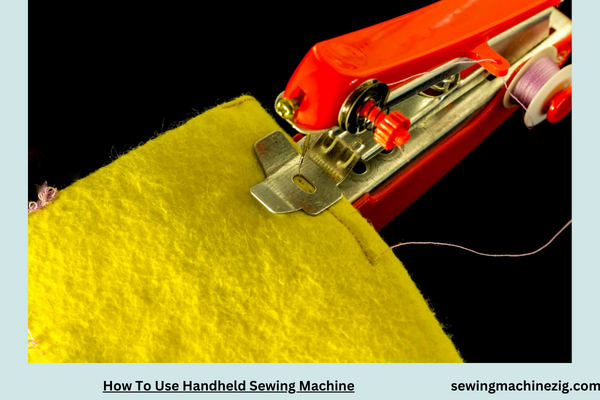
Understanding the Handheld Wonder:
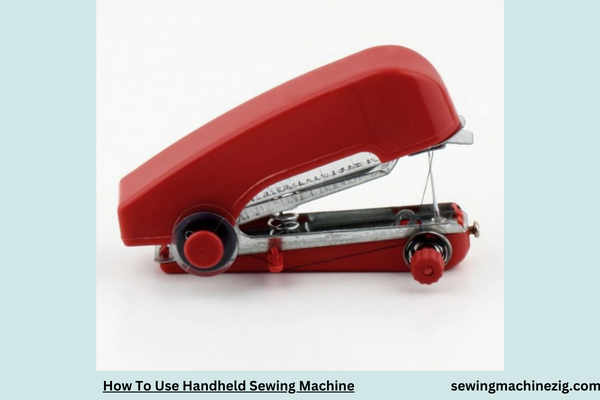
Compact, portable, and easy to use, a handheld sewing machine is a versatile tool for quick repairs, alterations, or even small sewing projects. Before diving into the process, it’s essential to understand the components of this handheld wonder.
- Needle Position: The needle on a handheld sewing machine moves up and down, creating stitches as you guide the machine along the fabric.
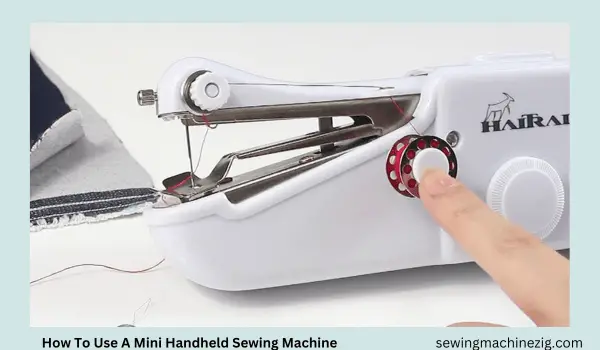
- Bobbin Compartment: This small compartment holds the thread bobbin, ensuring a continuous feed for smooth stitching.
- Tension Control: Some handheld machines have tension control options, allowing you to adjust the tightness of stitches based on your fabric and project.
- Power Source: Handheld sewing machines can be powered by batteries, electricity, or a combination of both. Ensure your machine has the required power source.
Step 1: Power Up and Thread the Needle:
- Power up your handheld sewing machine using the appropriate power source (batteries or electricity).
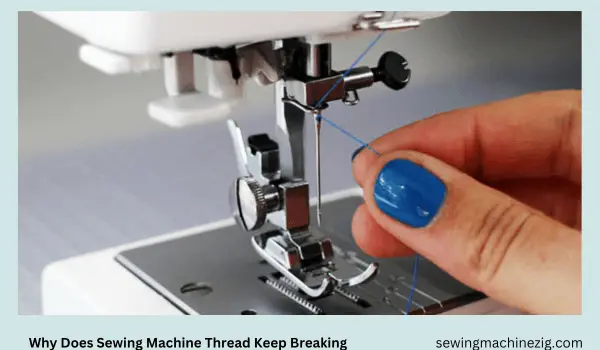
- Thread the needle by passing the thread through the needle eye and pulling it through.
Step 2: Load the Bobbin:
- Open the bobbin compartment and load the bobbin with your desired thread. Follow the machine’s instructions for proper loading.
Step 3: Set the Tension (if applicable):
- If your handheld sewing machine has tension control, adjust it based on the fabric and the type of stitching you intend to do. Consult the machine’s manual for guidance.
Step 4: Practice on Scrap Fabric:
- Before working on your actual project, practice stitching on a scrap piece of fabric. This allows you to familiarize yourself with the machine’s movements and make any necessary adjustments.
Step 5: Position the Fabric:
- Position the fabric you want to sew under the needle. Hold the fabric taut with one hand while guiding the handheld sewing machine with the other.
Step 6: Start Stitching:
- Press the machine’s power button or foot pedal (if applicable) to start stitching. Guide the machine along the fabric in the desired direction, maintaining a steady pace.
Step 7: Practice Straight and Zigzag Stitches:
- Experiment with creating straight stitches and zigzag stitches on your scrap fabric. Get comfortable with controlling the machine’s movements to achieve the stitch patterns you desire.
Step 8: Secure the Stitching:
- To secure your stitches, stitch a few stitches in place at the beginning and end of your seam. This ensures the thread won’t unravel.
Step 9: Explore Stitching Techniques:
- Depending on your project, explore different stitching techniques such as backstitching, basting, or decorative stitches. Each technique adds a unique touch to your sewing.
Step 10: Troubleshooting and Adjustments:
- If you encounter any issues like skipped stitches or uneven tension, refer to the machine’s manual for troubleshooting tips. Adjust the settings accordingly.
Step 11: Complete Your Project:
- Once you’ve mastered the basic stitches and techniques, proceed to complete your project. Whether it’s mending a tear, hemming pants, or adding embellishments, the handheld sewing machine offers a versatile solution.
Step 12: Clean and Maintain:
- After completing your project, clean the machine by removing any accumulated lint or loose threads. Proper maintenance ensures the longevity of your handheld sewing machine.
Tips for Success:
- Choose the right needle and thread for your fabric.
- Practice good stitching posture to maintain control and precision.
- Experiment with different fabrics and stitch lengths to expand your skill set.
- Start with simple projects before tackling more complex ones.
Summary:
Mastering How To Use A Handheld Sewing Machine opens a world of possibilities for DIY enthusiasts and sewing aficionados alike. From quick repairs to creative projects, the compact and portable nature of these machines makes them a valuable addition to any sewing toolkit.
By understanding the machine’s components, practicing on scrap fabric, and exploring various stitching techniques, you can unleash your creativity and achieve professional-looking results. The art of handheld sewing is in your hands—sew on with confidence!
Handheld Sewing Machine Trouble Shooting
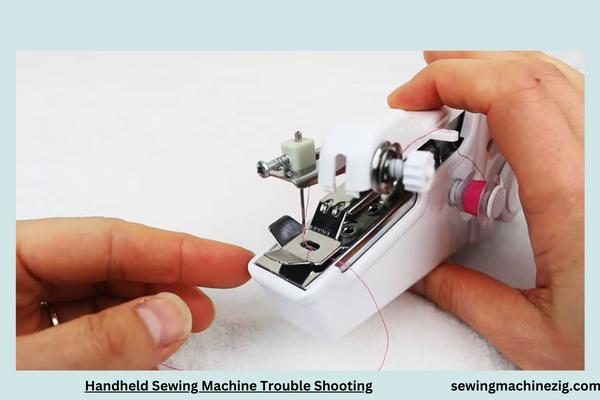
Embarking on a sewing project with a handheld sewing machine can be a delightful and empowering experience. However, even the most reliable tools may encounter hiccups along the way.
In this comprehensive guide, we’ll unravel the mysteries of troubleshooting common issues that may arise with handheld sewing machines. Whether you’re a seasoned stitcher or a novice with a passion for DIY, understanding how to address these challenges will ensure smooth sailing through your creative endeavors.
1. Symptom: Skipped Stitches
Possible Causes:
- Dull or bent needle
- Incorrect needle size for the fabric
- Tension issues
- Insufficient presser foot pressure
Troubleshooting Steps:
- Replace the needle with a new, sharp one.
- Ensure you’re using the correct needle size for your fabric.
- Check and adjust the tension according to the machine’s manual.
- Confirm that the presser foot is applying adequate pressure.
2. Symptom: Uneven Stitches
Possible Causes:
- Uneven pressure on the fabric
- Uneven guiding of the machine
- Incorrect threading
- Tension issues
Troubleshooting Steps:
- Maintain even pressure on the fabric as you guide it through the machine.
- Practice smooth, consistent movements with the handheld sewing machine.
- Re-thread the machine, ensuring the thread is properly seated in the tension discs.
- Adjust the tension to achieve balanced stitches.
3. Symptom: Thread Breakage
Possible Causes:
- Poor quality or old thread
- Incorrect threading
- Tension issues
- Misalignment of the needle
Troubleshooting Steps:
- Use high-quality, fresh thread suitable for your fabric.
- Re-thread the machine, ensuring the thread passes through all necessary guides.
- Adjust the tension to a suitable level.
- Check the needle alignment and make sure it is not bent.
4. Symptom: Fabric Jamming or Not Feeding Through
Possible Causes:
- Dull or bent needle
- Incorrect threading
- Tension issues
- Accumulated lint or debris in the machine
Troubleshooting Steps:
- Replace the needle with a new, sharp one.
- Re-thread the machine, following the threading path in the manual.
- Adjust the tension to ensure smooth fabric feed.
- Clean the machine, removing any lint or debris that may be causing obstructions.
5. Symptom: Machine Won’t Start or Loses Power
Possible Causes:
- Dead batteries (if using a battery-powered machine)
- Faulty power source or adapter
- Loose connection
Troubleshooting Steps:
- Replace the batteries with fresh ones or charge the machine if applicable.
- Check the power source or adapter for any issues.
- Ensure all connections are secure and the power switch is in the ON position.
6. Symptom: Thread Bunching or Bird’s Nest Formation on the Bottom Side of Fabric
Possible Causes:
- Incorrect threading
- Tension issues
- Bobbin issues
Troubleshooting Steps:
- Re-thread the machine, making sure the thread is correctly seated in the tension discs.
- Adjust the tension to achieve balance between the top and bottom threads.
- Check the bobbin for proper winding and ensure it is correctly inserted into the bobbin case.
7. Symptom: Noisy Operation
Possible Causes:
- Dull or bent needle
- Misaligned parts
- Lack of lubrication
Troubleshooting Steps:
- Replace the needle with a new, sharp one.
- Inspect the machine for any misaligned parts and adjust as needed.
- Lubricate the machine according to the manufacturer’s recommendations.
8. Symptom: Handheld Sewing Machine Produces Loops
Possible Causes:
- Incorrect threading
- Tension issues
- Bobbin issues
Troubleshooting Steps:
- Re-thread the machine, following the correct threading path.
- Adjust the tension to achieve a balanced stitch.
- Check the bobbin for proper winding and correct insertion.
9. Symptom: Handheld Sewing Machine is Heating Up
Possible Causes:
- Prolonged continuous use
- Motor issues
- Overheating due to internal problems
Troubleshooting Steps:
- Allow the machine to cool down by taking breaks during extended use.
- If the issue persists, consult the manufacturer’s manual for guidance on motor-related issues.
- If overheating continues, seek professional assistance.
Summary: Empowering Your Sewing Journey
Troubleshooting your handheld sewing machine is an integral part of becoming a confident and capable stitcher. By identifying and addressing common issues, you empower yourself to tackle a wide range of sewing projects with ease.
Remember to consult your machine’s manual for specific guidance and, if needed, don’t hesitate to seek assistance from experienced sewers or professionals in the field. As you navigate through the intricacies of troubleshooting, you’ll find that the journey of creative stitching becomes even more rewarding.
Summary:
Troubleshooting a handheld sewing machine involves addressing common issues such as skipped stitches, uneven stitching, thread breakage, and more.
By understanding possible causes and following systematic troubleshooting steps, you can resolve these challenges and ensure smooth operation. Remember to consult the machine’s manual for specific guidance and maintain regular maintenance practices.
Empower yourself to overcome hurdles in your sewing journey, turning each troubleshooting experience into a valuable lesson in craftsmanship and creativity.
Conclusion
In conclusion, in “How To Use A Handheld Sewing Machine” navigating the intricacies of a handheld sewing machine transforms stitching from a daunting task into a portable and accessible craft. Mastering how to use a handheld sewing machine empowers DIY enthusiasts and crafters alike. Its compact design and ease of operation make it a versatile tool for quick fixes and creative projects on the go.
From hemming garments to unleashing creative stitches, the handheld sewing machine adds a new dimension to the world of sewing, proving that big things can indeed come in small packages. “How To Use A Handheld Sewing Machine“
FAQS
Q1: Can a handheld sewing machine be used for larger sewing projects?
A1: Handheld machines are ideal for quick fixes and small projects. For larger projects, a traditional sewing machine may be more efficient.”How To Use A Handheld Sewing Machine“
Q2: What types of repairs can I handle with a handheld sewing machine?
A2: Handheld machines excel at hemming, mending seams, and fixing small tears, providing quick solutions for common fabric issues. “How To Use A Handheld Sewing Machine“
Q3: Can children use handheld sewing machines safely?
A3: While supervision is recommended, many handheld machines are designed with safety features, making them suitable for supervised use by children. “How To Use A Handheld Sewing Machine“
Q4: How do I maintain and clean a handheld sewing machine?
A4: Regularly clean lint and debris from the machine, follow the maintenance guidelines in the manual, and store it in a protective case when not in use. “How To Use A Handheld Sewing Machine“
Q5: Can I use a handheld sewing machine for embroidery or decorative stitching?
A5: Handheld machines are primarily for basic repairs and stitching. For intricate embroidery or decorative stitching, a traditional sewing machine with such capabilities is more suitable. “How To Use A Handheld Sewing Machine“

