The hemming foot is a useful attachment for sewing machines that simplifies the process of creating hems on garments or fabric edges. It is a specialized presser foot designed to guide the fabric and create even, precise hems with ease.
Whether you are a beginner or an experienced sewer, understanding how to use a hemming foot can enhance your sewing projects and provide professional-looking finishes.
The hemming foot is particularly handy when you need to sew narrow hems, such as on skirts, dresses, pants, or curtains. It eliminates the need for measuring, folding, and pressing the fabric manually, saving time and effort.
With its unique design, the hemming foot enables you to create uniform hems of consistent widths quickly.
how to use a hemming foot well using a hemming foot requires some familiarity with your sewing machine and its compatible attachments.
While specific instructions may vary depending on the make and model of your machine, the basic principles remain the same.
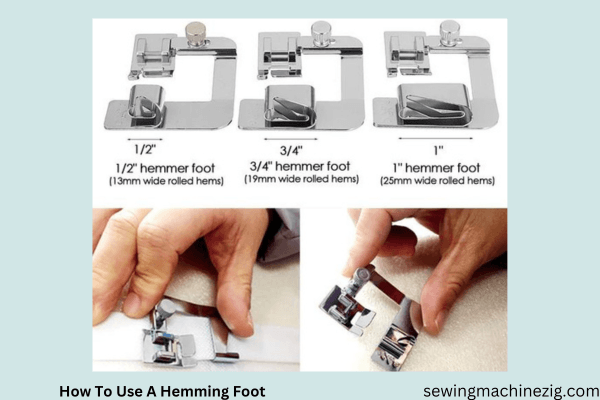
This versatile foot typically consists of a guide to fold the fabric and a channel for the needle to pass through, ensuring accurate stitching along the folded edge.
In this guide, we will explore the step-by-step process of how to use a hemming foot, including preparation, positioning, and stitching techniques.
By following these instructions and practicing on scrap fabric, you will gain confidence in using this valuable tool and achieve professional hem finishes that add a polished touch to your sewing projects.
Step-By-Step Guide:
Step 1: Select The Appropriate Hemming Foot:
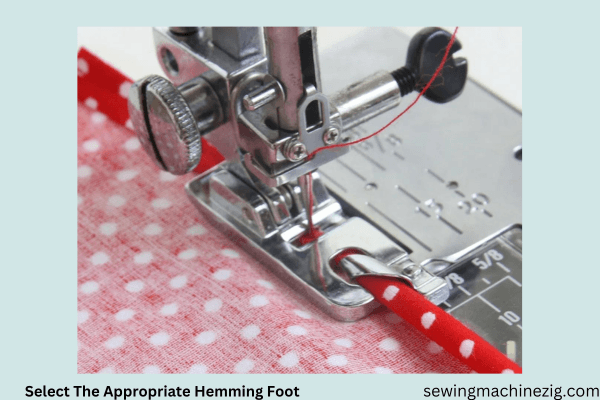
Choose a hemming foot that suits the desired hem width and is compatible with your sewing machine. Hemming feet come in various sizes, so ensure you have the correct one for your project.
Step 2: Prepare The Fabric:
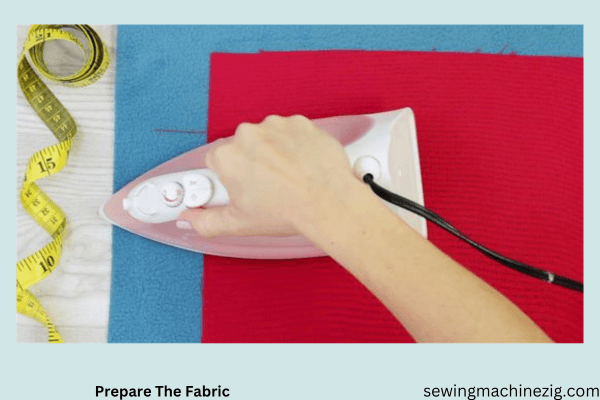
Fold and press the fabric edge to create the desired hem width. This step is crucial to ensure accurate and consistent results. Use an iron to create a crisp fold along the edge of the fabric.
Step 3: Attach The Hemming Foot:
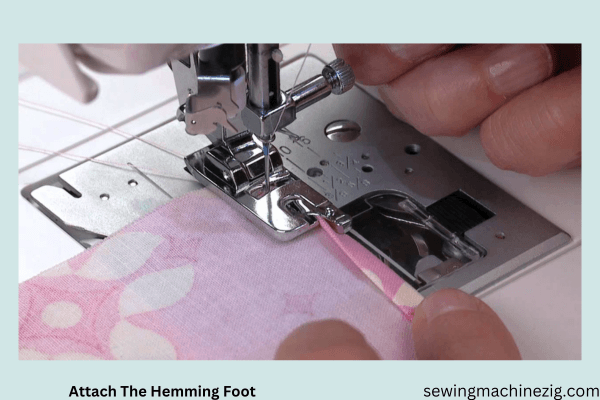
Remove the standard presser foot from your sewing machine and attach the hemming foot according to the manufacturer’s instructions. Ensure it is securely in place before proceeding.
Step 4: Position The Fabric:
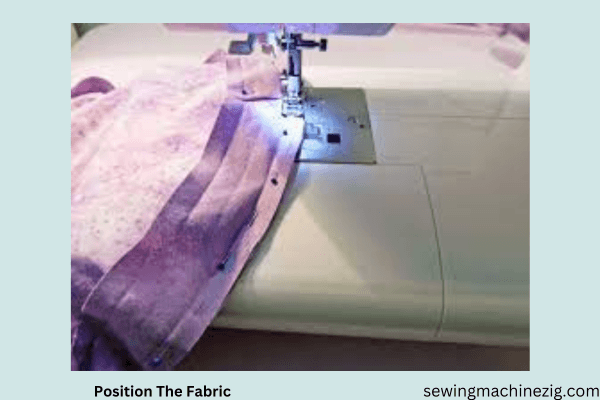
Place the folded fabric edge under the hemming foot, aligning the folded edge with the guide on the foot. Make sure the fabric is positioned evenly and straight to achieve a neat hem.
Step 5: Lower The Presser Foot:
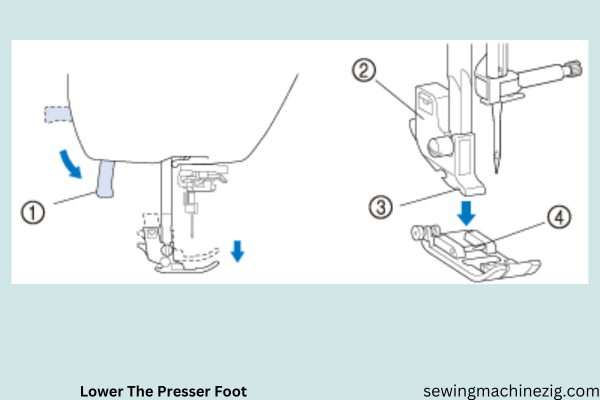
Lower the presser foot lever to secure the fabric in place. The hemming foot should now be pressing against the folded fabric edge, guiding it as you sew.
Step 6: Set The Stitch Length And Width:
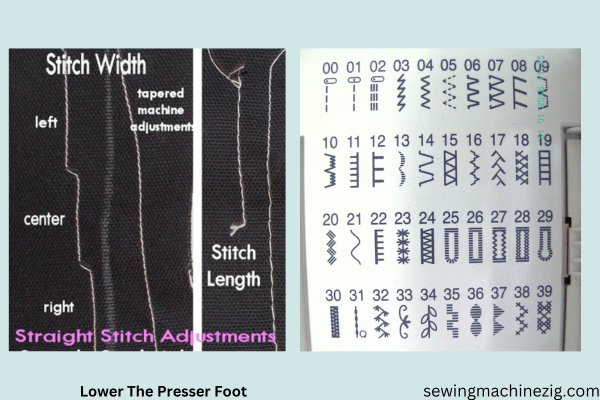
Adjust your machine’s settings to the desired stitch length and width. For most hems, a medium-length straight stitch is suitable. Test on a scrap fabric to ensure the settings produce the desired result.
Step 7: Start Sewing:
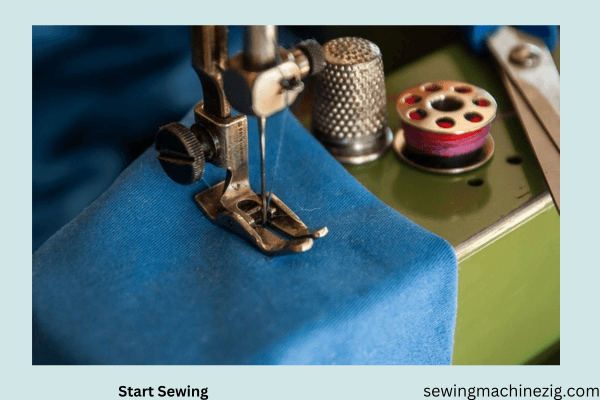
Begin sewing slowly; allowing the hemming foot’s guide to guide the fabric along the folded edge. Keep the fabric taut but not overly stretched. Ensure the needle stitches directly on the fabric fold for a clean, even hem.
Step 8: Continue Sewing And Finish The Hem:
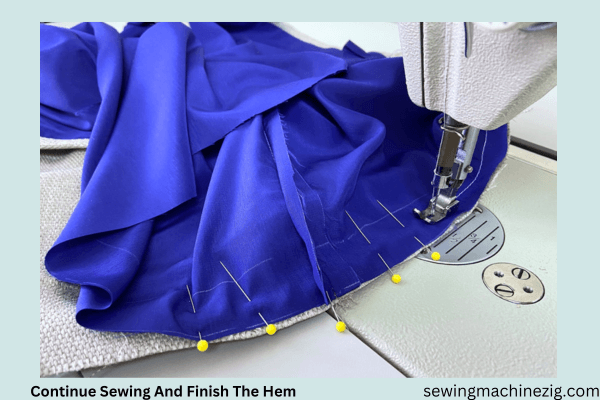
As you continue sewing, gently guide the fabric under the hemming foot, keeping the edge aligned with the guide. Maintain a steady pace, and backstitch at the end to secure the hem. Trim any excess threads.
With practice, you will become more proficient in how to use a hemming foot and achieve consistent, professional-looking hems. Remember to experiment and adjust the settings and techniques according to your specific fabric and project requirements. I hope after reading and following the steps you fully understand how to use a hemming foot.
How To Use A Narrow Hem Foot
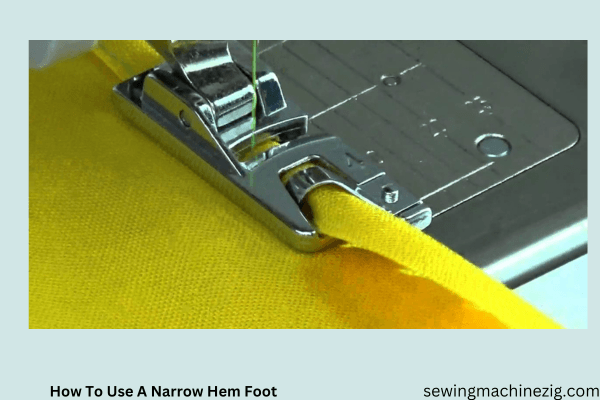
Whether you’re a seasoned seamstress or a beginner exploring the wonderful world of sewing, having the right tools at your disposal can make a world of difference. If you haven’t first followed and understood the steps of how to use a hemming foot, then this process will be a little hard so have patience. Narrow hem foot is another
One such tool that can elevate the quality and aesthetics of your projects is the narrow hem foot. This remarkable accessory allows you to create beautifully finished narrow hems effortlessly.
In this guide, we will delve into the art of how to use a hemming foot narrow, empowering you to add a touch of professionalism to your garments and creations.
Step-By-Step Guide:
Step 1: Understanding The Narrow Hem Foot:
Before we embark on our sewing journey, it’s important to familiarize ourselves with the narrow hem foot. This specialized presser foot is designed to fold and stitch fabric edges to create a narrow, neat hem. It typically has a curled or folded metal guide running along its center, which assists in folding the fabric as you sew.
Step 2: Choosing The Right Fabric And Thread:
To achieve the best results with a narrow hem foot, select lightweight to medium-weight fabrics such as cotton, linen, chiffon, or lightweight silk. These fabrics are easier to manipulate and will yield crisp, delicate hems. Additionally, ensure that your thread matches or complements the fabric color for a seamless finish.
Step 3: Preparing The Fabric:
Before you start hemming, it’s crucial to prepare your fabric appropriately. Begin by pressing the fabric to remove any wrinkles or creases. This step will not only make it easier to work with but also ensure a polished final result.
Step 4: Attaching The Narrow Hem Foot:
Attach the narrow hem foot to your sewing machine according to its instructions. Ensure it is securely fastened, allowing the fabric to smoothly pass underneath without any obstructions. Familiarize yourself with the machine’s settings, such as stitch length and width adjustments, to tailor them to your desired hem width.
Step 5: Marking The Hem Width:
To achieve consistent results, mark the desired hem width on your fabric using a fabric pen, chalk, or pins. This will serve as your guide when folding the fabric while sewing.
Step 6: Folding And Sewing The Hem:
Place the fabric right side up under the narrow hem foot, aligning the marked hemline with the curved metal guide. Begin stitching slowly, allowing the guide to curl the fabric edge towards the needle. As you progress, guide the fabric smoothly and steadily, ensuring that it feeds evenly under the foot. Take care not to pull or stretch the fabric, as it may result in an uneven hem.
Step 7: Finishing The Hem:
Once you’ve completed sewing the initial hem, continue sewing along the fabric’s edge, folding it once more to enclose the raw edge within the hem. This will provide a clean and professional finish to your project. Remember to maintain a steady pace and keep the fabric aligned with the metal guide.
Step 8: Final Touches And Pressing:
After you’ve completed your narrow hem, give it a final press with an iron to set the stitches and create a crisp, polished look. Take care to press gently, using a low to medium heat setting suitable for your fabric type.
Congratulations! You have now mastered the art of using a narrow hem foot. With this newfound skill, you can confidently add beautifully finished narrow hems to garments, curtains, table linens, and more.
Enjoy learning how to use a hemming foot narrow. Embrace the versatility and elegance that a narrow hem foot brings to your sewing repertoire, and let your creativity soar.
How To Sew A Rolled Hem Without A Special Foot
Achieving a delicate and refined rolled hem adds a touch of elegance to your sewing projects, but what if you don’t have a special foot for the task?
Fear not! With a few simple techniques and a regular sewing machine foot, you can create a beautiful rolled hem that rivals the results obtained with a specialized foot.
This guide will walk you through the process step-by-step, showcasing how to achieve a neatly rolled hem without the need for any extra equipment.
Get ready to elevate your sewing skills and add a professional finish to your garments and linens. Let’s dive in and explore the art of sewing a rolled hem without a special foot.
Materials Needed:
- Lightweight To Medium-Weight Fabric (Chiffon, Silk, Lightweight Cotton, Organza)
- Matching Thread
- Sewing Machine
- Fabric Marking Tool (Fabric Pen, Chalk, Or Pins)
- Iron
Step-By-Step Guide:
Step 1: Choosing The Right Fabric And Thread:
Select a suitable lightweight to medium-weight fabric for a rolled hem.
For example, let’s use a delicate chiffon fabric in this guide. Choose a thread color that matches or complements the fabric.
Step 2: Preparing The Fabric:
Press the fabric using a low heat setting to remove any wrinkles or creases. This will make it easier to work with and ensure a polished final result.
Step 3: Marking The Hem Width:
Using your fabric marking tool, mark the desired width of the rolled hem on the fabric. For this example, let’s leave a ¼ inch (0.6 cm) from the fabric’s edge on both the left and right sides.
Step 4: Folding The First Fold:
Fold the fabric along the marked hemline, towards the wrong side of the fabric. In this case, fold the fabric by ¼ inch (0.6 cm) on both sides, aligning with the marked width.
Step 5: Folding The Second Fold:
Fold the fabric once more, rolling the raw edge inside the initial fold. This will enclose the raw edge within the fold and create a neat rolled hem. For our example, roll the fabric by another ¼ inch (0.6 cm) on both sides.
Step 6: Adjusting The Sewing Machine Settings:
Set your sewing machine to a straight stitch with a medium stitch length. Adjust the tension as needed, depending on your fabric and thread combination. Test the stitching on a fabric scrap to ensure the desired result.
Step 7: Positioning The Fabric:
Position the fabric under the sewing machine foot, aligning the folded edge with the edge of the foot. Hold the fabric gently but firmly, guiding it as you stitch. Remember to leave approximately ¼ inch (0.6 cm) from both the left and right sides.
Step 8: Stitching The Rolled Hem:
Begin sewing slowly, ensuring that the needle catches the folded fabric securely with each stitch. Guide the fabric smoothly and evenly under the foot, keeping the folded edge aligned with the edge of the foot. Remember to leave the same ¼ inch (0.6 cm) on both sides as you stitch.
Example: Let’s say you’re working on a scarf made of chiffon fabric. You want to create a delicate rolled hem that is ¼ inch (0.6 cm) wide.
Start by folding the fabric ¼ inch (0.6 cm) towards the wrong side on both sides. Then, fold it again by another ¼ inch (0.6 cm) to enclose the raw edge.
As you sew, position the fabric under the foot, aligning the folded edge with the edge of the foot. Leave approximately ¼ inch (0.6 cm) from both the left and right sides as you stitch the rolled hem.
Conclusion:
I hope after following my article you’re aware of how to use a hemming foot and that the process with easy to advance Steps. Mastering the use of a hemming foot can significantly enhance the quality and appearance of your sewing projects. This specialized foot offers precise guidance and facilitates the creation of beautifully finished hems with ease.
By following the steps outlined in this guide and familiarizing yourself with the hemming foot, you can achieve professional-looking hems that add a polished touch to your garments, curtains, and linens.
Experiment with different fabrics, adjust the foot settings as needed, and practice to refine your technique so that you will learn more about how to use a hemming foot. Embrace the power of the hemming foot and elevate your sewing skills to new heights.
Enjoy the satisfaction of creating impeccable hems that showcase your attention to detail and craftsmanship.
FAQs:
Q 1: How To Use A Hemming Foot And How Does It Work?
A: A hemming foot is a specialized sewing machine foot designed to create perfectly folded and stitched hems. It has a curved or folded metal guide that helps fold the fabric as it is sewn. The fabric is guided along the guide, allowing for consistent and even hems.
Q 2: How Do I Attach The Hemming Foot To My Sewing Machine?
A: Attaching a hemming foot may vary depending on your sewing machine model. Typically, you will need to remove the regular presser foot and attach the hemming foot in its place. Refer to your sewing machine’s manual for specific instructions on attaching the foot.
Q 3: How Do I Adjust The Settings On My Sewing Machine For Using A Hemming Foot?
A: Set your sewing machine to a straight stitch. Adjust the stitch length and width according to your desired hem width. Experiment with different settings on a fabric scrap to find the ideal combination for your project.
Q 4: How Do I Prepare The Fabric For Hemming?
A: Start by pressing the fabric to remove any wrinkles or creases. This will make it easier to work with and ensure a neater finish. You can also consider using fabric stabilizers if needed.
Q 5: How Do I Guide The Fabric Through The Hemming Foot?
A: Place the fabric under the hemming foot with the wrong side facing up. Align the fabric edge with the folded metal guide on the foot. Hold the fabric taut but not stretched, and slowly sew while guiding the fabric along the guide. The foot will automatically fold the fabric as you sew.
Q 6: How Do I Achieve Consistent And Even Hems?
A: To achieve consistent hems, ensure that you maintain a steady sewing pace and keep the fabric aligned with the guide. Avoid pulling or stretching the fabric, as this can result in uneven hems. Practice and experiment with different fabric types to perfect your technique.
Q 7: Can I Use A Hemming Foot For Different Hem Widths?
A: Yes, a hemming foot allows for versatility in hem widths. You can adjust the position of the fabric along the metal guide to create narrower or wider hems. Experiment with different fabric thicknesses and adjust the guide position accordingly for best results.”how to use a hemming foot“

