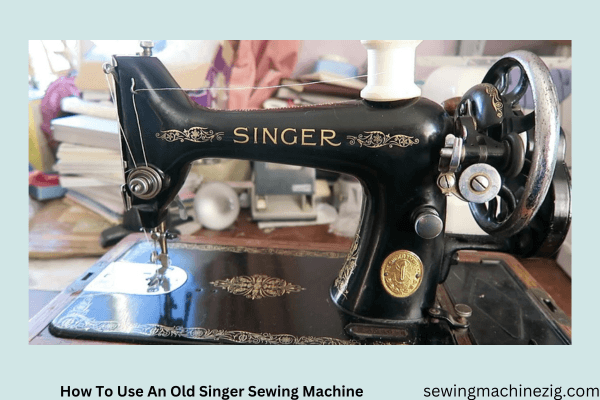
Owning an old Singer sewing machine is like having a cherished piece of history, allowing you to tap into the nostalgia and craftsmanship of yesteryears.
These vintage machines, with their sturdy construction and timeless design, have stood the test of time and continue to captivate sewing enthusiasts and collectors alike.
If you are fortunate enough to own one of these vintage treasures, learning how to use an old Singer sewing machine can open up a world of creative possibilities and a deeper appreciation for traditional sewing techniques.
Using an old Singer sewing machine may require a slightly different approach compared to modern machines, but with a little knowledge and practice, you can bring this timeless beauty back to life.
In this guide, we will take you through the steps of operating an old Singer sewing machine, ensuring that you can embrace the charm and functionality of these classic machines.
From threading the machine to selecting the right needle and mastering the tension settings, we will cover essential aspects of how to use an old Singer sewing machine.
We’ll explore the intricacies of bobbin winding, adjusting stitch length and width, and utilizing the unique features that make these machines so distinctive. In this article, we will discuss a beginner guide on how to use an old Singer sewing machine.
How To Use A Vintage Singer Sewing Machine
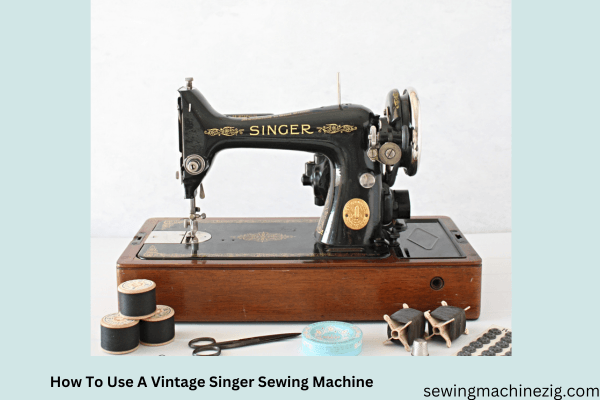
Whether you’ve inherited an old vintage Singer sewing machine or found one at a thrift store, understanding how to use it properly allows you to connect with sewing traditions of the past while creating your own vintage-inspired masterpieces.
So, let’s embark on this journey and discover the artistry that lies within an old Singer sewing machine.
Using an old Singer sewing machine involves several steps. Here is a detailed guide on how to use an old Singer sewing machine, in steps:
Step-By-Step Guide:
Step 1: Familiarize Yourself With The Machine:
Take the time to understand the different parts and features of the sewing machine. Refer to the machine’s manual or online resources for guidance. Learn about the threading path, stitch selection, tension adjustment, and bobbin winding mechanism.
Step 2: Threading The Machine:
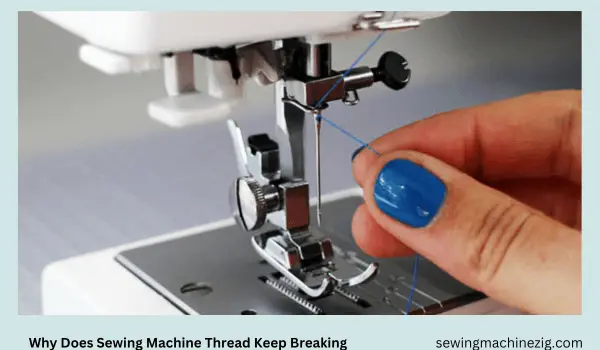
Raise the presser foot and ensure the needle is at its highest position. Follow the threading path indicated on the machine, which typically involves guiding the thread through various tension disks, guides, and needles.
Step 3: Winding The Bobbin:
Place an empty bobbin on the designated spindle. Depending on the machine model, you may need to wind the bobbin on a separate winding mechanism or while sewing. Follow the instructions to wind the bobbin evenly and securely.
Step 4: Inserting The Bobbin:
Open the bobbin case or slide plate and insert the wound bobbin. Ensure the thread is properly threaded through the tension spring or guide. Follow the arrows or markings for correct bobbin placement.
Step 5: Selecting Stitches:
Old Singer machines usually offer a range of stitch options controlled by a dial or lever. Consult the stitch selection guide provided and turn the dial or lever to choose the desired stitch pattern.
Step 6: Adjusting Tension And Stitch Length:
The tension dial on the machine controls the tightness of the upper thread, while the stitch length dial adjusts the length of the stitches. Experiment with different settings to achieve the desired results. Gradually increase or decrease the tension to find the optimal balance for your fabric.
Step 7: Using The Presser Foot And Guiding Fabric:
Lower the presser foot onto the fabric, ensuring it holds the fabric securely in place. Guide the fabric gently and steadily while sewing, maintaining a consistent speed. Use the handwheel to manually turn the needle if necessary.
Step 8: Finishing And Maintaining The Machine:
When you finish sewing, raise the presser foot and trim the excess thread. Regularly clean the old Singer sewing machine to keep it in good working condition. Remove lint and dust from the bobbin area and oil the necessary parts following the manufacturer’s instructions.
Remember, each old Singer sewing machine may have specific nuances, so it’s important to consult the machine’s manual or seek guidance from experienced sewists or vintage sewing machine enthusiasts. With practice and a little patience, you can enjoy the unique charm and learn how to use an old Singer sewing machine and do craftsmanship of using an old Singer sewing machine to create beautiful, timeless projects.
How To Set Up An Old Singer Sewing Machine
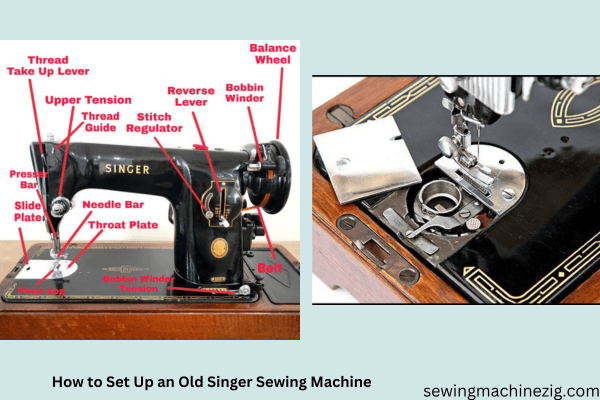
Setting up an old Singer sewing machine is the first step to embarking on a journey of vintage craftsmanship and sewing nostalgia. These timeless machines have captured the hearts of sewing enthusiasts with their sturdy construction and classic design.
To ensure a smooth and enjoyable sewing experience, it’s crucial to set up your old Singer sewing machine correctly. From positioning the machine on a stable surface to threading the needle and preparing the bobbin, understanding the setup process is key.
In this guide, we will take you through the essential steps of setting up an old Singer sewing machine or how to use an old Singer sewing machine, allowing you to unlock the beauty and functionality of these beloved vintage gems.
Step-By-Step Guide:
Step 1: Gather The Necessary Supplies:
Before starting, gather the required supplies including the sewing machine, power cord, foot pedal, spool of thread, empty bobbin, and a needle suitable for your fabric.
Step 2: Choose A Stable Work Surface:
Select a stable and flat surface to place your sewing machine. Ensure that there is enough space around the machine for comfortable sewing and movement.
Step 3: Position The Machine:
Place the sewing machine on the chosen surface, aligning it so that the needle area is easily accessible. Ensure that the machine is centered and balanced to prevent any wobbling during use.
Step 4: Attach The Power Cord And Foot Pedal:
Connect the power cord to the machine’s designated socket, usually located at the back or side. Attach the foot pedal to the machine using the appropriate connector.
Step 5: Prepare The Bobbin:
Wind the bobbin using the desired thread color and type. Follow the instructions specific to your machine for proper bobbin winding. Place the wound bobbin on the bobbin spindle or in the bobbin case, depending on your machine model.
Step 6: Thread The Machine:
Follow the threading path indicated on the machine or consult the manual for threading instructions. Begin by placing the spool of thread on the spool pin and guiding the thread through various thread guides, tension disks, and finally through the needle.
Step 7: Adjust The Tension And Stitch Settings:
Refer to the machine’s manual to locate the tension dial and stitch selection options. Set the tension to a medium setting, and choose the desired stitch pattern using the stitch selection dial or lever. Adjust the stitch length and width as needed.
Step 8: Test The Machine:
Before starting your sewing project, conduct a test run on a scrap fabric. Ensure that the machine is properly threaded, the bobbin is correctly inserted, and the stitches are forming evenly.
By following these steps, you can successfully set up your old Singer sewing machine, ensuring it is ready for your sewing endeavors.
Remember to consult the machine’s manual for specific instructions and guidelines unique to your machine model.
With proper setup, you can easily set up a vintage machine or learn how to use an old Singer sewing machine, embrace the vintage charm and functionality of your old Singer sewing machine and enjoy the art of sewing.
Conclusion:
Using an old Singer sewing machine brings a sense of nostalgia and craftsmanship to your sewing projects.
With the right knowledge and understanding, you can navigate the intricacies of these vintage machines and unleash their true potential.
From threading the machine to adjusting tension and selecting stitches, each step plays a crucial role in achieving beautiful and precise stitching.
Embrace the unique features and quirks of your old Singer sewing machine, and with practice, you’ll gain and learn how to use an old Singer sewing machine and confidence in creating timeless garments and crafts.
Whether you’re a sewing enthusiast or simply appreciate the artistry of these vintage gems, the journey of using an old Singer sewing machine is an opportunity to connect with the rich history of sewing and showcase your creativity. I hope After reading this article you’re fully aware of how to use an old Singer sewing machine. Happy sewing!
FAQs – How to Use an Old Singer Sewing Machine:
Q 1: How To Thread An Older Singer Sewing Machine?
A: To thread an old Singer sewing machine, start by raising the presser foot and ensuring the needle is at its highest position.
Follow the threading path indicated on the machine, which typically involves guiding the thread through tension disks, guides, and the needle. Consult the machine’s manual for specific threading instructions.
Q 2: How Do I Wind The Bobbin On An Old Singer Sewing Machine?
A: To wind the bobbin on an old Singer sewing machine, place an empty bobbin on the designated spindle.
Follow the machine’s instructions to wind the bobbin evenly and securely. Some machines have a separate bobbin winding mechanism, while others wind the bobbin while sewing. Refer to the manual for your machine’s specific bobbin winding process.
Q 3: How Do I Insert The Bobbin On An Old Singer Sewing Machine?
A: To insert the bobbin on an old Singer sewing machine, open the bobbin case or slide plate. Insert the wound bobbin, following the arrows or markings for correct placement. Make sure the thread is properly threaded through any tension springs or guides associated with the bobbin case.
Q 4: How Do I Select Stitches On An Old Singer Sewing Machine?
A: To select stitches on an old Singer sewing machine, consult the stitch selection guide provided with your machine.
Use the stitch selection dial or lever to choose the desired stitch pattern. Vintage Singer machines may offer various stitches, but the options could be limited compared to modern machines.
Q 5: How Do I Adjust The Tension On An Old Singer Sewing Machine?
A: To adjust the tension on an old Singer sewing machine, locate the tension dial or disks. Experiment with different settings to achieve the desired tension for your fabric.
Start with a medium setting and make small adjustments as needed. Practice on scrap fabric to find the ideal tension for your specific sewing project.
Q 6: How Do I Adjust The Stitch Length On An Old Singer Sewing Machine?
A: To adjust the stitch length on an old Singer sewing machine, look for the stitch length dial or lever. Turn the dial or move the lever to adjust the stitch length according to your preference.
Vintage Singer machines usually provide a range of stitch lengths to accommodate different sewing needs.
Q 7: How Do I Maintain An Old Singer Sewing Machine?
A: To maintain an old Singer sewing machine, keep it clean and well-oiled. Regularly remove lint and dust from the bobbin area and other accessible parts.
Consult the machine’s manual for specific maintenance instructions, including the recommended type and frequency of oiling.

