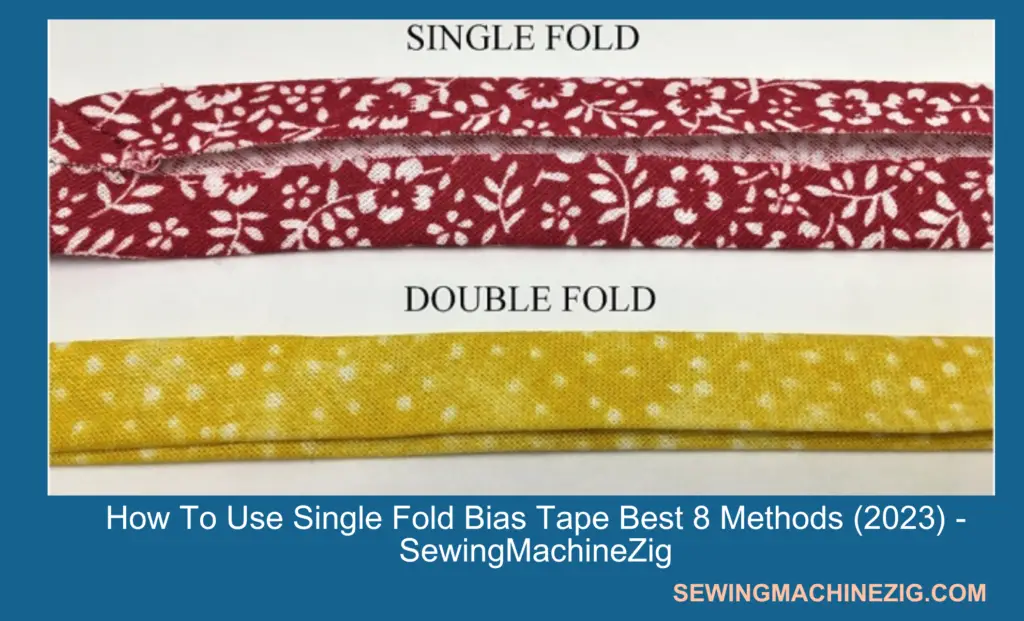
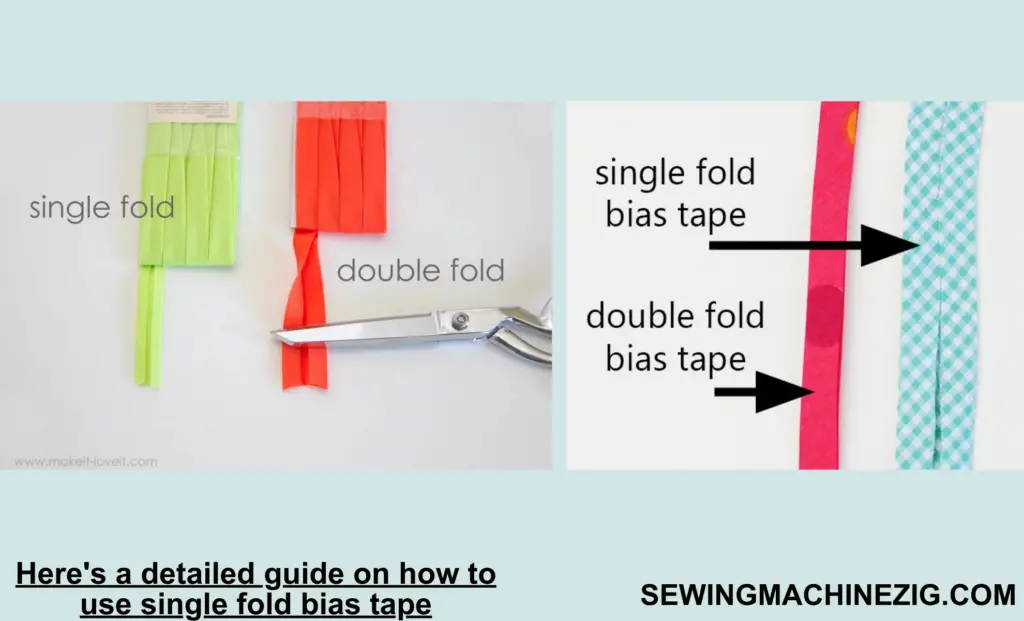
How to use Single fold bias tape, Which is a versatile and essential sewing notion that can be used for a variety of projects. Bias tape is a narrow strip of fabric cut on the bias, which allows it to stretch and conform to curves and edges. It can be used to finish raw edges, add decorative accents, and create casings for drawstrings or elastic. Single fold bias tape is a type of bias tape that has been folded once, with both edges folded towards the center, creating a single fold.
This type of bias tape is commonly used for finishing the edges of garments and other sewing projects. In this article, we will discuss How to use Single fold bias tape, to achieve a professional and polished finish for your sewing projects.
Here’s a detailed guide on how to use single fold bias tape
Materials needed:
- Single-fold bias tape
- Sewing machine or needle and thread
- Fabric to bind
- Pins
- Scissors
- Iron
- Ruler or tape measure
- Marking tool
Steps:
Step 1: Choose the right size and color of bias tape
Choose the right size and color of bias tape for your project. Bias tape is available in different widths, materials, and colors. Make sure you have enough bias tape to go around the entire edge of your project.
Example: If you are binding a quilt, choose a bias tape that is wide enough to cover the raw edges and matches the color of your fabric.
Step 2: Cut the fabric
Cut the fabric to the correct size and shape for your project. Make sure the fabric is clean and pressed. Use a rotary cutter or scissors to cut the fabric to the correct size and shape for your project.
Example: If you are binding the edges of a neck or armhole, cut the fabric to match the curve of the garment.
Step 3: Use Pin in bias tape
Place the bias tape on the right side of the fabric, with the wrong side facing up. Align the raw edges and match the curves of the fabric and the bias tape. Use pins to hold the bias tape in place.
Example: Pin the bias tape to the neckline, starting at the center back and continuing around the front.
Step 4: Remove pins
Use a sewing machine or needle and thread to sew the bias tape to the fabric, following the markings you made on the fabric and bias tape. Remove the pins as you go.
Example: Use a sewing machine to sew the bias tape to the fabric, starting at the center back and continuing around the front.
Step 5: Fold the bias tape
Fold the bias tape to the wrong side of the fabric, covering the raw edges. Pin the bias tape in place, making sure the fold is even and the raw edges are completely enclosed.
Example: Fold the bias tape to the wrong side of the fabric, starting at the center back and continuing around the front. Pin in place.
Step 6: Sew the bias tape
Sew the bias tape to the fabric on the wrong side, following the fold line. Use a sewing machine or needle and thread to sew the bias tape to the fabric on the wrong side, following the fold line. Make sure the stitches are even and the bias tape is securely attached to the fabric.
Example: Use a sewing machine to sew the bias tape to the fabric on the wrong side, following the fold line.
Step 7: Trim the excess
Trim the excess fabric and bias tape, leaving a small seam allowance.
Example: Trim the fabric and bias tape close to the stitching line, but be careful not to cut the stitches.
Step 8: Press the Bias Tape
Finally, press the bias tape to give it a crisp, professional look. Use a pressing cloth to protect delicate fabrics.
By following these steps you will easily learn How to use Single fold bias tape, by yourself.
Tips about How To Use Single Fold Bias Tape:
Single-fold bias tape is a versatile sewing notion that can be used in a variety of ways to add decorative accents and finish edges. Here are some Tips on How to use Single fold bias tape, in your sewing projects:
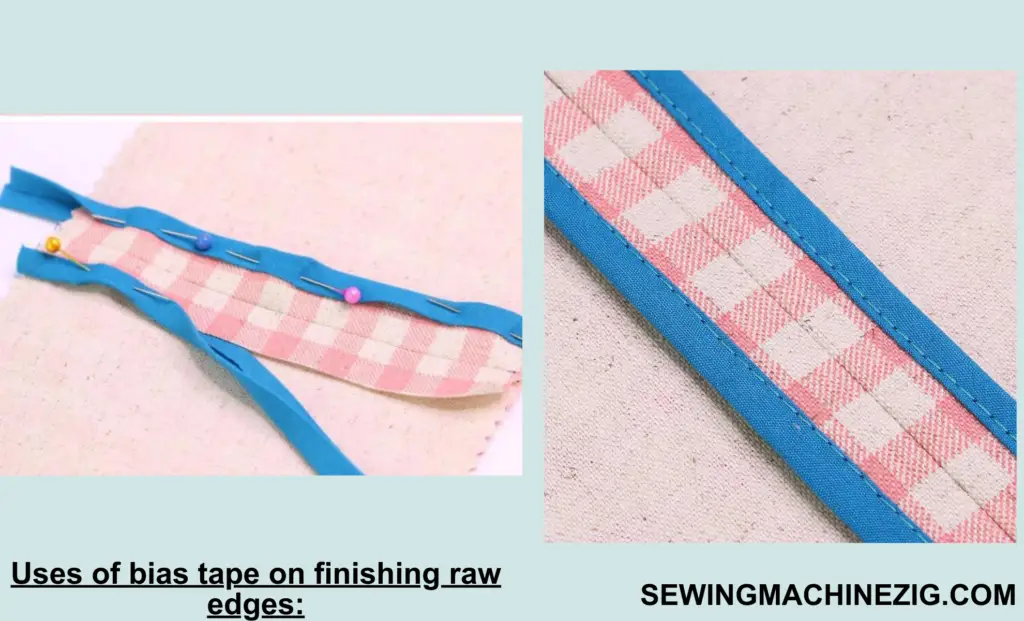
Uses of bias tape on finishing raw edges:
Single-fold bias tape can be used to finish the raw edges of fabrics. Simply sew the bias tape to the raw edge, and then fold it over to the backside of the fabric and sew it in place. This will prevent the fabric from fraying and give it a neat and clean finish.
Binding seams:
You can use single-fold bias tape to bind the seams of your garments. This is especially useful for finishing curved or circular seams, as the bias tape can easily conform to the curves. Simply sew the bias tape to the raw edge of the seam allowance, fold it over to the backside of the fabric, and sew it in place.
Adding Accents:
How to use single-fold bias tape, single fold bias tape can be used to add decorative accents to your sewing projects. You can use it to create piping, ruffles, or decorative edging on clothing, pillows, and other items. Simply sew the bias tape to the edge of the fabric, and then sew the fabric with the attached bias tape to your project.
Creating Casings:
Single-fold bias tape can be used to create casings for drawstrings or elastic. Simply sew the bias tape to the raw edge of the fabric, leaving a small opening for the drawstring or elastic. Thread the drawstring or elastic through the casing, and then sew the bias tape in place to close the opening.
Apply:
Single-fold bias tape can be used to create intricate appliqué designs on fabric. Simply sew the bias tape to the fabric in the desired design, and then sew the fabric with the attached bias tape to your project.
By using single-fold bias tape, you can add professional and polished finishes to your sewing projects. These are just a few of the many ways to use this versatile sewing notion. Experiment with different techniques and applications to discover How to use Single fold bias tape, and you can also enhance your sewing projects.
Conclusion:
How to use Single fold bias tape
How to use Single fold bias tape, Which is a handy tool that can be used to finish raw edges or add decorative trims to various sewing projects. How to use Single fold bias tape, Using bias tape can be intimidating for beginners, but following the eight steps outlined in this article can make the process easy and stress-free. When using single fold bias tape, it’s important to choose the right width, color, and material for your project, and to measure and cut the tape to the correct size.
By sewing the tape along the folded edge and folding it over the raw edge of your fabric, you can achieve a clean and professional-looking finish that will make your sewing project stand out. With practice and patience, you can master the art of using single fold bias tape in your sewing projects. I hope now you are fully aware of How to use Single fold bias tape,
FAQs:
The basic answer you should know:
Q: What is single-fold bias tape and how to use single-fold bias tape?
A: Single-fold bias tape is a narrow strip of fabric that has been cut on the bias (diagonal) grain of the fabric. It is often used to finish raw edges or add decorative trims to various sewing projects. The bias cut allows the tape to be more flexible and able to curve around edges and corners.
Q: How wide is single-fold bias tape?
A: Single-fold bias tape is available in various widths, ranging from 1/2 inch to 2 inches. The width you choose will depend on the width of the seam or edge you need to cover or finish. It’s important to measure the edge or seam before choosing the width of your bias tape to ensure the right fit.
Q: How do I choose the right color and material for my project?
A: The color and material of your bias tape will depend on the fabric and design of your project. You can choose a color that matches or contrasts with your fabric, and a material that complements the texture and weight of your fabric. For example, if you are working with a lightweight fabric, you may want to use a lightweight bias tape made of cotton or polyester. It’s always a good idea to test a small piece of bias tape on your fabric to make sure it looks and feels right.
Q: Can I make my own bias tape?
A: Yes, you can make your own bias tape by cutting strips of fabric on the bias grain and folding them in half lengthwise. There are also bias tape makers available that can make the process easier and more efficient. Making your own bias tape allows you to customize the color and material to your liking.
Q: Can I use single-fold bias tape for curved edges?
A: Yes, single-fold bias tape can be used for curved edges. You may need to clip the bias tape along the curve to help it lay flat and avoid puckering. It’s important to use a bias tape that is wide enough to cover the curved edge without stretching or distorting.
Q: Can I use single-fold bias tape for quilt binding?
A: Yes, single-fold bias tape can be used for quilt binding. However, double-fold bias tape is more commonly used for quilt binding as it provides more coverage and durability. If you choose to use single-fold bias tape for quilt binding, make sure to fold it over the raw edge of the quilt and sew it in place securely.
Q: How do I sew the single-fold bias tape to my project?
A: To sew the single-fold bias tape to your project, first align the unfolded edge of the bias tape with the raw edge of your fabric, right sides together. Sew along the crease line of the bias tape using a straight stitch. Then fold the bias tape over the raw edge of your fabric and stitch it in place along the folded edge of the bias tape.
Q: How do I miter corners with single-fold bias tape?
A: To miter corners with single-fold bias tape, first sew the bias tape to one side of the corner, stopping at the corner point. Fold the bias tape up and away from the corner at a 45-degree angle. Then fold the bias tape back down over the adjacent side, aligning the folded edge of the bias tape with the raw edge of the adjacent side. Continue sewing along the crease line of the bias tape. Repeat on the other side of the corner for a neat and professional look.

