Embarking on your sewing journey with a Husqvarna Viking machine? Mastering essential skills like winding a bobbin is key. In this step-by-step guide, we unravel the intricacies of “How to Wind a Bobbin on a Husqvarna Viking Sewing Machine.” Efficient bobbin winding ensures a seamless sewing experience, allowing you to focus on your creative projects without interruptions.
Let’s delve into the process, demystifying each step to empower you with the knowledge needed to optimize your Husqvarna Viking sewing machine for impeccable stitching.
How To Wind A Bobbin On A Husqvarna Viking Sewing Machine Detailed Answer
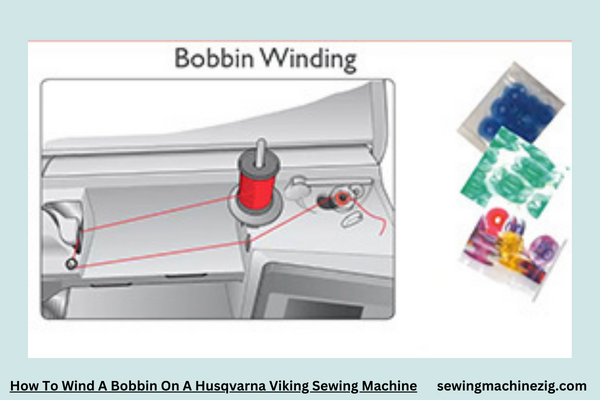
Let’s delve into the step-by-step process “How to Wind a Bobbin on a Husqvarna Viking Sewing Machine” of winding a bobbin on a Husqvarna Viking sewing machine, demystifying this essential task for sewists of all levels.
Step 1: Preparation
Begin by ensuring your Husqvarna Viking sewing machine is powered on and threaded correctly. Have the desired thread spool on the vertical spool pin and an empty bobbin ready.
Step 2: Thread the Machine
Guide the thread through the machine’s threading path, following the machine’s manual to ensure proper placement through tension discs and guides.
Step 3: Place the Bobbin
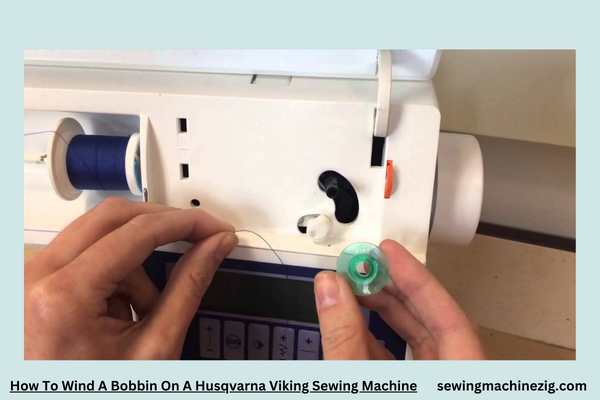
Locate the bobbin winding spindle on your machine. Slide the empty bobbin onto the spindle, ensuring it clicks into place securely.
Step 4: Engage the Bobbin Winding Mechanism
On your machine, locate the bobbin winding mechanism. This is typically a small lever or switch near the bobbin winding spindle. Engage this mechanism to disengage the needle mechanism and allow the machine to focus on winding the bobbin.
Step 5: Thread the Bobbin
Take the free end of the thread and insert it through a hole in the bobbin from the inside out. Place the bobbin onto the winding spindle and slide it to the right to secure it.
Step 6: Start Winding
Hold the thread end with one hand and, with the other, press the foot pedal to start the machine. The bobbin will begin winding, and you should guide the thread to ensure even distribution.
Step 7: Monitoring Thread Tension
Keep an eye on the thread tension. Adjust the tension dial if needed, ensuring the thread winds smoothly and evenly onto the bobbin.
Step 8: Automatic Stop or Manual Stop
Many Husqvarna Viking machines have an automatic stop feature that halts bobbin winding when it’s full. If your machine doesn’t have this feature, stop the winding when you have enough thread on the bobbin, leaving a small space.
Step 9: Cut the Thread
Once the bobbin is adequately wound, cut the thread, disengage the bobbin winding mechanism, and remove the bobbin from the spindle.
Step 10: Final Checks
Inspect the wound bobbin for evenness and proper tension. Ensure the bobbin is securely placed in its case, following the machine’s manual for guidance.
Repeat this process as needed, allowing you to have a ready supply of wound bobbins for your sewing projects. Regularly refer to your Husqvarna Viking sewing machine manual for specific instructions tailored to your model.
With this comprehensive guide, mastering How to Wind a Bobbin on a Husqvarna Viking Sewing Machine becomes a seamless and empowering part of your sewing journey.
Viking Sewing Machine How To Thread Bobbin
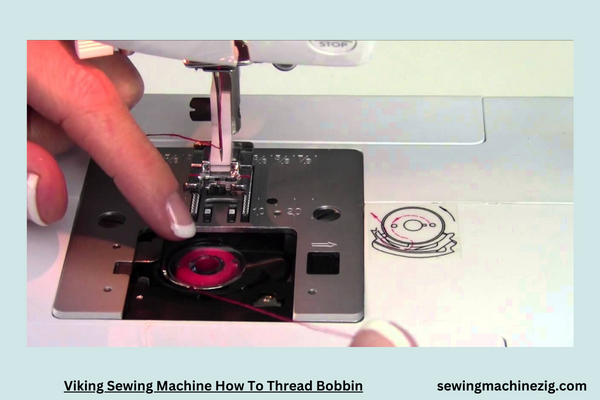
Mastering the skill of winding a bobbin on your Husqvarna Viking sewing machine is crucial for a smooth and enjoyable sewing experience.
Follow this comprehensive step-by-step guide to ensure you accurately wind the bobbin and optimize the overall performance of your Husqvarna Viking sewing machine.
Step 1: Gather Your Supplies
Begin by collecting your essential supplies: your Husqvarna Viking sewing machine, an empty bobbin, and the thread you intend to use.
Step 2: Choose the Right Thread
Opt for a high-quality thread that suits your project. It should match both the needle thread and the fabric you’ll be working with.
Step 3: Turn Off Your Machine
Prioritize safety by turning off your Husqvarna Viking sewing machine before you begin the bobbin winding process.
Step 4: Locate the Bobbin Area
Find the bobbin area on your Husqvarna Viking sewing machine, usually positioned near the needle. Refer to your machine’s manual for precise details.
Step 5: Remove the Bobbin Case
Follow your machine’s instructions to open the bobbin case. This may involve sliding a cover or releasing a latch.
Step 6: Insert the Thread
Place your selected thread on the spool pin, ensuring it unwinds in the correct direction. Pay attention to any guides or tension discs recommended by your machine.
Step 7: Guide the Thread
Refer to the threading path outlined in your Husqvarna Viking sewing machine manual. Typically, this involves guiding the thread through various hooks, guides, and tension discs.
Step 8: Thread the Bobbin
Thread the bobbin by passing the thread’s end through a hole in the bobbin. Secure the bobbin on the bobbin winder spindle.
Step 9: Engage the Bobbin Winder
Follow your machine’s instructions to engage the bobbin winder, which may entail pushing a lever or activating a switch.
Step 10: Start Winding
Press the foot pedal or start button to initiate the bobbin winding process. Ensure the thread winds evenly, stopping when you have a sufficient amount on the bobbin.
Step 11: Cut the Thread
Once the bobbin is adequately wound, cut the thread and disengage the bobbin winder. Remove the bobbin from the spindle.
Step 12: Insert the Bobbin
Insert the wound bobbin into the bobbin case, following the directional guide in your Husqvarna Viking sewing machine manual.
Step 13: Thread the Needle
With the bobbin in place, follow the threading path to thread the needle. Consult your machine’s manual for the correct sequence.
Step 14: Pull Up the Bobbin Thread
Hold the end of the needle thread and manually turn the handwheel towards you. This action lowers the needle and brings up the bobbin thread.
Step 15: Secure Both Threads
Hold both threads in your hands, positioning them under the presser foot and to the back before starting your stitching.
Step 16: Test the Tension
Sew a few test stitches on scrap fabric to ensure the tension is balanced. Adjust the tension settings if necessary, following your machine’s guidelines.
By mastering ” How to Wind a Bobbin on a Husqvarna Viking Sewing Machine” the bobbin winding process on your Husqvarna Viking sewing machine, you lay the groundwork for successful and stress-free sewing sessions. Consistent practice and consulting your machine’s manual will enhance your bobbin winding skills, ensuring optimal performance for a variety of sewing projects.
Winding The Bobbin On A Viking Sewing Machine
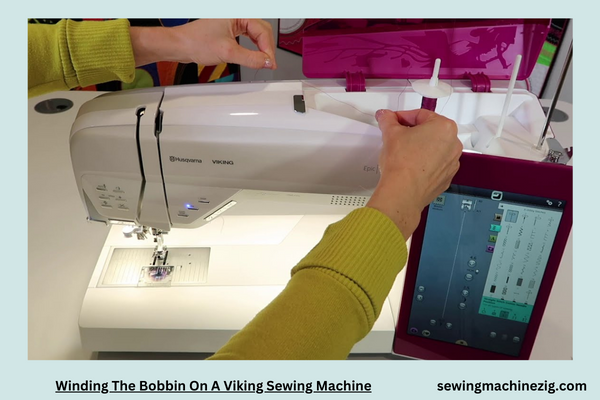
Winding the bobbin on your Husqvarna Viking sewing machine is an essential skill for achieving seamless and efficient sewing. Here’s a comprehensive guide to mastering this process:
Step 1: Gather Your Supplies
Begin by gathering your essentials – a Husqvarna Viking sewing machine, an empty bobbin, and the thread chosen for your project.
Step 2: Choose the Right Thread
Select a high-quality thread that complements both the needle thread and the fabric you’ll be working with.
Step 3: Turn Off Your Machine
Always prioritize safety by turning off your Husqvarna Viking sewing machine before beginning the threading process.
Step 4: Locate the Bobbin Area
Find the bobbin area near the needle on your Husqvarna Viking sewing machine, referring to your machine’s manual for specific details.
Step 5: Remove the Bobbin Case
Follow your machine’s instructions to open the bobbin case, which may involve sliding a cover or releasing a latch.
Step 6: Insert the Thread
Place the thread on the spool pin, ensuring it unwinds in the correct direction. Follow any guides or tension discs specified by your Husqvarna Viking machine.
Step 7: Guide the Thread
Navigate the threading path as outlined in your Husqvarna Viking sewing machine manual, passing the thread through hooks, guides, and tension discs.
Step 8: Thread the Bobbin
Thread the bobbin by passing the end through a designated hole and securing it on the bobbin winder spindle.
Step 9: Engage the Bobbin Winder
Follow your machine’s instructions to engage the bobbin winder, which might involve pushing a lever or engaging a switch.
Step 10: Start Winding
Press the foot pedal or start button to evenly wind the bobbin. Stop when you have sufficient thread on the bobbin.
Step 11: Cut the Thread
After winding, cut the thread, disengage the bobbin winder, and carefully remove the bobbin.
Step 12: Insert the Bobbin
Place the wound bobbin into the bobbin case, following the guidelines in your Husqvarna Viking sewing machine manual.
Step 13: Thread the Needle
With the bobbin in place, follow the threading path to thread the needle. Refer to your machine’s manual for the correct sequence.
Step 14: Pull Up the Bobbin Thread
Hold the end of the needle thread and manually turn the handwheel towards you, lowering the needle and bringing up the bobbin thread.
Step 15: Secure Both Threads
Hold both threads together, placing them under the presser foot and to the back before commencing your stitching.
Step 16: Test the Tension
Sew a few test stitches on scrap fabric to ensure balanced tension. Adjust if necessary, following your Husqvarna Viking machine’s guidelines.
By following these steps, you lay the groundwork for successful sewing sessions with your Husqvarna Viking machine. Regular practice and consulting your machine’s manual will elevate your threading proficiency, ensuring optimal performance across a variety of sewing projects.
Conclusion
In conclusion, mastering How to Wind a Bobbin on a Husqvarna Viking Sewing Machine is a fundamental skill that empowers sewists in their creative endeavors. Following the detailed steps provided ensures a smooth and efficient process, setting the foundation for successful and stress-free sewing sessions.
Regular practice and consultation with the machine’s manual contribute to heightened proficiency, allowing individuals to optimize their sewing machine’s performance across a diverse range of projects. Elevate your sewing experience by confidently navigating the essential task of bobbin winding on a Husqvarna Viking machine.
FAQS
Q1: How do I wind a bobbin on a Husqvarna Viking sewing machine?
A: To wind a bobbin on your Husqvarna Viking sewing machine, start by gathering your essentials – an empty bobbin, chosen thread, and turning off the machine for safety. Follow your machine’s manual to locate the bobbin area, insert the thread, engage the bobbin winder, and start winding. Once done, cut the thread, insert the bobbin, thread the needle, and you’re ready to sew. “How to Wind a Bobbin on a Husqvarna Viking Sewing Machine“
Q2: Can I use any thread for winding a bobbin on a Husqvarna Viking sewing machine?
A: It’s crucial to choose a high-quality thread suitable for your project, ensuring it matches both the needle thread and the fabric. Always refer to your machine’s manual for recommended thread types and guidelines. “How to Wind a Bobbin on a Husqvarna Viking Sewing Machine“
Q3: How do I troubleshoot bobbin winding issues on my Husqvarna Viking sewing machine?
A: If you encounter bobbin winding problems, check the thread path, ensure proper engagement of the bobbin winder, and confirm that the bobbin is correctly inserted. Consult your machine’s troubleshooting section in the manual for specific solutions.
Q4: Is there a specific tension setting for bobbin winding on a Husqvarna Viking sewing machine?
A: Generally, bobbin winding is independent of the machine’s tension settings. However, it’s advisable to check your machine’s manual for any specific recommendations or adjustments related to bobbin winding. “How to Wind a Bobbin on a Husqvarna Viking Sewing Machine“
Q5: Can I wind multiple bobbins in one go on a Husqvarna Viking sewing machine?
A: While most machines require winding one bobbin at a time, some advanced models may offer multiple bobbin winding features. Refer to your machine’s manual to understand its capabilities and limitations regarding simultaneous bobbin winding. “How to Wind a Bobbin on a Husqvarna Viking Sewing Machine“

