Embarking on the intricate journey of textile craftsmanship, one encounters the enigmatic What Is A Serger Sewing Machine. Akin to a textile sorcerer, the serger possesses the alchemical ability to transform raw fabric into refined masterpieces. Delving into the symbiosis of stitches and edges, this guide demystifies the question: “What Is A Serger Sewing Machine?” Unravel the complexity of this multifaceted artisan, where every loop and seam converges with precision.
From seamless hems to professional finishes, the serger emerges as the silent architect in the creation of tailored wonders. Explore the interplay of creativity and functionality as we decode the secret language of the serger.
What Is A Serger Sewing Machine Detailed Answer
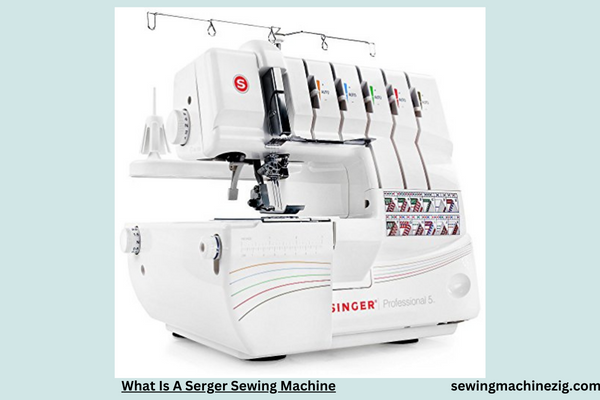
Embarking on your sewing journey opens doors to a vast array of machines, each designed for specific purposes. Among these, a serger sewing machine stands out as a powerful and versatile tool.
In this detailed guide, “What Is A Serger Sewing Machine” We will explore what a serger sewing machine is, its functionalities, and step-by-step instructions on how to use this invaluable device for achieving professional-looking seams and finishes.
Understanding a Serger Sewing Machine:
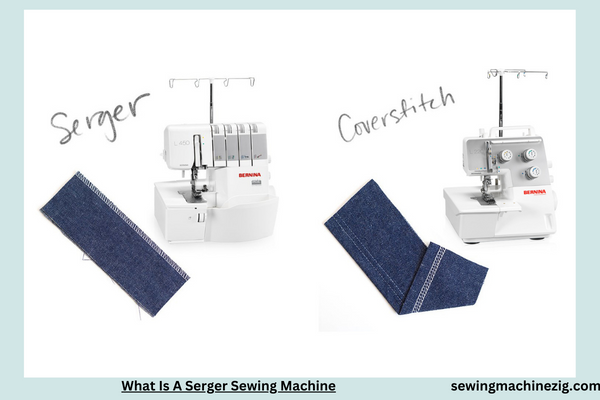
A serger, also known as an overlocker in some regions, is a specialized sewing machine designed to handle a variety of tasks that go beyond the capabilities of a conventional sewing machine. While traditional sewing machines are adept at creating seams and hems, sergers excel in creating finished edges, preventing fraying, and providing a clean and professional look to your projects.
Key Features of a Serger Sewing Machine:
- Multiple Threads:
- Sergers typically use multiple threads simultaneously. Common configurations include 3-thread and 4-thread setups, offering different stitch variations for various fabrics and applications.
- Cutting Blade:
- One of the distinctive features of a serger is its built-in cutting blade. As you sew, the blade trims the fabric’s edge, creating neatly finished edges and preventing fraying.
- Versatile Stitch Options:
- Sergers can produce a variety of stitches, including overlock, flatlock, and rolled hem stitches. These stitches contribute to the durability and professional finish of your sewing projects.
- Speed and Efficiency:
- Sergers are known for their speed and efficiency. They can quickly sew and finish edges, making them an ideal choice for large projects or those requiring a high level of precision.
- Differential Feed:
- The differential feed feature allows the serger to handle different fabric types seamlessly. It prevents stretching or puckering of fabrics, ensuring smooth and even stitches.
Step-by-Step Guide on How to Use a Serger Sewing Machine:
Step 1: Familiarize Yourself with Your Serger
Before diving into your project, take the time to become familiar with the different components of your serger. Identify the thread paths, tension dials, stitch length, and cutting blade. Consult your machine’s manual for specific details related to your model.
Step 2: Thread the Serger
Threading a serger may seem intimidating due to the multiple threads involved, but it becomes straightforward with practice. Follow these general steps:
a. Lower the Presser Foot: – Ensure the presser foot is raised before starting the threading process.
b. Raise the Thread Guide Bar: – Lift the thread guide bar to its highest position, allowing easy access to the thread paths.
c. Thread the Upper Looper: – Begin by threading the upper looper. Follow the color-coded thread paths indicated on your serger.
d. Thread the Lower Looper: – Next, thread the lower looper using the designated thread path. Refer to your machine’s manual for specific instructions.
e. Thread the Needles: – Thread the needles according to your desired stitch configuration (3-thread or 4-thread). Again, follow the color-coded paths.
f. Engage the Cutting Blade: – Ensure the cutting blade is engaged for projects requiring trimming.
Step 3: Adjust Tension Settings
Proper tension settings are crucial for achieving balanced and professional-looking stitches. Adjust the tension dials based on the type of fabric you are working with. Experiment on a scrap piece to find the optimal tension for your specific project.
Step 4: Set Differential Feed
The differential feed controls the rate at which the front and rear feed dogs move, preventing stretching or puckering of fabrics. Adjust the differential feed setting based on the fabric type. A differential feed setting of 1.0 is standard, but you may need to increase or decrease it depending on the fabric.
Step 5: Test on Scrap Fabric
Before working on your actual project, test the serger on a scrap piece of fabric. This allows you to fine-tune the tension and differential feed settings and ensures that the machine is producing the desired stitch quality.
Step 6: Begin Sewing Your Project
Once you are confident in your serger’s setup, start sewing your project. Whether you’re creating seams, finishing edges, or adding decorative stitches, the serger’s efficiency will enhance your sewing experience.
Common Issues and Solutions:
- Thread Breakage:
- Issue: Threads breaking during sewing.
- Solution: Ensure the threads are correctly threaded through the machine. Check for any knots or tangles and rethread as needed. Adjust the tension if breakage persists.
- Uneven Stitches:
- Issue: Stitches appearing uneven or loopy.
- Solution: Check and adjust the tension settings. Uneven stitches may result from imbalanced tension. Ensure that the differential feed is set appropriately for the fabric.
- Fabric Puckering or Stretching:
- Issue: Fabric puckering or stretching as it’s sewn.
- Solution: Adjust the differential feed to a higher setting if the fabric is stretching. Lower the setting if there is puckering. Experiment with tension adjustments as well.
- Cutting Blade Not Functioning:
- Issue: The cutting blade is not trimming the fabric.
- Solution: Check if the cutting blade is engaged. If not, engage it according to your machine’s manual. Ensure the blade is sharp and not dull.
Additional Tips:
- Regular Maintenance:
- Keep your serger well-maintained by cleaning it regularly. Remove lint, dust, and any accumulated threads to ensure smooth operation.
- Experiment with Stitch Configurations:
- Explore the various stitch configurations your serger offers. Whether it’s a 4-thread overlock, rolled hem, or flatlock stitch, each configuration adds versatility to your projects.
- Use Quality Serger Thread:
- Invest in high-quality serger thread to ensure smooth stitching and reduce the likelihood of thread breakage.
- Practice Serger Serging Techniques:
- Practice serging on scrap fabric to master techniques such as corners, curves, and gathering. This helps build confidence in handling different projects.
By following this comprehensive guide “What Is A Serger Sewing Machine” and addressing common issues, you’ll unlock the full potential of your serger sewing machine. Whether you’re a beginner or an experienced sewist, the precision and efficiency of a serger will elevate the quality of your sewing projects. Happy serging!
Everything You Wanted To Know About Sergers
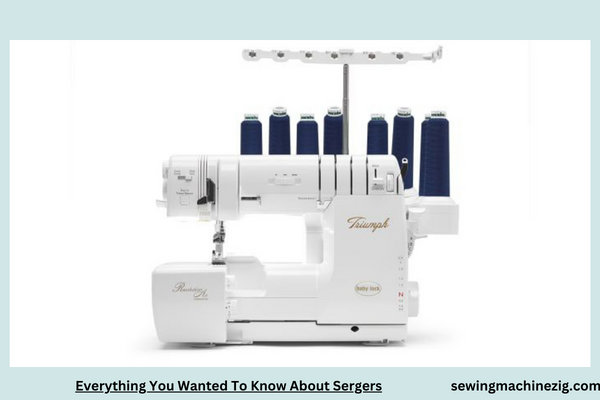
A Comprehensive Guide: All About Sergers – The Ultimate Resource for Sewists
Sergers, also known as overlock machines, are powerhouse tools in the world of sewing, enhancing the efficiency and quality of finished projects. Understanding their functionalities, features, and how to maximize their potential can elevate your sewing game.
In this extensive guide, we’ll explore everything you need to know about sergers, including their capabilities, operations, common issues, and troubleshooting techniques.
Understanding Sergers:
A serger is a specialized sewing machine designed to create professional-looking finishes, secure seams, and trim excess fabric simultaneously. It excels in handling various fabrics and can produce different types of stitches, making it an invaluable addition to any sewing enthusiast’s toolkit.
Key Features and Functions of Sergers:
- Multiple Thread Configuration:
- Sergers operate using multiple threads simultaneously, often configured in 3-thread or 4-thread setups. This allows for various stitch options and finishes.
- Cutting Mechanism:
- One of the primary features of a serger is its integrated cutting blade, which trims excess fabric while sewing, resulting in neat, finished edges.
- Versatility in Stitches:
- Sergers offer a range of stitch options, including overlock, rolled hem, flatlock, and more. These stitches enhance the durability and aesthetics of sewing projects.
- Differential Feed System:
- The differential feed mechanism prevents stretching or puckering of fabric, ensuring smooth and even stitches, especially when working with different fabric types.
Step-by-Step Guide to Using a Serger:
Step 1: Familiarize Yourself with Your Serger
Before using your serger, acquaint yourself with its components, including thread paths, tension dials, stitch options, and the cutting blade. Refer to the user manual for detailed instructions specific to your model.
Step 2: Threading the Serger
Threading a serger involves multiple threads and paths. Follow these general steps:
a. Raise the Presser Foot: – Ensure the presser foot is up before threading to release tension.
b. Thread the Upper Looper: – Begin by threading the upper looper following the color-coded guides.
c. Thread the Lower Looper: – Next, thread the lower looper according to the designated path.
d. Thread the Needles: – Thread the needles based on your desired stitch configuration (3-thread or 4-thread) using the color-coded paths.
e. Engage the Cutting Blade: – Ensure the cutting blade is engaged for projects requiring fabric trimming.
Step 3: Adjust Tension Settings
Balanced tension settings are crucial for achieving high-quality stitches. Experiment on scrap fabric to find the optimal tension for your specific project and fabric type.
Step 4: Set Differential Feed
Adjust the differential feed dial to prevent stretching or puckering of fabric. Start with the standard setting (usually 1.0) and adjust as needed for different fabrics.
Step 5: Test Stitches on Scrap Fabric
Before starting your main project, test various stitches and settings on scrap fabric. This allows you to fine-tune the serger for optimal performance.
Common Issues and Solutions:
- Thread Breakage:
- Issue: Threads breaking during sewing.
- Solution: Ensure correct threading paths and tension adjustments. Check for knots or tangles in the threads and rethread as needed.
- Uneven Stitches:
- Issue: Stitches appearing uneven or loopy.
- Solution: Adjust tension settings; unbalanced tension can cause uneven stitches. Ensure proper threading and needle placement.
- Fabric Puckering or Stretching:
- Issue: Fabric puckering or stretching during sewing.
- Solution: Adjust the differential feed to a higher or lower setting as needed for the specific fabric. Experiment with tension adjustments.
- Dull Cutting Blade:
- Issue: The cutting blade not effectively trimming the fabric.
- Solution: Ensure the cutting blade is engaged and sharp. Replace or sharpen the blade if it’s dull.
Additional Tips for Using Sergers:
- Cleaning and Maintenance:
- Regularly clean and oil your serger to maintain its performance and prevent lint buildup, following the manufacturer’s instructions.
- Experiment with Stitches:
- Explore different stitch options and settings to expand your serging capabilities. Each stitch has unique applications.
- Threading Order:
- Follow the correct threading order recommended by your serger’s manual to avoid threading errors.
- Practice Techniques:
- Practice serging on scrap fabric to master techniques like corners, curves, and gathering before applying them to your main project.
By following these comprehensive steps and troubleshooting tips, you’ll harness the full potential of your serger sewing machine. Whether you’re a beginner or an experienced sewist, understanding and mastering the functionalities of a serger will significantly enhance your sewing projects. Happy serging!
Conclusion
In conclusion, unraveling What Is A Serger Sewing Machine illuminates a powerful device that transforms ordinary seams into professional, polished finishes. This specialized machine, also known as an overlocker, excels in creating secure, neat edges, and trimming excess fabric simultaneously. Its efficiency in handling knits and preventing fraying elevates the quality of your sewing projects.
As you integrate a serger into your repertoire, you harness precision and speed, ensuring your creations boast impeccable seams and stand out in the world of sewing craftsmanship. “What Is A Serger Sewing Machine“
FAQS
Q1: What is a serger sewing machine, and how does it differ from a regular sewing machine?
A1: A serger, also known as an overlocker, is a specialized sewing machine designed for finishing fabric edges. It trims excess fabric and encases raw edges with overlocking stitches, creating a professional and neat finish. Unlike regular sewing machines, sergers have multiple thread cones, allowing for simultaneous cutting, sewing, and finishing.
Q2: Can a serger replace a regular sewing machine for all sewing tasks?
A2: While a serger excels at finishing edges, it doesn’t replace a regular sewing machine. Regular machines are versatile for various stitches and tasks, while sergers specialize in creating secure, trimmed edges, making them complementary tools in a sewing arsenal.
Q3: What types of stitches can a serger sewing machine create?
A3: Sergers can produce a variety of stitches, including overlock, rolled hem, flatlock, and more. These stitches are ideal for different fabric finishes and applications, providing versatility in garment construction and decorative work.
Q4: Is threading a serger more complicated than threading a regular sewing machine?
A4: Threading a serger may seem complex due to multiple thread cones, but with practice and familiarity, it becomes routine. Modern sergers often feature color-coded threading paths and detailed guides, simplifying the process. “What Is A Serger Sewing Machine“
Q5: Can a serger be used for quilting projects?
A5: While sergers are not typically used for quilting piecing, they can be employed for finishing quilt edges. The overlock stitch adds a professional touch to quilt seams, preventing fraying and enhancing the quilt’s durability. “What Is A Serger Sewing Machine“
Q6: Are sergers suitable for working with delicate fabrics?
A6: Yes, sergers are versatile and can handle delicate fabrics when adjusted appropriately. Differential feed settings on sergers help prevent stretching or puckering, ensuring smooth handling of delicate materials. “What Is A Serger Sewing Machine“

