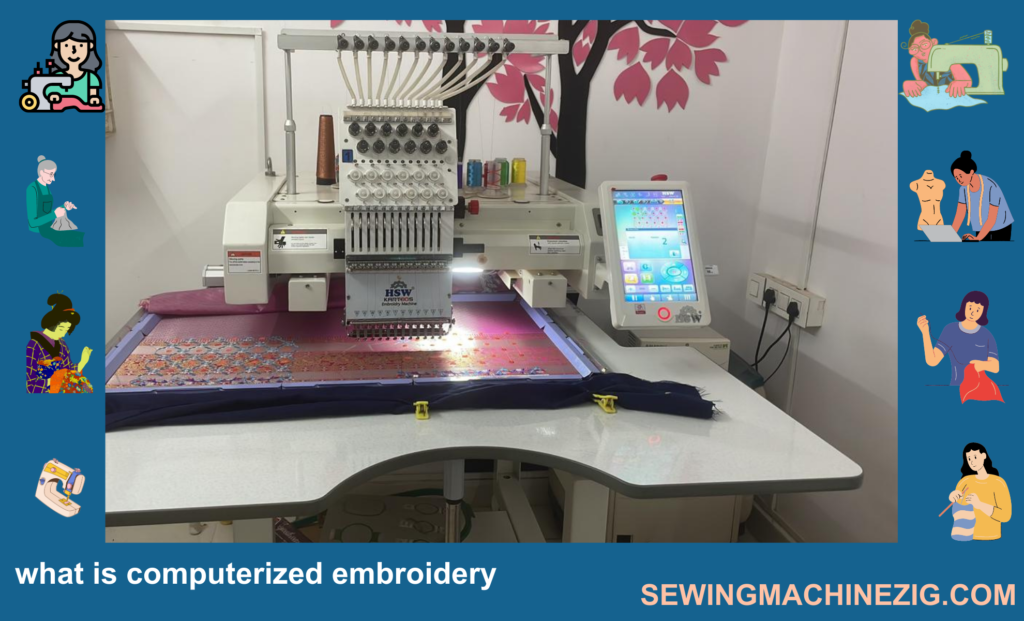
Computerized embroidery is a type of embroidery that utilizes automated machinery and computer software to create intricate and detailed designs on fabric. This modern embroidery technique offers a range of advantages over traditional hand embroidery, including precision, speed, and consistency.
The process of computerized embroidery involves the use of a computer-controlled embroidery machine that reads a digital embroidery file and then uses various thread colors and stitching techniques to replicate the design onto the fabric. What is computerized embroidery well the embroidery machine can recreate a design multiple times with the same level of consistency, ensuring high-quality and uniform results. This makes it an ideal choice for businesses that need to produce large quantities of identical items, such as uniforms, promotional products, and merchandise. I hope now you understand What is computerized embroidery.
There are different types of computerized embroidery techniques, each with its own unique characteristics and applications. Below are some of the common types of computerized embroidery:
5 Types of Computerized Embroidery
- Flat Embroidery
- 3D Foam Embroidery
- Appliqué Embroidery
- Sequin Embroidery
- Laser Cutting Embroidery
Computerized embroidery offers a range of techniques and applications that allow for the creation of high-quality, detailed designs on fabric. Its versatility and precision make it an essential tool for businesses and hobbyists looking to create custom embroidered items with a professional finish. All the types are part of “What is computerized embroidery“.
How To Use Flat Embroidery
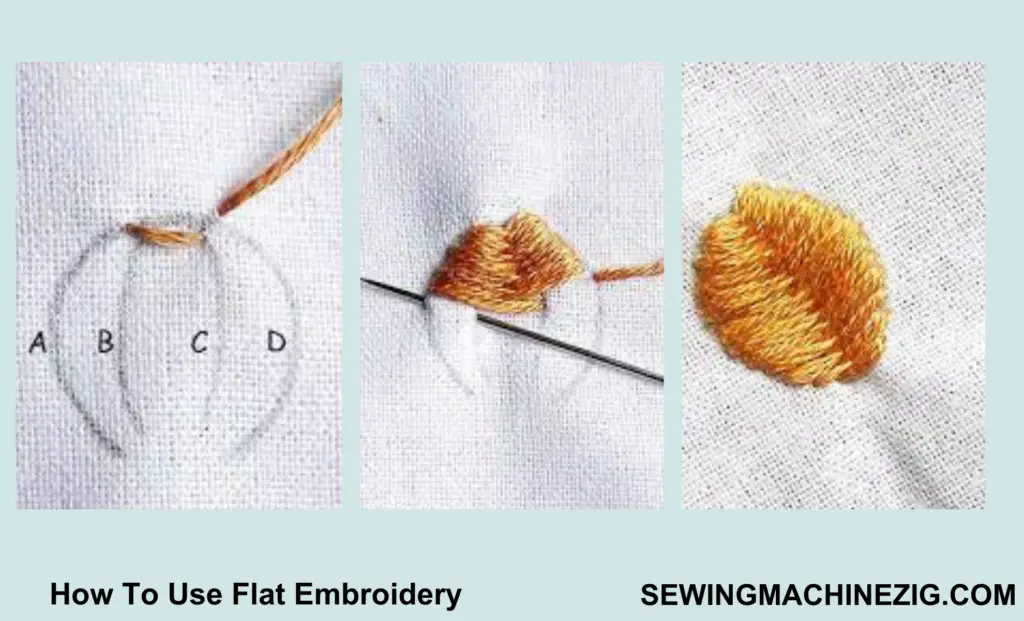
Flat embroidery is the most common type of computerized embroidery technique used to create intricate designs on fabric. It involves What is computerized embroidery and the use of a computer-controlled embroidery machine that reads a digital embroidery file and then uses various thread colors and stitching techniques to replicate the design onto the fabric.
Flat embroidery is a popular computerized embroidery technique used to create intricate designs on fabric. The followings are the materials and steps required to perform flat embroidery:
Materials:
- Computerized embroidery machine
- Embroidery digitizing software
- Fabric
- Embroidery thread
Steps:
Step 1: Design creation:
The first step is to create or select a design to be embroidered using embroidery digitizing software. The design should be saved in the appropriate file format for the embroidery machine to read.
Step 2: Hooping the fabric:
The fabric to be embroidered is hooped securely in a frame, which is then attached to the embroidery machine. It is important to ensure that the fabric is hooped tightly and evenly to avoid puckering or distortion.
Step 3: Stabilizing the fabric:
The stabilizer is added to the back of the fabric to keep it from shifting during the embroidery process. The stabilizer should be cut to the same size as the hoop.
Step 4: Loading the design:
The digitized embroidery design is loaded into the embroidery machine. The embroidery machine reads the design and determines the thread colors and stitch types needed to recreate the design.
Step 5: Starting the machine:
Once the design is loaded and the fabric is hooped and stabilized, the embroidery machine can be started. The machine moves the needle over the surface of the fabric, stitching the design onto it.
Step 6: Trimming threads:
After the embroidery is complete, any loose threads should be trimmed using scissors or a thread trimmer. Care should be taken not to cut the fabric or the stabilizer.
Step 7: Removing the fabric from the hoop:
Once the embroidery is complete and the threads have been trimmed, the fabric can be removed from the hoop. It is important to handle the fabric carefully to avoid damaging the embroidery.
Step 8: Finishing:
Depending on the intended use of the embroidered item, additional finishing steps may be required. For example, an embroidered patch may need to be ironed onto a garment, while an embroidered shirt may need to be washed before use.
When hooping the fabric, it is important to leave at least 1-2 inches of space on all sides of the design to ensure that the embroidery machine can move freely without stitching outside of the design area. Additionally, it is important to make sure that the fabric is hooped evenly and securely, as uneven hooping can result in distorted or uneven embroidery. “What is computerized embroidery” includes Flat embroidery type.
How To Use 3D Foam Embroidery
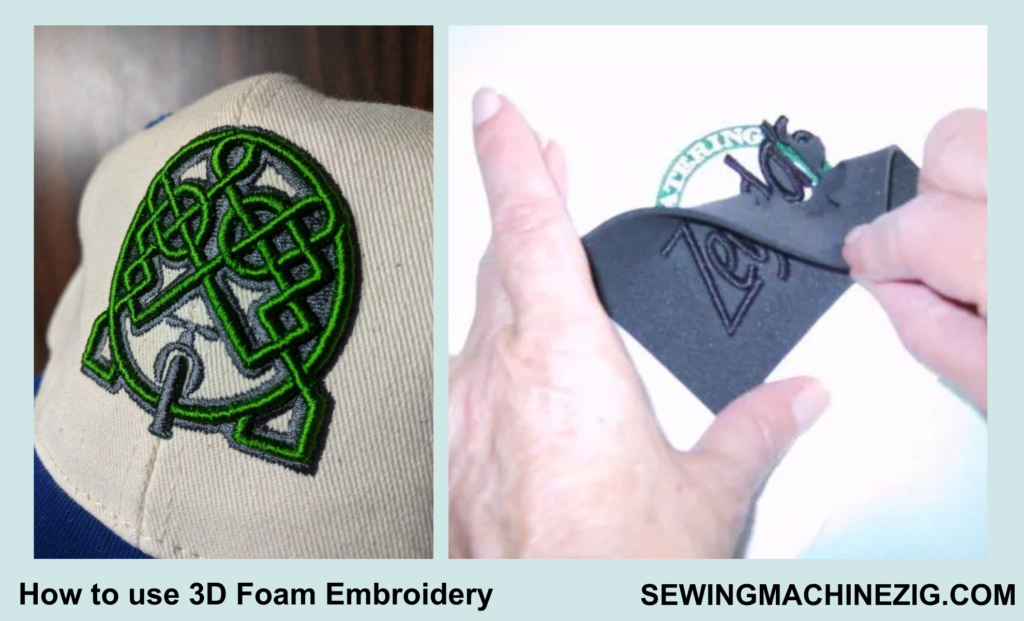
3D foam embroidery is a unique technique that creates a raised, three-dimensional effect on embroidered designs. It involves using a special foam material to create a raised surface on the fabric, which is then embroidered over. This technique is popular in creating logos, monograms, and lettering, as it provides a bold and eye-catching effect.
The foam material comes in different thicknesses to achieve different levels of depth in the embroidery. 3D foam embroidery adds dimension and texture to designs, making them stand out from the fabric. What is computerized embroidery on 3D foam, well It can be used on a variety of fabrics, including apparel, bags, and accessories. Overall, 3D foam embroidery is a great way to add a unique touch to your embroidery projects.
3D foam embroidery is a technique that involves using foam to raise the embroidered design above the fabric surface, creating a 3D effect. The followings are the materials and steps required to perform 3D foam embroidery:
Materials:
- Computerized embroidery machine
- Embroidery digitizing software
- Foam embroidery backing
- Fabric
- Embroidery thread
Steps:
Step 1: Design creation:
The first step is to create or select a design to be embroidered using embroidery digitizing software. The design should be saved in the appropriate file format for the embroidery machine to read.
Step 2: Hooping the fabric:
The fabric to be embroidered is hooped securely in a frame, which is then attached to the embroidery machine. The foam embroidery backing is then placed on top of the fabric, centered over the design area.
Step 3: Stabilizing the fabric:
The stabilizer is added to the back of the fabric to keep it from shifting during the embroidery process. The stabilizer should be cut to the same size as the hoop.
Step 4: Loading the design:
The digitized embroidery design is loaded into the embroidery machine. The embroidery machine reads the design and determines the thread colors and stitch types needed to recreate the design.
Step 5: Starting the machine:
Once the design is loaded and the fabric is hooped and stabilized, the embroidery machine can be started. The machine stitches the design onto the foam embroidery backing, which raises the embroidered design above the fabric surface.
Step 6: Removing excess foam:
After the embroidery is complete, any excess foam around the edges of the design should be carefully trimmed away using scissors or a sharp blade.
Step 7: Trimming threads:
Any loose threads should be trimmed using scissors or a thread trimmer. Care should be taken not to cut the fabric or the stabilizer.
Step 8: Removing the fabric from the hoop:
Once the embroidery is complete and the threads have been trimmed, the fabric can be removed from the hoop. It is important to handle the fabric carefully to avoid damaging the embroidery.
When hooping the fabric for 3D foam embroidery, it is important to leave enough space between the foam embroidery backing and the edge of the hoop to allow for the foam to expand. A good rule of thumb is to leave at least 1 inch of space around the edge of the design. Additionally, it is important to make sure that the foam embroidery backing is centered over the design area, as any misalignment can result in a distorted or uneven 3D effect. “What is computerized embroidery” includes 3D foam embroidery type.
How To Use Applique Embroidery
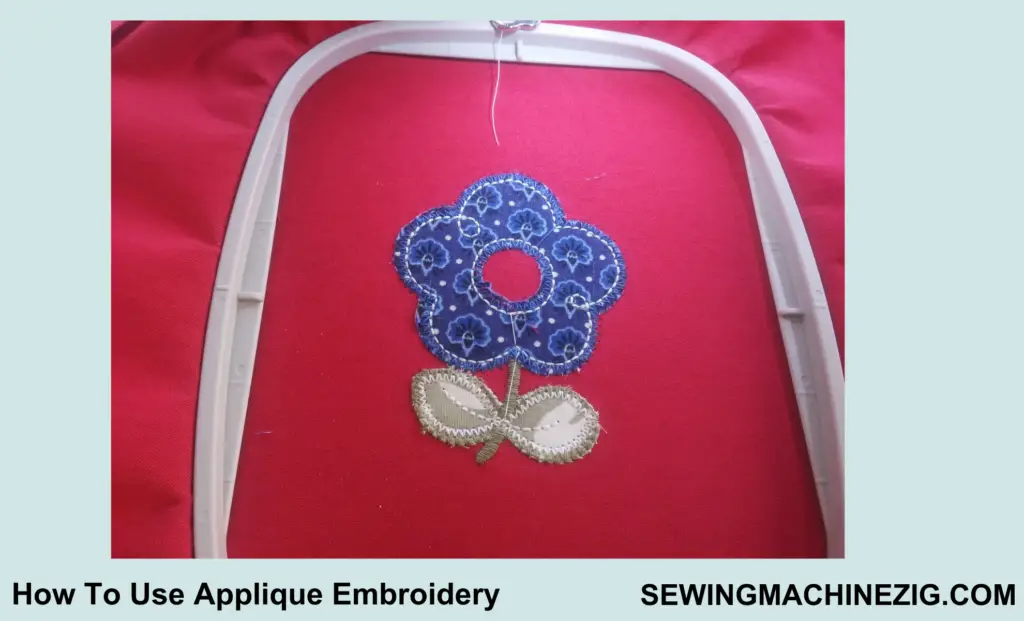
Computerized appliqué embroidery is a modern take on the traditional appliqué technique, which uses computer technology to create more intricate and detailed designs. This technique involves the use of specialized software and embroidery machines to cut and stitch fabrics onto a base material, resulting in a highly precise and accurate finished product.
What is computerized embroidery appliqué, Appliqué embroidery offers a wide range of possibilities in terms of design, as it allows for more complex shapes, patterns, and textures to be created. This technique is popular in creating custom patches, logos, and monograms for apparel, accessories, and home decor items. Overall, computerized appliqué embroidery is a great way to elevate your embroidery projects to a more advanced level of precision and detail.
Appliqué embroidery is a technique where pieces of fabric are sewn onto a base fabric to create a design. The followings are the materials and steps required to perform appliqué embroidery:
Materials:
- Computerized embroidery machine
- Embroidery digitizing software
- Base fabric
- Appliqué fabric
- Embroidery thread
Steps:
Step 1: Design creation:
The first step is to create or select a design to be embroidered using embroidery digitizing software. The design should include appliqué areas that will be filled with fabric.
Step 2: Hooping the fabric:
The base fabric is hooped securely in a frame, which is then attached to the embroidery machine. The appliqué fabric is then placed on top of the base fabric, covering the appliqué area in the design.
Step 3: Stabilizing the fabric:
The stabilizer is added to the back of the base fabric to keep it from shifting during the embroidery process. The stabilizer should be cut to the same size as the hoop.
Step 4: Loading the design:
The digitized embroidery design is loaded into the embroidery machine. The embroidery machine reads the design and determines the thread colors and stitch types needed to recreate the design.
Step 5: Starting the machine:
Once the design is loaded and the fabric is hooped and stabilized, the embroidery machine can be started. The machine stitches a placement stitch around the appliqué area, which helps to hold the appliqué fabric in place.
Step 6: Trimming the appliqué fabric:
After the placement stitch is complete, the excess appliqué fabric around the edge of the placement stitch should be trimmed away using scissors or a sharp blade.
Step 7: Satin stitch:
The machine then stitches a satin stitch around the edge of the appliqué area, which secures the fabric in place and gives the design a finished look.
Step 8: Removing the fabric from the hoop:
Once the embroidery is complete and the threads have been trimmed, the fabric can be removed from the hoop. It is important to handle the fabric carefully to avoid damaging the embroidery.
When hooping the base fabric for appliqué embroidery, it is important to leave enough space around the edge of the design to allow for the appliqué fabric to be sewn on. A good rule of thumb is to leave at least 1 inch of space around the edge of the design. Additionally, it is important to make sure that the appliqué fabric is centered over the appliqué area in the design, as any misalignment can result in a distorted or uneven design. “What is computerized embroidery” includes applique embroidery type.
How to use Sequin Embroidery
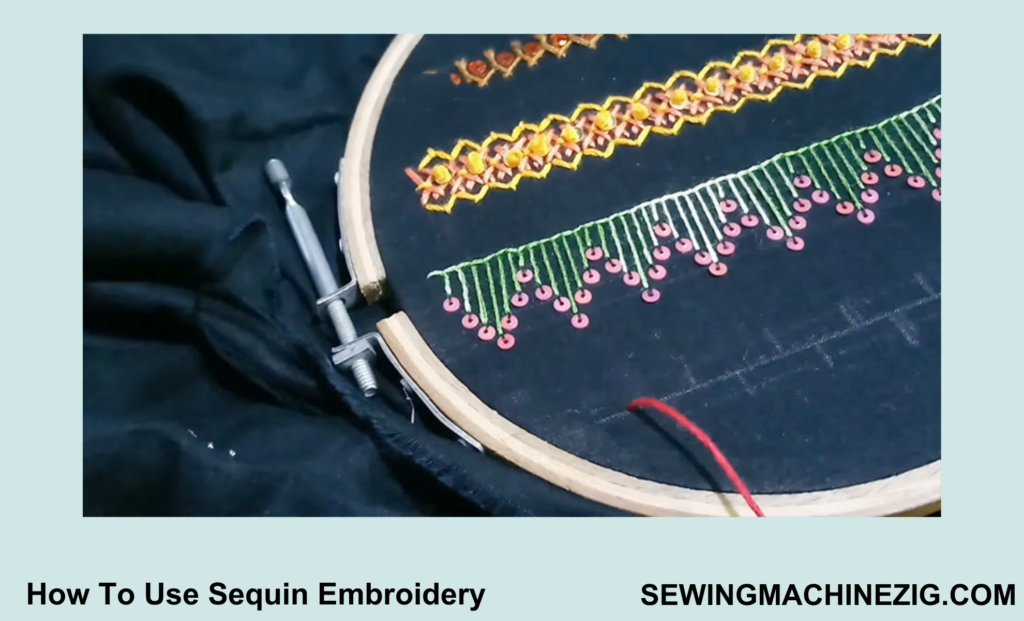
Computerized sequin embroidery is an advanced technique that uses specialized embroidery machines and software to create intricate designs using sequins. This technique involves the use of a sequin attachment that can be programmed to sew sequins onto a fabric in a specific pattern or design. This allows for the creation of complex and detailed patterns with a wide range of sequin colors and sizes.
What is computerized embroidery sequin, it is popular in creating custom designs for apparel, accessories, and home decor items. It offers a high level of precision and accuracy, ensuring that each sequin is placed perfectly, resulting in a stunning finished product. Overall, computerized sequin embroidery is a great way to add sparkle and shine to your embroidery projects.
Sure, here are the materials and 8-step process for performing sequin embroidery along with examples and the amount of space to leave from the left and right:
Materials:
- Computerized embroidery machine
- Embroidery digitizing software
- Fabric
- Sequins
- Embroidery thread
Steps:
Step 1: Design creation:
Use embroidery digitizing software to create or select a design that includes areas for the sequins to be placed.
Step 2: Hooping the fabric:
Securely hoop the fabric in the embroidery frame and attach it to the embroidery machine. Leave at least 2 inches of space on both the left and right sides of the hoop to avoid hitting the machine’s arm and needle.
Step 3: Stabilizing the fabric:
Use a stabilizer on the back of the fabric to prevent it from puckering or stretching during the embroidery process.
Step 4: Setting up the machine:
Thread the machine with embroidery thread and adjust the tension and settings according to the manufacturer’s instructions.
Step 5: Sewing the outline:
Sew the outline of the design onto the fabric, leaving space for the sequins to be placed. Use a small zigzag stitch for a secure base.
Step 6: Placing the sequins:
Place the sequins onto the fabric in the designated areas. Use a sequin foot on the embroidery machine to hold the sequins in place while sewing.
Step 7: Sewing the sequins:
Use a straight stitch to sew the sequins onto the fabric. Be sure to sew only through the center of the sequin to avoid damaging it.
Step 8: Finishing:
Once all sequins are sewn, remove the hoop from the embroidery machine and carefully remove the excess stabilizer from the back of the fabric. Leave at least 2 inches of space on both the left and right sides of the design to allow for framing or finishing.
Example: Let’s say you are creating a sequin embroidered design of a flower on a 6×6 inch square of fabric. When hooping the fabric, leave at least 2 inches of space on the left and right sides of the hoop.
When sewing the outline, leave a space for the sequins to be placed. When placing the sequins, be sure to follow the design and place them in the designated areas. When sewing the sequins, use a straight stitch and sew only through the center of the sequin to avoid damaging it. When finishing, leave at least 2 inches of space on both the left and right sides of the design for framing or finishing. “What is computerized embroidery” includes sequin embroidery type.
How To Use Laser Cutting Embroidery
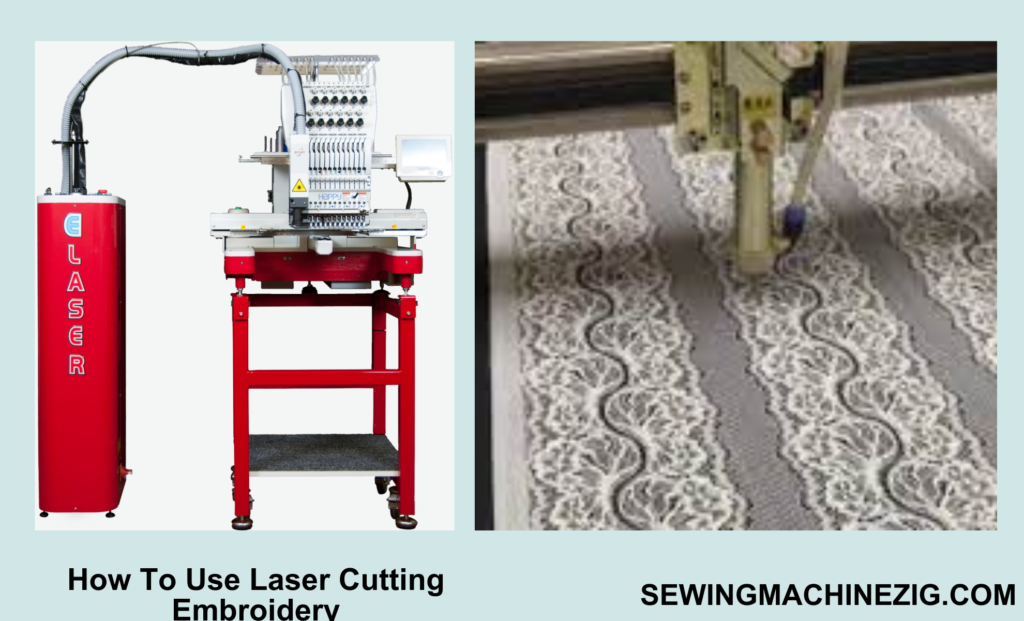
Computerized laser cutting embroidery is a cutting-edge technique that utilizes both embroidery machines and laser technology to create intricate designs. This technique involves the use of specialized software and machinery to cut fabrics with the help of a laser beam, resulting in highly precise and accurate cuts. Laser-cutting embroidery allows for the creation of complex designs with a wide range of fabrics, including delicate and intricate materials that may be difficult to cut by hand.
This technique is popular in creating custom designs for apparel, accessories, and home decor items. What is computerized embroidery laser cutting, it is a high level of accuracy, ensuring that each cut is made with precision and resulting in a stunning finished product. Overall, computerized laser-cutting embroidery is a great way to take your embroidery projects to the next level and achieve a level of intricacy that is hard to achieve by hand.
Here are the materials and step process for performing laser cutting embroidery along with examples.
Materials:
- Computerized embroidery machine
- Embroidery digitizing software
- Fabric
- Laser cutting machine
- Heat-resistant paper or film
- Tweezers
Steps:
Step 1: Design creation:
Use embroidery digitizing software to create or select a design that includes areas for laser cutting.
Step 2: Hooping the fabric:
Securely hoop the fabric in the embroidery frame and attach it to the embroidery machine. Leave at least 2 inches of space on both the left and right sides of the hoop to avoid hitting the machine’s arm and needle.
Step 3: Stabilizing the fabric:
Use heat-resistant paper or film on the back of the fabric to prevent it from scorching or burning during the laser-cutting process.
Step 4: Setting up the machine:
Adjust the laser cutting machine according to the manufacturer’s instructions.
Step 5: Cutting the design:
Use the laser cutting machine to precisely cut out the designated areas of the design. Use tweezers to remove the cut pieces from the fabric.
Step 6: Sewing the design:
Use the embroidery machine to sew the remaining parts of the design onto the fabric. Be sure to align the cut pieces with the sewn design.
Step 7: Finishing:
Once the design is complete, carefully remove any excess stabilizer or heat-resistant paper or film from the fabric.
Step 8: Quality check:
Inspect the final product to ensure that the embroidery and laser cutting are properly aligned and that the design is of high quality.
Example:
Let’s say you are creating a laser-cutting embroidered design of a butterfly on a 6×6 inch square of fabric. When hooping the fabric, leave at least 2 inches of space on the left and right sides of the hoop. When stabilizing the fabric, use heat-resistant paper or film to protect it from the laser cutting process.
When cutting the design, use the laser cutting machine to precisely cut out the designated areas of the butterfly’s wings. Use tweezers to remove the cut pieces from the fabric. When sewing the design, use the embroidery machine to sew the remaining parts of the butterfly’s body onto the fabric. Be sure to align the cut pieces with the sewn design.
When finishing, carefully remove any excess stabilizer or heat-resistant paper or film from the fabric. Finally, inspect the final product to ensure that the embroidery and laser cutting are properly aligned and that the design is of high quality. “What is computerized embroidery” includes laser cutter embroidery type.
Conclusion
Computerized embroidery is a modern embroidery technique that utilizes advanced technology to create intricate and detailed designs. It involves the use of specialized software and machinery that work together to create custom designs with precision and accuracy.
This technique allows for a wide range of customization options, including the ability to use a variety of fabrics, colors, and stitching techniques. What is computerized embroidery well with computerized embroidery, it is possible to create complex designs with ease, producing high-quality and stunning finished products.
This technique has revolutionized the embroidery industry, making it possible for designers and creators to bring their unique visions to life. Overall, computerized embroidery is a powerful tool that offers endless possibilities for custom designs, making it a popular choice for a variety of industries, including fashion, home decor, and more. I hope now you know everything about “What is computerized embroidery” and its embroidery types.
FAQs:
Q 1: What is computerized embroidery?
A: What is computerized embroidery it is a modern embroidery technique that involves the use of specialized software and machinery to create custom designs with precision and accuracy.
Q 2: What materials can be used in computerized embroidery?
A: A wide range of materials can be used in computerized embroidery, including cotton, silk, wool, denim, leather, and even synthetic materials.
Q 3: How does computerized embroidery work?
A: Computerized embroidery works by creating a digital design using specialized software, which is then loaded onto an embroidery machine. The machine uses a needle and thread to stitch the design onto the fabric according to the digital design. “What is computerized embroidery“
Q 4: Can computerized embroidery be used for both small and large-scale projects?
A: Yes, computerized embroidery can be used for both small and large-scale projects. The software and machinery used in computerized embroidery allow for customization options that can be scaled up or down based on the project size.
Q 5: Is computerized embroidery more precise than hand embroidery?
A: Yes, computerized embroidery is more precise than hand embroidery. The software and machinery used in computerized embroidery allow for highly precise and accurate stitching, resulting in a more polished and professional finished product.
Q 6: Can computerized embroidery be used to create complex designs?
A: Yes, computerized embroidery can be used to create complex designs with a high level of detail. The software used in computerized embroidery allows for intricate and detailed designs that may be difficult or impossible to achieve by hand.
Q 7: What industries commonly use computerized embroidery?
A: Computerized embroidery is commonly used in a variety of industries, including fashion, home decor, promotional products, and even medical equipment. It offers customization options and precision that traditional embroidery techniques may not be able to provide.

