In the intricate dance of fabric and thread, unexpected disruptions can create a frustrating symphony of tangled stitches. Amidst the artistry of sewing, a common inquiry arises: “Why Does My Sewing Machine Keep Bunching The Thread?” Beyond the mechanical hitches, understanding the nuances of tension, threading, and bobbin intricacies is paramount.
Join the exploration into the troubleshooting labyrinth, where we unravel not only the technical mysteries but also the deeper connection between the sewist and their machine, transforming obstacles into opportunities for enhanced craftsmanship.
Why Does My Sewing Machine Keep Bunching The Thread Detailed Answer
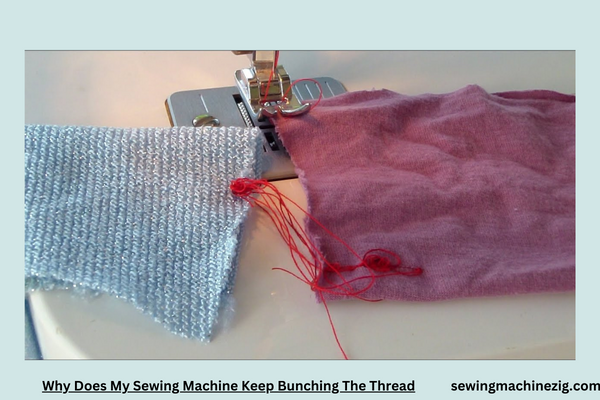
Encountering thread bunching issues in your sewing machine can be frustrating, disrupting your creative flow. Understanding “Why Does My Sewing Machine Keep Bunching The Thread” is crucial for resolving this common problem.
Follow this comprehensive step-by-step guide to identify, troubleshoot, and address the root causes of thread bunching.
Step 1: Check Needle Condition
Examine the needle closely. A dull, bent, or improperly inserted needle can lead to thread bunching. Replace the needle with a new, appropriate one, ensuring it is securely and correctly installed.
Step 2: Use High-Quality Thread
Low-quality or old thread can contribute to bunching issues. Opt for a high-quality thread that matches your fabric type and project. Ensure the thread is wound evenly on the spool.
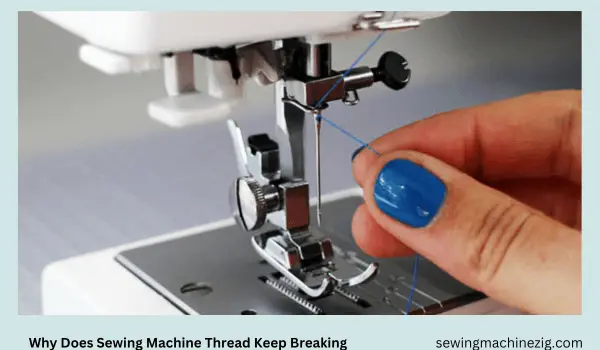
Step 3: Re-Thread the Machine
Incorrect threading is a common culprit. Unthread the machine completely, following the machine’s threading diagram meticulously. Re-thread both the upper and lower threads, making sure the threads are properly seated in the tension discs and bobbin case.
Step 4: Check Tension Settings
Improper tension settings are a major cause of thread bunching. Adjust the tension according to your machine’s manual, ensuring balanced tension between the upper and lower threads. Perform test stitches on scrap fabric to fine-tune the tension.
Step 5: Inspect Bobbin and Bobbin Case
Check the bobbin for proper winding, ensuring it’s placed in the bobbin case correctly. Clean any lint or debris from the bobbin case. If using pre-wound bobbins, ensure they are compatible with your machine.
Step 6: Assess Thread Quality
Inconsistent thread thickness or poor-quality thread can lead to bunching. Choose a thread that is suitable for your fabric and project. Ensure the thread passes smoothly through the needle’s eye.
Step 7: Verify Needle Size
Using the wrong needle size for your fabric can cause bunching. Refer to your machine’s manual for the recommended needle size for the fabric you’re working with.
Step 8: Check Sewing Machine Timing
If all else fails, the sewing machine timing may be off. Consult your machine’s manual for guidance on checking and adjusting the timing. Timing issues may require professional servicing.
Step 9: Inspect Thread Path
Examine the entire thread path, including guides and tension discs. Ensure there are no obstacles or snags that could impede the smooth flow of the thread.
Step 10: Test Different Fabrics
Certain fabrics may be more prone to thread bunching. Experiment with different fabric types to see if the issue persists. Adjust your machine settings accordingly for each fabric.
Step 11: Clean the Machine
Lint and debris can accumulate in the bobbin area and affect stitching. Regularly clean your sewing machine, especially the bobbin case area, to prevent thread bunching issues.
Step 12: Consult Professional Assistance
If the problem persists despite your efforts, it may be time to seek professional assistance. A certified sewing machine technician can diagnose and address more complex issues with your machine.
Step 13: Practice Good Sewing Habits
Preventive measures can avoid future issues. Practice good sewing habits, such as using the right needle, threading the machine correctly, and cleaning it regularly to maintain optimal performance.
By following these comprehensive steps, you’ll unravel the mystery of “Why Does My Sewing Machine Keep Bunching The Thread.” Troubleshoot systematically, address each potential cause, and restore your sewing machine to smooth and precise stitching. Happy sewing!
Sewing Machine Thread Bunching On Bottom
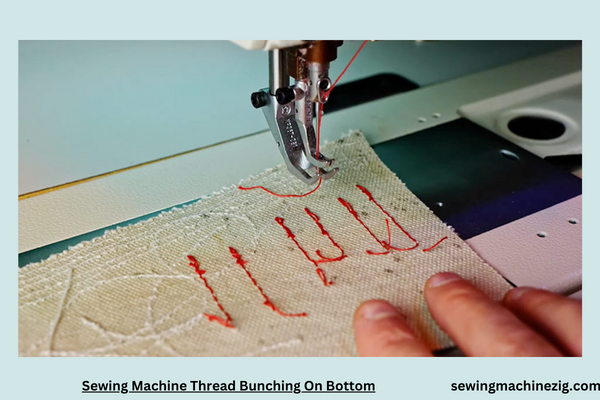
Experiencing the vexing issue of sewing machine thread bunching on the bottom side of your fabric? Don’t worry; it’s a common challenge that can be easily addressed. Let’s delve into “Why Does My Sewing Machine Keep Bunching The Thread” and how to resolve the annoyance of thread bunching on the bottom.
Understanding the Issue:
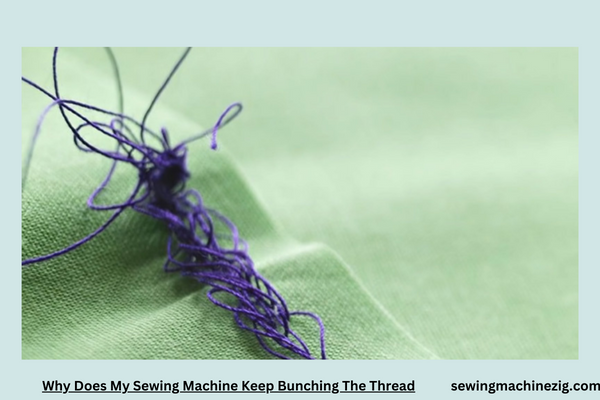
When your sewing machine thread is bunching on the bottom side of your fabric, it’s often referred to as birdnesting. This occurs when the upper thread and lower thread tangle, creating a messy clump beneath the fabric.
Step 1: Check Upper Thread Tension:
Incorrect tension in the upper thread is a frequent culprit. Ensure your machine is threaded correctly, passing through all the necessary guides and tension disks. Adjust the tension dial gradually, testing on scrap fabric until you achieve a balanced tension.
Step 2: Re-thread the Machine:
A simple threading mistake can lead to bunching. Rethread both the upper and lower threads, following your machine’s manual for accurate threading instructions. Confirm that the threads are securely placed in the tension disks.
Step 3: Quality Thread and Needle:
Use good-quality thread compatible with your fabric and ensure your needle is sharp. A dull or bent needle can contribute to thread bunching. Change the needle regularly, especially if you notice any signs of wear.
Step 4: Bobbin Check:
Inspect the bobbin area for any thread snags or tangles. Confirm that the bobbin is inserted correctly, spinning in the right direction. Regularly clean the bobbin case to prevent lint buildup, which can impede smooth thread flow.
Step 5: Fabric and Needle Compatibility:
Mismatched fabric and needle sizes can cause bunching. Choose a needle appropriate for the fabric weight. Light fabrics require a smaller needle, while heavy fabrics need a larger one.
Step 6: Sewing Machine Maintenance:
Frequent cleaning of your sewing machine, especially around the bobbin area, is crucial to prevent lint accumulation. Follow your machine’s maintenance guidelines for lubrication and regular checkups.
Step 7: Check Bobbin Tension:
Adjusting the bobbin tension may be necessary. Refer to your machine’s manual for instructions on modifying bobbin tension. Make minor adjustments and test on scrap fabric until you achieve balanced tension.
Step 8: Test on Scrap Fabric:
Before starting your actual project, always conduct a test on scrap fabric. This allows you to identify and resolve any tension or bunching issues without affecting your main project.
Step 9: Consult the Manual:
If the problem persists, refer to your sewing machine’s manual. It often contains troubleshooting tips and specific instructions tailored to your machine model.
Step 10: Seek Professional Help:
If all else fails and you’re unable to resolve the issue, consider seeking assistance from a professional sewing machine technician. They can diagnose and fix any underlying mechanical issues.
By addressing these steps and understanding “Why Does My Sewing Machine Keep Bunching The Thread,” you can conquer the frustration of thread bunching on the bottom side of your fabric, ensuring a smoother and more enjoyable sewing experience.
How Do You Fix A Bunching Thread On A Sewing Machine?
Experiencing frustration with thread bunching on your sewing machine? Don’t worry, addressing this issue is simpler than it seems. Here’s an easy guide on “Why Does My Sewing Machine Keep Bunching The Thread” and how to fix it.
Understanding the Issue:
Thread bunching, often referred to as birdnesting, occurs when the upper and lower threads tangle, creating a messy cluster underneath the fabric. This can be caused by various factors.
Step 1: Check Thread Tension:
Incorrect tension is a common culprit. Ensure your machine is threaded correctly and that the tension settings match the fabric you’re using. Adjust the tension dial gradually, testing on a scrap piece until you achieve balanced tension.
Step 2: Re-thread the Machine:
A simple oversight in threading can lead to bunching. Rethread both the upper and lower threads, following your machine’s manual for proper threading instructions. Make sure the threads are securely in the tension disks.
Step 3: Quality Thread and Needle:
Low-quality thread or a dull needle can contribute to bunching. Use a good-quality thread and make sure your needle is sharp and suitable for the fabric. Change the needle regularly to prevent stitching issues.
Step 4: Bobbin Check:
Examine the bobbin area for any thread snags or tangles. Ensure the bobbin is correctly inserted and spinning in the right direction. Clean the bobbin case regularly to prevent lint buildup.
Step 5: Fabric and Needle Compatibility:
Mismatched fabric and needle sizes can lead to bunching. Choose a needle appropriate for the fabric weight. Fine fabrics require a smaller needle, while thicker fabrics need a larger one.
Step 6: Sewing Machine Maintenance:
Regularly clean your sewing machine, especially the bobbin area, to remove lint and debris. Lubricate moving parts following your machine’s maintenance guidelines. A well-maintained machine operates more smoothly.
Step 7: Check Bobbin Tension:
In some cases, adjusting the bobbin tension may be necessary. Refer to your machine’s manual for instructions on adjusting bobbin tension. Make small adjustments and test on scrap fabric until the tension is balanced.
Step 8: Test on Scrap Fabric:
Before starting your actual project, always test on scrap fabric. This allows you to identify and resolve any tension or bunching issues without affecting your main project.
Step 9: Consult the Manual:
If the problem persists, consult your sewing machine’s manual. It often contains troubleshooting tips and specific instructions tailored to your machine model.
Step 10: Seek Professional Help:
If all else fails, and you’re unable to resolve the issue, consider seeking assistance from a professional sewing machine technician. They can diagnose and fix any underlying mechanical issues.
By following these steps on “Why Does My Sewing Machine Keep Bunching The Thread” and implementing the suggested solutions, you’ll likely overcome the frustration of thread bunching, ensuring a smoother and more enjoyable sewing experience.
Conclusion
In conclusion, unraveling the mystery of “Why Does My Sewing Machine Keep Bunching The Thread” is crucial for seamless stitching. By addressing potential causes such as bobbin issues, threading errors, or tension problems, users can troubleshoot and resolve this common frustration.
Understanding and rectifying these issues ensures smoother sewing experiences and high-quality results. Regular maintenance, correct threading techniques, and attention to tension settings contribute to a frustration-free sewing environment, allowing crafters to focus on their creative pursuits without thread-related interruptions.
FAQS
Q1: Why does my sewing machine keep bunching the thread?
A1: Thread bunching, also known as birdnesting, can occur due to various reasons. One common cause is improper threading. Ensure the machine is threaded correctly, following the threading path outlined in your manual, and that the thread is properly seated in the tension discs.
Q2: Can using the wrong needle cause thread bunching on my sewing machine?
A2: Yes, using the wrong needle can contribute to thread bunching. Ensure you’re using the correct needle for the fabric type, and replace the needle if it’s damaged or dull. A bent or blunt needle may cause uneven tension and result in thread bunching.
Q3: Does the thread quality affect the likelihood of bunching in the sewing machine?
A3: Yes, using poor-quality or old thread can contribute to thread bunching. Ensure you’re using high-quality, appropriate thread for your project, and store thread in a cool, dry place to prevent it from becoming brittle or weak.
Q4: How can tension issues lead to thread bunching on my sewing machine?
A4: Incorrect tension settings are a common culprit for thread bunching. Check both the upper and bobbin tension settings, ensuring they are balanced. Experiment with small adjustments until you achieve even tension for a smooth and even stitch. “”Why Does My Sewing Machine Keep Bunching The Thread
Q5: Can a dirty sewing machine cause thread bunching?
A5: Yes, accumulated lint and debris in the machine’s bobbin area or tension discs can lead to thread bunching. Regularly clean your sewing machine, including the bobbin case and feed dogs, to prevent lint buildup that may interfere with smooth thread flow. “”Why Does My Sewing Machine Keep Bunching The Thread
Q6: How can I prevent thread bunching when starting a new sewing project?
A6: Before starting a new project, rethread the machine, ensuring the thread is correctly placed in the tension discs and guides. Use a new needle appropriate for the fabric and thread, and check the bobbin for proper winding and insertion. “Why Does My Sewing Machine Keep Bunching The Thread“

