Unlocking the potential of your Brother sewing machine extends beyond the basics, and mastering the art of creating a perfect buttonhole is a skill every seamstress should possess. The query, “How to Make a Buttonhole on a Brother Sewing Machine,” unveils a world of possibilities.
In this comprehensive guide, we will unravel the intricacies of crafting flawless buttonholes with your Brother sewing machine. From selecting the right stitch to adjusting settings, join us on this creative journey as we demystify the process and empower you to enhance your sewing repertoire.
How To Make A Buttonhole On A Brother Sewing Machine Detailed Answer
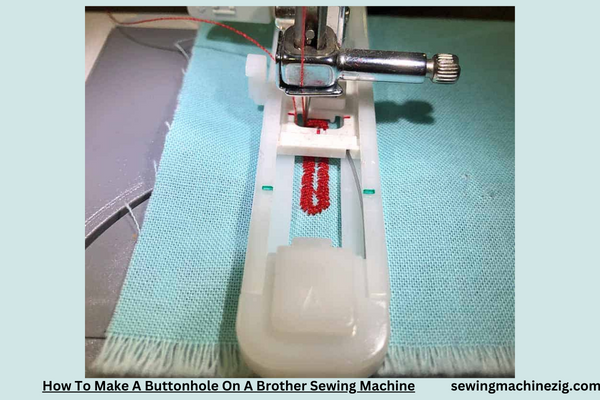
Embarking on a sewing project often involves the crucial skill of crafting the perfect buttonhole. If you find yourself asking, “How to Make a Buttonhole on a Brother Sewing Machine,” you’re about to embark on a step-by-step journey to achieve professional and polished results.
Step 1: Machine Preparation
Begin by selecting the appropriate needle and thread for your fabric. Ensure your Brother sewing machine is threaded correctly and that the bobbin is adequately filled. Consult your machine’s manual for specific recommendations.
Step 2: Attach the Buttonhole Foot
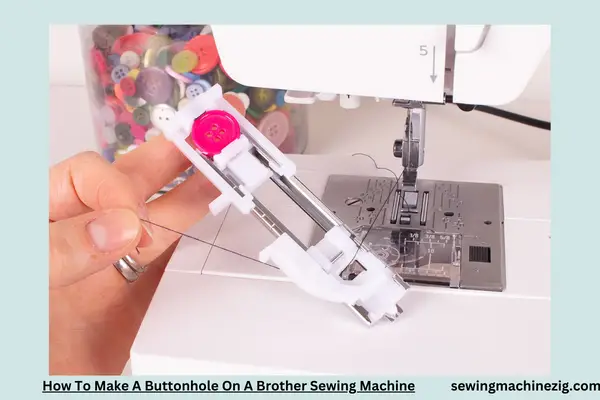
Locate the buttonhole foot in your Brother sewing machine accessories. Attach it securely to the presser foot holder, ensuring it clicks into place. The buttonhole foot is crucial for guiding the machine in creating a precise buttonhole.
Step 3: Select the Buttonhole Stitch
On your Brother sewing machine, navigate to the stitch selection dial or menu. Choose the buttonhole stitch. This stitch is typically represented by a rectangular icon. Adjust the stitch length if necessary, following your project requirements.
Step 4: Mark the Buttonhole Placement
Use fabric chalk or removable marking tools to indicate where you want the buttonhole. Ensure accurate spacing and alignment, especially if you’re creating multiple buttonholes.
Step 5: Set the Buttonhole Size
Many Brother sewing machines allow you to set the buttonhole size. Refer to your machine’s manual to understand how to adjust the buttonhole length based on the size of your button.
Step 6: Test on Scrap Fabric
Before diving into your actual project, it’s advisable to test the buttonhole on a scrap piece of fabric. This allows you to fine-tune settings and ensure the buttonhole size matches your button accurately.
Step 7: Place Fabric Under the Presser Foot
Position your fabric under the presser foot, aligning it with the buttonhole marking. Lower the presser foot to secure the fabric in place.
Step 8: Start the Stitching Process
Initiate the buttonhole stitching by pressing the foot pedal or activating the start button, depending on your machine model. The machine will automatically stitch forward, then backward, creating the sides of the buttonhole.
Step 9: Machine Adjustment During Stitching
Some Brother sewing machines feature an automatic buttonhole function, while others may require manual adjustments. Be prepared to stop and adjust as needed, following your machine’s prompts or guidelines.
Step 10: Secure the Buttonhole
Once the machine completes the stitching, it’s time to secure the buttonhole. Lift the presser foot, remove the fabric, and use a seam ripper to carefully open the buttonhole. Exercise caution to avoid cutting the stitches.
Step 11: Final Check and Trim Threads
Inspect the buttonhole for uniformity and completeness. Trim any loose threads, and if satisfied with the result, your buttonhole is ready to accommodate a button.
By following these detailed steps “mastering the art of creating a perfect buttonhole is a skill every seamstress should possess. The query, “How to Make a Buttonhole on a Brother Sewing Machine,” unveils a world of possibilities.,” You’ve empowered yourself to add professional and functional buttonholes to your sewing repertoire. Whether you’re a novice or a seasoned sewist, mastering this skill enhances the quality and versatility of your sewing projects.
If you’re having issues with making a buttonhole on your Brother sewing machine, let’s troubleshoot the process step by step. This Brother Sewing Machine Buttonhole Troubleshooting guide will help you overcome common challenges:
Brother Sewing Machine Buttonhole Troubleshooting
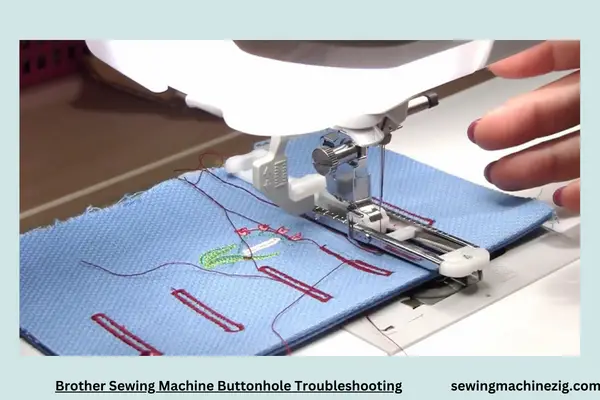
1. Select the Right Stitch:
Ensure you’ve chosen the correct buttonhole stitch on your Brother sewing machine. Look for the buttonhole icon on the stitch selector. It’s often a rectangular shape that represents the automated buttonhole feature.
2. Thread Tension Check:
Examine the tension settings for both the upper thread and the bobbin. Incorrect tension can lead to messy buttonholes. Consult your machine manual to adjust the tension to the recommended settings.
3. Bobbin Thread Placement:
Confirm that the bobbin thread is properly threaded and inserted into the bobbin case. If it’s not placed correctly, it can affect the overall quality of the buttonhole.
4. Fabric Stabilization:
Ensure your fabric is stabilized with an appropriate interfacing or stabilizer. This prevents the fabric from puckering or stretching during the buttonhole creation process.
5. Buttonhole Size Adjustment:
If the buttonhole isn’t the right size for your button, check if your Brother sewing machine allows you to adjust the buttonhole length. Refer to the manual for instructions on modifying the buttonhole size.
6. Clean the Machine:
Sometimes, dust or lint can accumulate in the feed dogs or around the buttonhole mechanism. Regularly clean your machine to maintain optimal performance.
7. Needle Condition:
A dull or bent needle can cause issues. Make sure your needle is sharp and suitable for the fabric you’re working with. Replace it if necessary.
8. Fabric Type Consideration:
Different fabrics may require specific settings. Adjust your machine settings according to the fabric type. Thick fabrics might need a different approach than delicate ones.
9. Test on Scrap Fabric:
Before creating a buttonhole on your actual project, test the settings on a scrap piece of fabric. This allows you to make adjustments without compromising your main project.
10. Refer to the Manual:
If you’re still facing challenges, consult your Brother sewing machine manual. It provides valuable insights into troubleshooting specific to your machine model.
By addressing these common issues through this Brother Sewing Machine Buttonhole Troubleshooting guide, you can enhance your buttonhole-making experience. Remember, each sewing machine may have unique features, so understanding your Brother machine’s specifics will contribute to successful buttonhole creation.
What Part Of The Sewing Machine Allows You To Sew A Buttonhole?
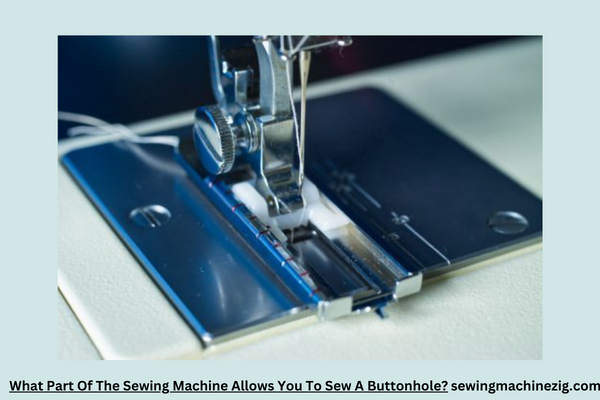
If you’re wondering about the specific part of your Brother sewing machine that allows you to sew a buttonhole, it’s called the “buttonhole foot.” This essential attachment is designed to streamline the buttonhole-making process and ensure a neat and precise result.
1. Identifying the Buttonhole Foot:
Look for the buttonhole foot among your Brother sewing machine accessories. It often has a unique shape, with a sliding mechanism or a place to insert a button. The foot is crucial for guiding the machine as it stitches the buttonhole.
2. Attaching the Buttonhole Foot:
Before you begin, make sure your sewing machine is turned off. Attach the buttonhole foot to the presser foot holder. It usually clicks into place or is secured with a locking mechanism.
3. Selecting the Buttonhole Stitch:
Navigate to the stitch selection on your Brother sewing machine. Choose the buttonhole stitch, often represented by a rectangular icon. Adjust the stitch length as needed, following your project requirements.
4. Marking the Buttonhole Placement:
Use fabric chalk or removable marking tools to indicate where you want the buttonhole. Ensure accurate spacing and alignment, especially if you’re creating multiple buttonholes.
5. Buttonhole Size Adjustment:
Some Brother sewing machines allow you to adjust the buttonhole size. Refer to your machine’s manual to understand how to modify the buttonhole length based on the size of your button.
6. Placing Fabric Under the Presser Foot:
Position your fabric under the presser foot, aligning it with the marked buttonhole placement. Lower the presser foot to secure the fabric in place.
7. Starting the Stitching Process:
Initiate the buttonhole stitching by pressing the foot pedal or activating the start button, depending on your machine model. The machine will automatically stitch forward, then backward, creating the sides of the buttonhole.
8. Securing the Buttonhole:
Once the machine completes the stitching, lift the presser foot, remove the fabric, and use a seam ripper to carefully open the buttonhole. Be cautious to avoid cutting the stitches.
9. Testing and Adjusting:
After the first buttonhole, test it by placing the button inside. If adjustments are needed for size or alignment, make necessary changes and retest on scrap fabric before proceeding with the actual project.
10. Practice and Familiarization:
To master buttonhole-making, practice on scrap fabric and experiment with different button sizes. With familiarity, you’ll confidently create buttonholes for various sewing projects.
Understanding and utilizing the buttonhole foot on your Brother sewing machine opens up possibilities for adding functional closures to your garments and projects. Following these easy steps ensures a hassle-free experience in sewing precise and professional-looking buttonholes.
Conclusion
In summary, learning How to Make a Buttonhole on a Brother Sewing Machine is a valuable skill for any sewing enthusiast. This guide on “How to Make a Buttonhole on a Brother Sewing Machine” equips you with the know-how to create precise and functional buttonholes, enhancing the professional finish of your projects.
With this newfound skill, you can confidently tackle a variety of sewing tasks, adding a polished touch to your garments and ensuring they stand the test of time. Happy sewing!
FAQS
A1: Making a buttonhole on your Brother sewing machine is easy. First, select the buttonhole stitch on the machine. Place the fabric under the presser foot, ensuring it’s stabilized. Lower the presser foot and start the machine. The machine will automatically stitch the buttonhole, creating a neat and precise closure for your projects.”How to Make a Buttonhole on a Brother Sewing Machine“
A2: Yes, most Brother sewing machines allow you to adjust the size of the buttonhole. Refer to your machine’s manual to understand how to modify the buttonhole length based on the size of your button. “How to Make a Buttonhole on a Brother Sewing Machine“
A3: Uneven buttonhole stitches may be a result of incorrect tension settings. Double-check the upper thread tension and make sure the fabric is stabilized. If issues persist, consult the machine’s manual for troubleshooting tips or contact Brother’s customer support.”How to Make a Buttonhole on a Brother Sewing Machine“
A5: Yes, Brother sewing machines often come with settings suitable for stretch fabrics. Use the appropriate needle and thread, stabilize the fabric, and adjust the machine settings as needed for optimal buttonhole results on stretchy materials.“How to Make a Buttonhole on a Brother Sewing Machine“

