Unraveling the mechanics of your sewing journey often involves troubleshooting, and understanding how to open your sewing machine foot pedal is a crucial skill. “How To Open Sewing Machine Foot Pedal And Fix It“, delves into the intricacies of this essential component, empowering you to troubleshoot and remedy issues seamlessly.
Whether it’s a stuck mechanism or an electrical glitch, navigating the internals of your foot pedal is key to maintaining uninterrupted creativity. Join us in this exploration as we guide you through the steps to unlock, inspect, and potentially fix your sewing machine foot pedal with ease.
How To Open Sewing Machine Foot Pedal And Fix It Detailed Answer
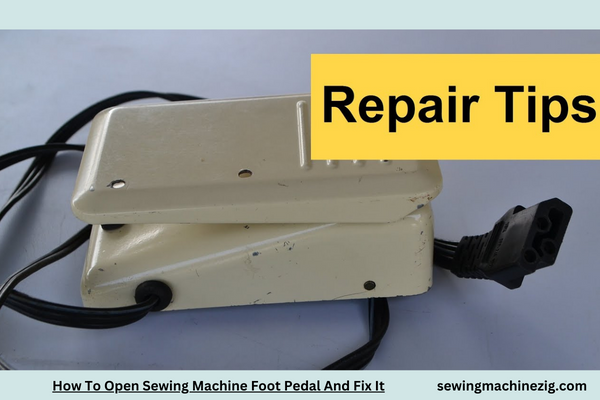
Sewing machine foot pedals are integral components, and understanding how to troubleshoot and open them is a valuable skill for any seamstress.
In this detailed guide, we’ll take you through the process of “How To Open Sewing Machine Foot Pedal And Fix It,” ensuring smooth and uninterrupted sewing sessions.
Step 1: Unplug Your Sewing Machine
Before delving into the foot pedal, ensure your sewing machine is unplugged to avoid any electrical hazards. This step is crucial for your safety throughout the troubleshooting process.
Step 2: Examine the Exterior
Inspect the exterior of the foot pedal for visible damage, loose connections, or frayed wires. If any issues are evident, take note of them as they might provide clues to the underlying problem.
Step 3: Locate Screws or Fasteners
Most foot pedals have screws or fasteners securing the casing. Use a screwdriver or the appropriate tool to carefully remove these and open the outer casing. Remember to keep track of the screws to reassemble later.
Step 4: Inspect the Interior Components
Once the casing is open, examine the interior components. Look for loose wires, disconnected connections, or any signs of wear and tear. Pay close attention to the points where wires connect to the pedal.
Step 5: Reconnect Loose Wires
If you find any loose wires, carefully reconnect them to their designated terminals. Ensure a secure connection and use electrical tape or heat shrink tubing to insulate and protect the wires.
Step 6: Check for Frayed Wires
Frayed wires can lead to electrical malfunctions. If you identify any frayed wires, trim the damaged sections and carefully reconnect the wires. Again, insulate the repaired area to prevent future issues.
Step 7: Test the Pedal
Before reassembling the casing, plug in your sewing machine and test the foot pedal. Check for responsiveness and make sure the machine operates smoothly. If the issue persists, proceed to the next steps.
Step 8: Inspect the Mechanism
Within the foot pedal, there is a mechanical mechanism that translates your foot pressure into electrical signals. Ensure this mechanism is free from debris, lint, or any obstructions. Clean it gently with a small brush or compressed air.
Step 9: Lubricate Moving Parts (If Applicable)
In some foot pedals, there are moving parts that may benefit from a small amount of lubrication. Consult your sewing machine manual to identify these parts and use a sewing machine oil or lubricant as recommended.
Step 10: Reassemble the Foot Pedal
Once you’ve addressed the issues and tested the pedal successfully, carefully reassemble the casing. Tighten the screws or fasteners securely, ensuring the casing is properly closed.
Step 11: Test Again
After reassembly, conduct another test to confirm that the foot pedal is functioning correctly. Pay attention to the responsiveness and make any final adjustments if necessary.
By following these comprehensive steps on “How To Open Sewing Machine Foot Pedal And Fix It,” you empower yourself to troubleshoot and resolve common issues, ensuring your sewing machine operates seamlessly for your creative endeavors. Regular maintenance and attentive care of your foot pedal contribute to a smooth and enjoyable sewing experience.
How To Dismantle A Newer Sewing Machine Foot Pedal
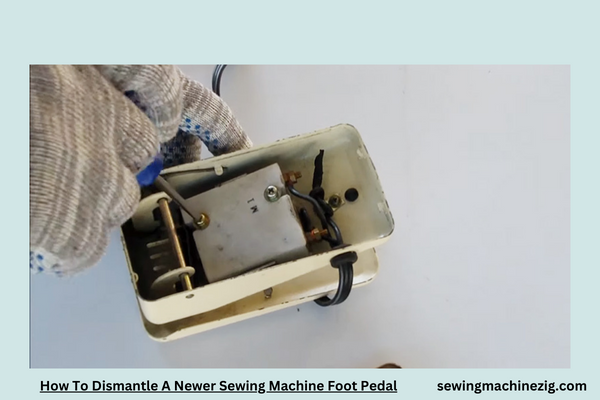
Dismantling a newer sewing machine foot pedal may seem intimidating, but with careful steps, it can be done easily. Here’s a simple explanation:
Unplug the Machine:
- Always start by unplugging your sewing machine for safety.
Locate Screws or Fasteners:
- Look for screws or fasteners that hold the foot pedal together. These are often located on the bottom or sides of the pedal.
Use the Right Tools:
- Grab the appropriate tools, usually a screwdriver, that fit the screws on the foot pedal.
Remove Screws or Fasteners:
- Carefully unscrew or remove the fasteners from the pedal. Keep the screws in a safe place to avoid losing them.
Open the Casing:
- Once the screws are removed, gently open the casing of the foot pedal. Some pedals may have clips; if so, use a flat tool to pry open the casing.
Handle with Care:
- Inside the casing, you’ll find the internal components. Handle everything with care to avoid damage.
Inspect for Issues:
- Take a close look at the internal components. Check for loose wires, broken connections, or any visible issues that might be affecting the pedal’s performance.
Reassemble or Repair:
- If you’ve identified a specific problem, address it by repairing or replacing the faulty part. If everything looks fine, you can proceed to reassemble the foot pedal.
Reattach the Casing:
- Once the necessary repairs are done, or if you simply inspected the components, carefully reattach the casing.
Secure the Screws or Fasteners:
- Put back the screws or fasteners and secure them tightly. This ensures the foot pedal is safely enclosed.
Test the Foot Pedal:
- Plug in your sewing machine and test the foot pedal to ensure it’s working correctly. Check for smooth operation and responsiveness.
Final Check:
- Double-check that all screws are tight and the casing is securely closed.
Remember, if you are unsure or uncomfortable dismantling the foot pedal, it’s always a good idea to consult the sewing machine’s manual or seek professional assistance.
Taking these steps“How To Open Sewing Machine Foot Pedal And Fix It“, with care ensures that you can inspect and address issues with your newer sewing machine foot pedal effectively.
How To Open A Singer Foot Pedal Controller Model CR307
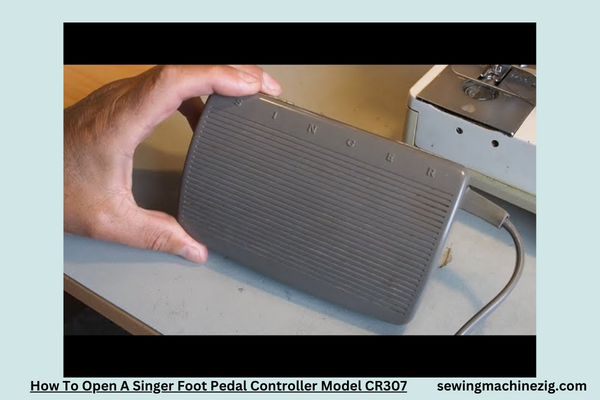
Opening a Singer Foot Pedal Controller Model CR307 is a straightforward process. Here’s a simple explanation:
Unplug the Foot Pedal:
- Before starting, ensure the foot pedal is unplugged from the sewing machine for safety.
Inspect the Exterior:
- Take a close look at the exterior of the foot pedal. Identify any screws or fasteners that may be holding the casing together.
Use the Right Tools:
- Gather the appropriate tools, typically a screwdriver that fits the screws on the foot pedal.
Remove Screws:
- Carefully unscrew the screws from the bottom or sides of the foot pedal. Keep the screws in a safe place.
Open the Casing:
- Once the screws are removed, gently open the casing of the foot pedal. Some models may have clips; if so, use a flat tool to carefully pry open the casing.
Handle with Care:
- Inside the casing, you’ll find the internal components. Handle everything with care to avoid damage.
Inspect for Issues:
- Take a close look at the internal components. Check for loose wires, broken connections, or any visible issues that might be affecting the foot pedal’s performance.
Reassemble or Repair:
- If you’ve identified a specific problem, address it by repairing or replacing the faulty part. If everything looks fine, you can proceed to reassemble the foot pedal.
Reattach the Casing:
- Once the necessary repairs are done or if you simply inspected the components, carefully reattach the casing.
Secure the Screws:
- Put back the screws and secure them tightly. This ensures the foot pedal is safely enclosed.
Test the Foot Pedal:
- Plug in your sewing machine and test the foot pedal to ensure it’s working correctly. Check for smooth operation and responsiveness.
Final Check:
- Double-check that all screws are tight, and the casing is securely closed.
Remember, if you’re unsure or uncomfortable with this process, consult the Singer Foot Pedal Controller Model CR307 manual or seek professional assistance. By following these steps carefully, you can open, inspect, and address any issues with your Singer foot pedal controller effectively.
Conclusion
In conclusion, “How To Open Sewing Machine Foot Pedal And Fix It“, understanding how to open a sewing machine’s foot pedal and address common issues empowers users to maintain their equipment effectively.
By following simple steps and handling components with care, one can troubleshoot and fix minor problems, ensuring the foot pedal functions seamlessly. This knowledge not only extends the life of the sewing machine but also enables users to enjoy uninterrupted and satisfying sewing experiences. So, when faced with a foot pedal concern, the ability to open and troubleshoot proves invaluable for any sewing enthusiast.
FAQS
Q1: Why would I need to open my sewing machine foot pedal, and what common issues can occur?
A1: Opening your sewing machine’s foot pedal might be necessary if you’re facing issues like unresponsiveness, erratic behavior, or unusual noises. Common problems can include loose wiring, damaged connections, or worn-out components inside the foot pedal.
Q2: How can I open my sewing machine foot pedal safely?
A2: To open a sewing machine foot pedal, start by unplugging the machine for safety. Identify any screws or fasteners on the pedal’s exterior, use the appropriate tools to remove them, and gently open the casing. Take care not to damage any internal components during the process.
Q3: What tools do I need to open and fix my sewing machine foot pedal?
A3: You’ll typically need a screwdriver that fits the screws on the foot pedal. In some cases, a flat tool may be necessary to release clips holding the casing together. Refer to your machine’s manual for specific tool recommendations.“How To Open Sewing Machine Foot Pedal And Fix It“
Q4: How can I fix a sewing machine foot pedal that’s not responding?
A4: After opening the foot pedal, check for loose wires, damaged connections, or worn-out parts. Reattach any loose wires, solder or replace damaged connections, and replace worn-out components. Always handle the internal parts with care to avoid further damage.”How To Open Sewing Machine Foot Pedal And Fix It“
Q5: Can I use the same steps to open and fix the foot pedal for different sewing machine models?
A5: While the general steps might be similar, the specifics can vary between different sewing machine models. Always refer to your machine’s manual for model-specific instructions and guidelines. If you’re unsure, it’s advisable to seek professional assistance. “How To Open Sewing Machine Foot Pedal And Fix It“

