Embark on a sewing journey with confidence as we delve into the realm of dressmaking using a sewing machine. This comprehensive guide on “How to Use a DressMaker Sewing Machine” will unravel the essential steps and features to bring your garment creations to life. From threading the machine to mastering different stitches, understanding your DressMaker sewing machine is key to unlocking your sewing potential.
Whether you’re a novice or a seasoned dressmaker, this guide promises to enhance your skills and make the creative process a seamless and enjoyable experience.
How To Use A DressMaker Sewing Machine Detailed Answer
Mastering the operation of a DressMaker sewing machine is essential for sewing enthusiasts. Here’s a comprehensive step-by-step guide on how to use a DressMaker sewing machine, ensuring you can make the most of its features and functionalities:
Step 1: Familiarize Yourself with the Machine
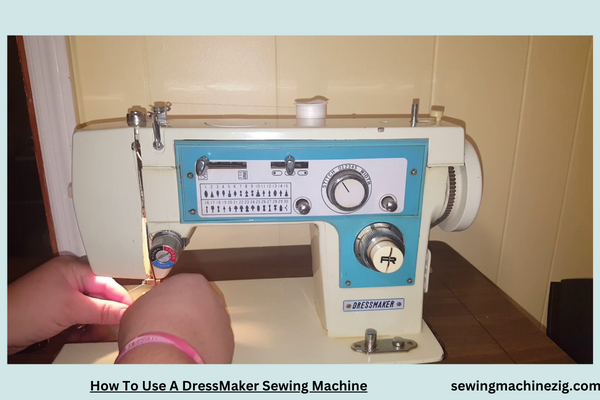
Begin by thoroughly reading the DressMaker sewing machine manual. Familiarize yourself with the machine’s components, including the bobbin winder, tension dial, stitch selector, and presser foot lever.
Step 2: Set Up Your Sewing Area
Ensure you have a well-lit and organized sewing space. Place the machine on a stable surface, providing enough room for fabric maneuvering and easy access to the controls.
Step 3: Prepare the Machine for Sewing
Start by winding a bobbin. Place an empty bobbin on the bobbin winder, follow the threading guide, and engage the bobbin winder. Once wound, insert the bobbin into the bobbin case and thread it according to the manual.
Step 4: Thread the Machine
Thread the machine by following the threading path indicated in the manual. Pass the thread through the tension dial, threading guides, and finally, through the needle. Make sure the presser foot is raised during this process for proper threading tension.
Step 5: Insert the Needle
Install a suitable sewing machine needle for your fabric. Loosen the needle clamp screw, insert the needle with the flat side facing the back, and tighten the clamp screw securely.
Step 6: Select the Stitch Type
Dressmaker sewing machines typically offer various stitch options. Use the stitch selector to choose the desired stitch type for your project. Adjust the stitch length and width settings as needed.
Step 7: Position and Secure Fabric
Place your fabric under the presser foot, lower the presser foot lever, and adjust the fabric position. Use the handwheel to manually lower the needle into the fabric to secure its starting point.
Step 8: Start Sewing
Hold the thread ends gently as you start sewing to prevent tangling. Depress the foot pedal to commence stitching. Guide the fabric evenly, keeping an eye on the selected stitch pattern.
Step 9: Practice Stitching Techniques
Experiment with different stitching techniques based on your project requirements. Dressmaker sewing machines typically support straight stitches, zigzag stitches, and other decorative options. Practice on scrap fabric to perfect your skills.
Step 10: Adjust Tension as Needed
Monitor the stitch quality and adjust the tension dial if necessary. Proper tension ensures neat and balanced stitches. Consult the manual for guidance on tension adjustments.
Step 11: Finish and Secure Stitches
To finish a seam, gradually reduce the sewing speed, raise the needle, and lift the presser foot. Trim excess thread and use a backstitch or lockstitch function if available to secure the stitches.
Step 12: Maintenance and Cleaning
Regularly clean the DressMaker sewing machine, removing lint and debris. Oil any recommended parts following the manual’s maintenance instructions to ensure smooth operation.
Key Tips:
- Use Quality Thread: Opt for high-quality thread suitable for your fabric type to prevent breakage and achieve better results.
- Test on Scrap Fabric: Before sewing your actual project, practice on scrap fabric to fine-tune settings and become familiar with the machine.
By following these step-by-step“How to Use a DressMaker Sewing Machine“, instructions on how to use a DressMaker sewing machine, you’ll confidently navigate its functions and create professional-looking garments and projects. Remember to reference the manual for model-specific details and leverage the machine’s versatility for various sewing endeavors.
How Do You Put A Bobbin In A DressMaker Sewing Machine?
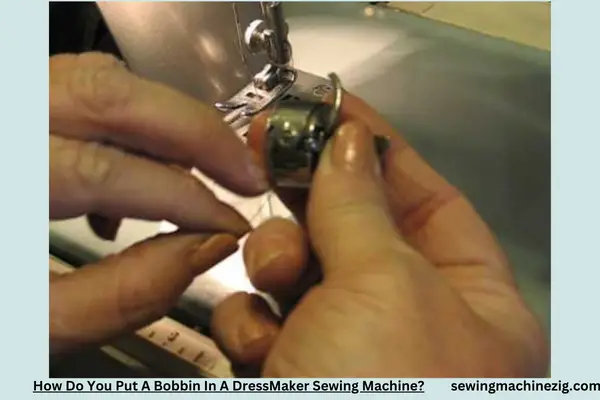
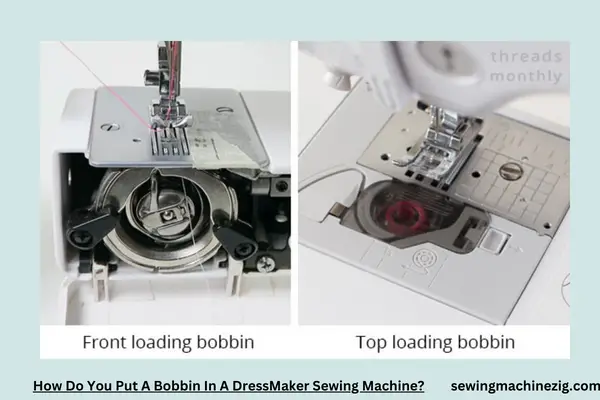
Putting a bobbin in your DressMaker sewing machine is a fundamental step to ensure seamless stitching. Follow these detailed instructions to correctly load the bobbin and enhance your sewing experience.
Materials Needed:
- Dressmaker sewing machine
- Bobbin
- Thread
Step 1: Turn Off the Machine
Before handling any components, ensure that your DressMaker sewing machine is turned off. This prevents any accidental engagement of the needle.
Step 2: Locate the Bobbin Area
Refer to your DressMaker sewing machine manual to identify the bobbin area. Typically, it is located beneath the needle plate.
Step 3: Remove the Bobbin Cover
If your machine has a removable bobbin cover, gently slide or lift it off to expose the bobbin area.
Step 4: Insert the Bobbin
Hold the bobbin with the thread unwinding in a counterclockwise direction. Place the bobbin into the bobbin case, ensuring it clicks into place.
Step 5: Guide the Thread
Follow any marked guides or thread paths indicated in your DressMaker sewing machine manual. Proper threading ensures smooth and even stitches.
Step 6: Pull the Thread into the Bobbin Tension Slot
Slide the thread into the designated tension slot on the bobbin case. This ensures proper tension while sewing.
Step 7: Pull the Thread Through the Bobbin Case
Continue pulling the thread until it fits into any additional guides or slots on the bobbin case. Make sure the thread is securely in place.
Step 8: Replace the Bobbin Cover
If you remove a bobbin cover, carefully put it back in its place, securing the bobbin area.
Step 9: Turn On the Machine
Power up your DressMaker sewing machine. Some machines may have specific settings for bobbin winding or engagement. Refer to your manual for guidance.
Step 10: Test the Bobbin
Engage the machine in a slow, test run to ensure the bobbin is properly threaded and the thread is feeding smoothly.
Step 11: Adjust Tension if Necessary
If you notice any irregularities in your stitches, you may need to adjust the bobbin tension. Refer to your DressMaker sewing machine manual for instructions on tension adjustment.
Step 12: Start Sewing
Once you’ve confirmed that the bobbin is correctly loaded and the tension is adjusted, you’re ready to start your sewing project.
Properly putting a bobbin in your DressMaker sewing machine is a foundational skill for any sewing enthusiast. Regularly refer to your machine’s manual for specific instructions and maintenance tips.
With this step-by-step guide, you’ll confidently load the bobbin, ensuring your DressMaker sewing machine operates at its best for all your creative projects.
Vintage DressMaker Sewing Machine Manual
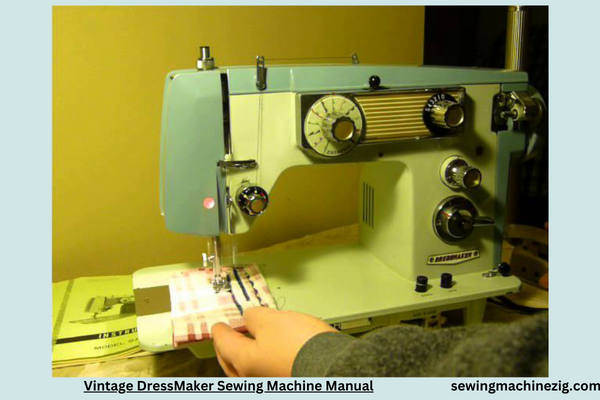
Exploring the intricacies of a Vintage Dressmaker Sewing Machine is a delightful journey into the rich history of sewing. This comprehensive guide will assist you in navigating the Vintage Dressmaker Sewing Machine Manual and unveiling the timeless techniques preserved within.
Step 1: Locate Your Vintage Manual
Begin your journey by finding the original Vintage Dressmaker Sewing Machine Manual. Check storage spaces, and online resources, or reach out to vintage sewing machine enthusiasts who might share digital copies.
Step 2: Understand the Machine Components
Dive into the manual’s introductory sections that detail the different components of your Vintage Dressmaker Sewing Machine. Familiarize yourself with each part, understanding its function.
Step 3: Threading the Machine
One of the manual’s essential sections covers threading instructions. Follow the step-by-step guide to correctly thread your Vintage Dressmaker Sewing Machine, ensuring smooth stitching.
Step 4: Bobbin Winding Techniques
Discover the unique bobbin winding techniques specific to your vintage model. The manual provides insights into preparing and loading the bobbin correctly for optimal sewing performance.
Step 5: Stitch Selection and Settings
Explore the stitch selection options offered by your Vintage Dressmaker Sewing Machine. The manual will guide you through adjusting settings, including stitch length and width, based on your sewing needs.
Step 6: Mastering Attachments
Many Vintage DressMaker machines come with various attachments for specialized sewing tasks. Delve into the manual’s section on attachments, understanding how to affix and use them effectively.
Step 7: Maintenance and Lubrication
Vintage machines require meticulous care. Follow the manual’s instructions on maintenance routines, including lubrication points, to keep your DressMaker sewing smoothly for years to come.
Step 8: Troubleshooting Tips
The manual serves as a troubleshooter’s guide. Understand common issues and follow the provided solutions to address any challenges you might encounter during your vintage sewing adventures.
Step 9: Exploring Decorative Stitches
Many Vintage Dressmaker Sewing Machines offer unique decorative stitches. Unearth these hidden gems by studying the manual’s section on decorative stitches and experimenting with creative embellishments.
Step 10: Revisiting Sewing Techniques
The manual is a treasure trove of sewing techniques. Brush up on foundational skills, from basic seams to intricate embroidery, as per the instructions provided in this section.
Step 11: Making Necessary Adjustments
Learn how to make adjustments to your Vintage DressMaker Sewing Machine based on the type of fabric and project at hand. The manual guides you in tweaking tension, presser foot pressure, and other crucial settings.
Step 12: Preservation and Care
Preserve your vintage sewing gem by following the manual’s guidance on long-term storage, cleaning, and protecting it from environmental factors that might affect its condition.
Unlocking the Vintage Dressmaker Sewing Machine Manual not only reveals the technicalities of your cherished machine but also opens a portal to the sewing practices of a bygone era. Through this guide, you’ll rediscover the charm of vintage sewing, one stitch at a time, and relish the timeless craftsmanship embedded in your DressMaker machine.
Conclusion
In conclusion, unlocking the full potential of your sewing endeavors hinges on mastering how to use a DressMaker sewing machine. This comprehensive guide “How to Use a DressMaker Sewing Machine” equips you with the knowledge to navigate your machine’s features, fostering creativity and precision in every stitch.
Whether you’re a novice or an experienced seamstress, understanding the nuances of your DressMaker sewing machine enhances your sewing experience. Regular practice and exploration of its capabilities open the door to a world of tailored creations, making your sewing journey more rewarding and fulfilling.
FAQS
Q1: How do I thread the needle on a DressMaker sewing machine?
A: To thread the needle on your DressMaker sewing machine, start by raising the presser foot and placing the spool of thread on the spool pin. Follow the threading path as outlined in your machine’s manual, ensuring the thread passes through all necessary guides and the needle’s eye. Finally, pull a few inches of thread through the needle to ensure proper stitching.
Q2: Can I use different types of needles with my DressMaker sewing machine?
A: Yes, DressMaker sewing machines typically accommodate various needle types for different fabrics. Consult your machine’s manual for guidance on selecting the appropriate needle size and type based on your sewing project. “How to Use a DressMaker Sewing Machine“
Q3: How do I adjust the tension on my DressMaker sewing machine?
A: Adjusting the tension on your DressMaker sewing machine is crucial for achieving balanced stitches. Refer to your machine’s manual to locate the tension adjustment dial and follow the recommended settings based on your fabric and thread choices.
A: Yes, most DressMaker sewing machines include a buttonhole feature. Consult your machine’s manual for specific instructions on setting up and using the buttonhole function. This typically involves selecting the buttonhole stitch and following the step-by-step guide. “How to Use a DressMaker Sewing Machine“
Q5: How do I clean and maintain my DressMaker sewing machine?
A: Regular cleaning is essential for maintaining optimal performance. Turn off the machine, unplug it, and follow the cleaning instructions in your manual. This usually involves removing lint and debris, oiling specific parts as directed, and keeping the bobbin area clean. Regular maintenance ensures smooth operation and extends the life of your DressMaker sewing machine. “How to Use a DressMaker Sewing Machine“

